GameBoy Color NES-themed modkit from FunnyPlaying
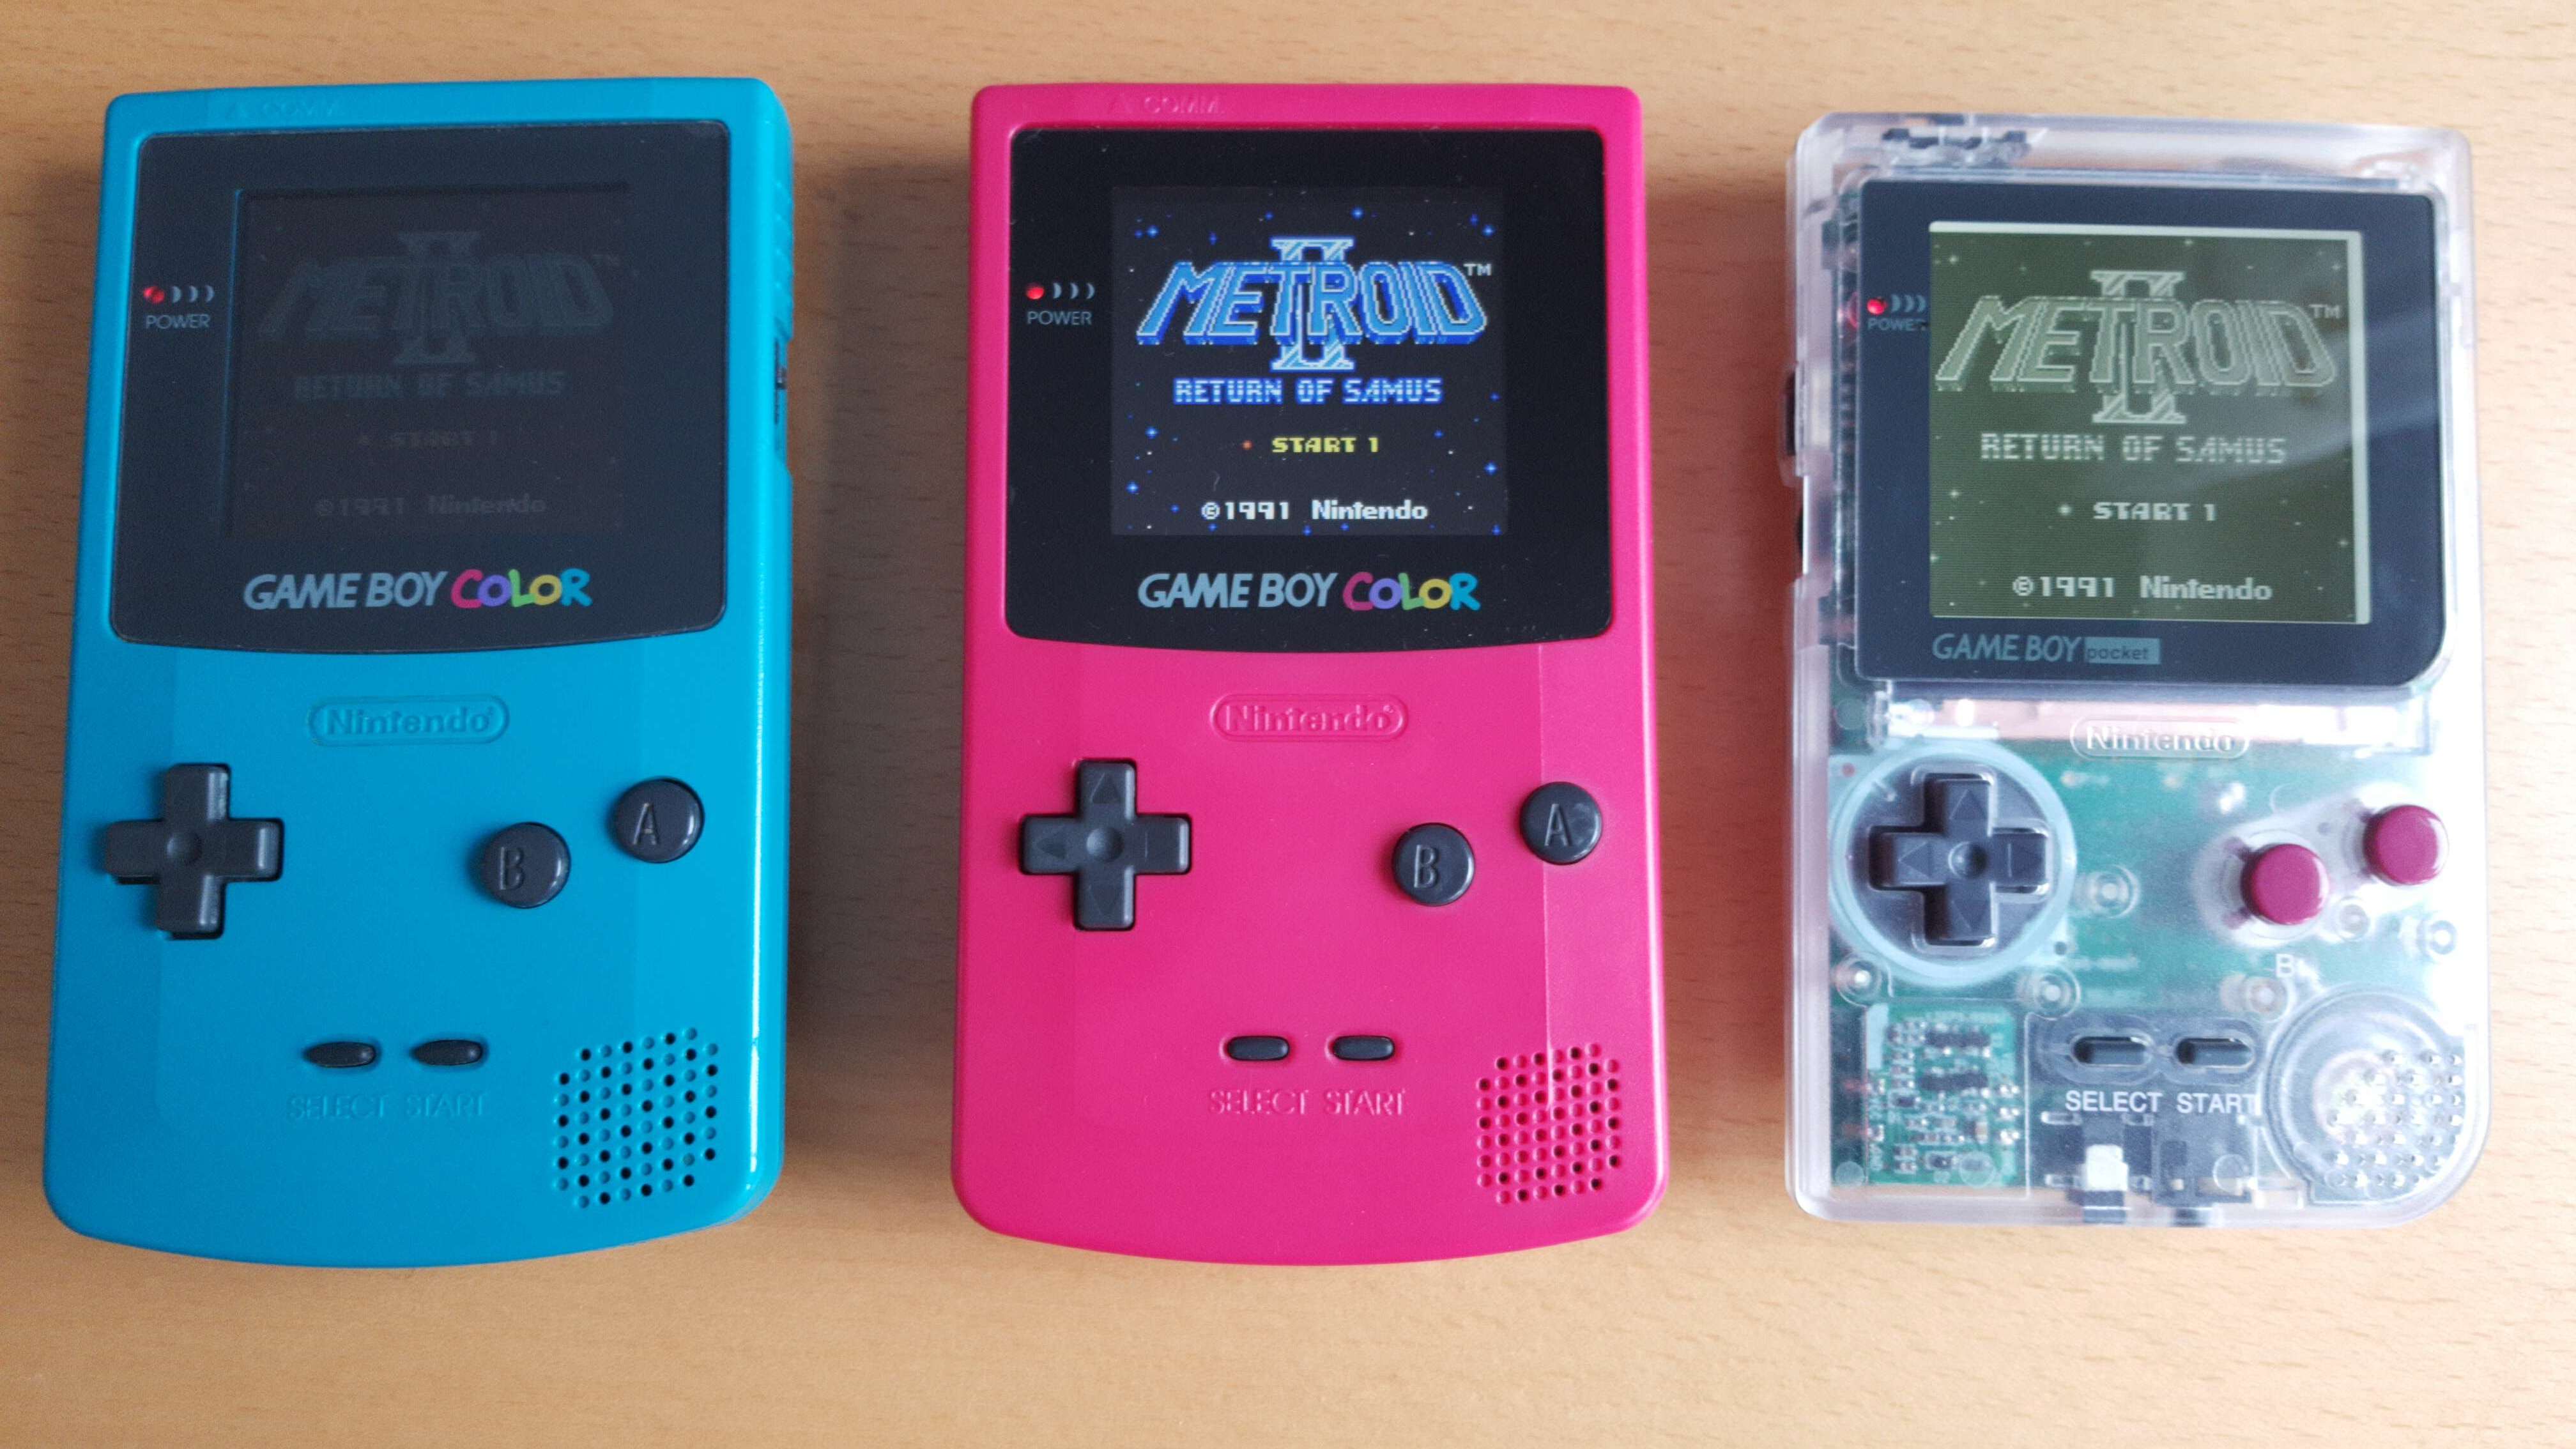
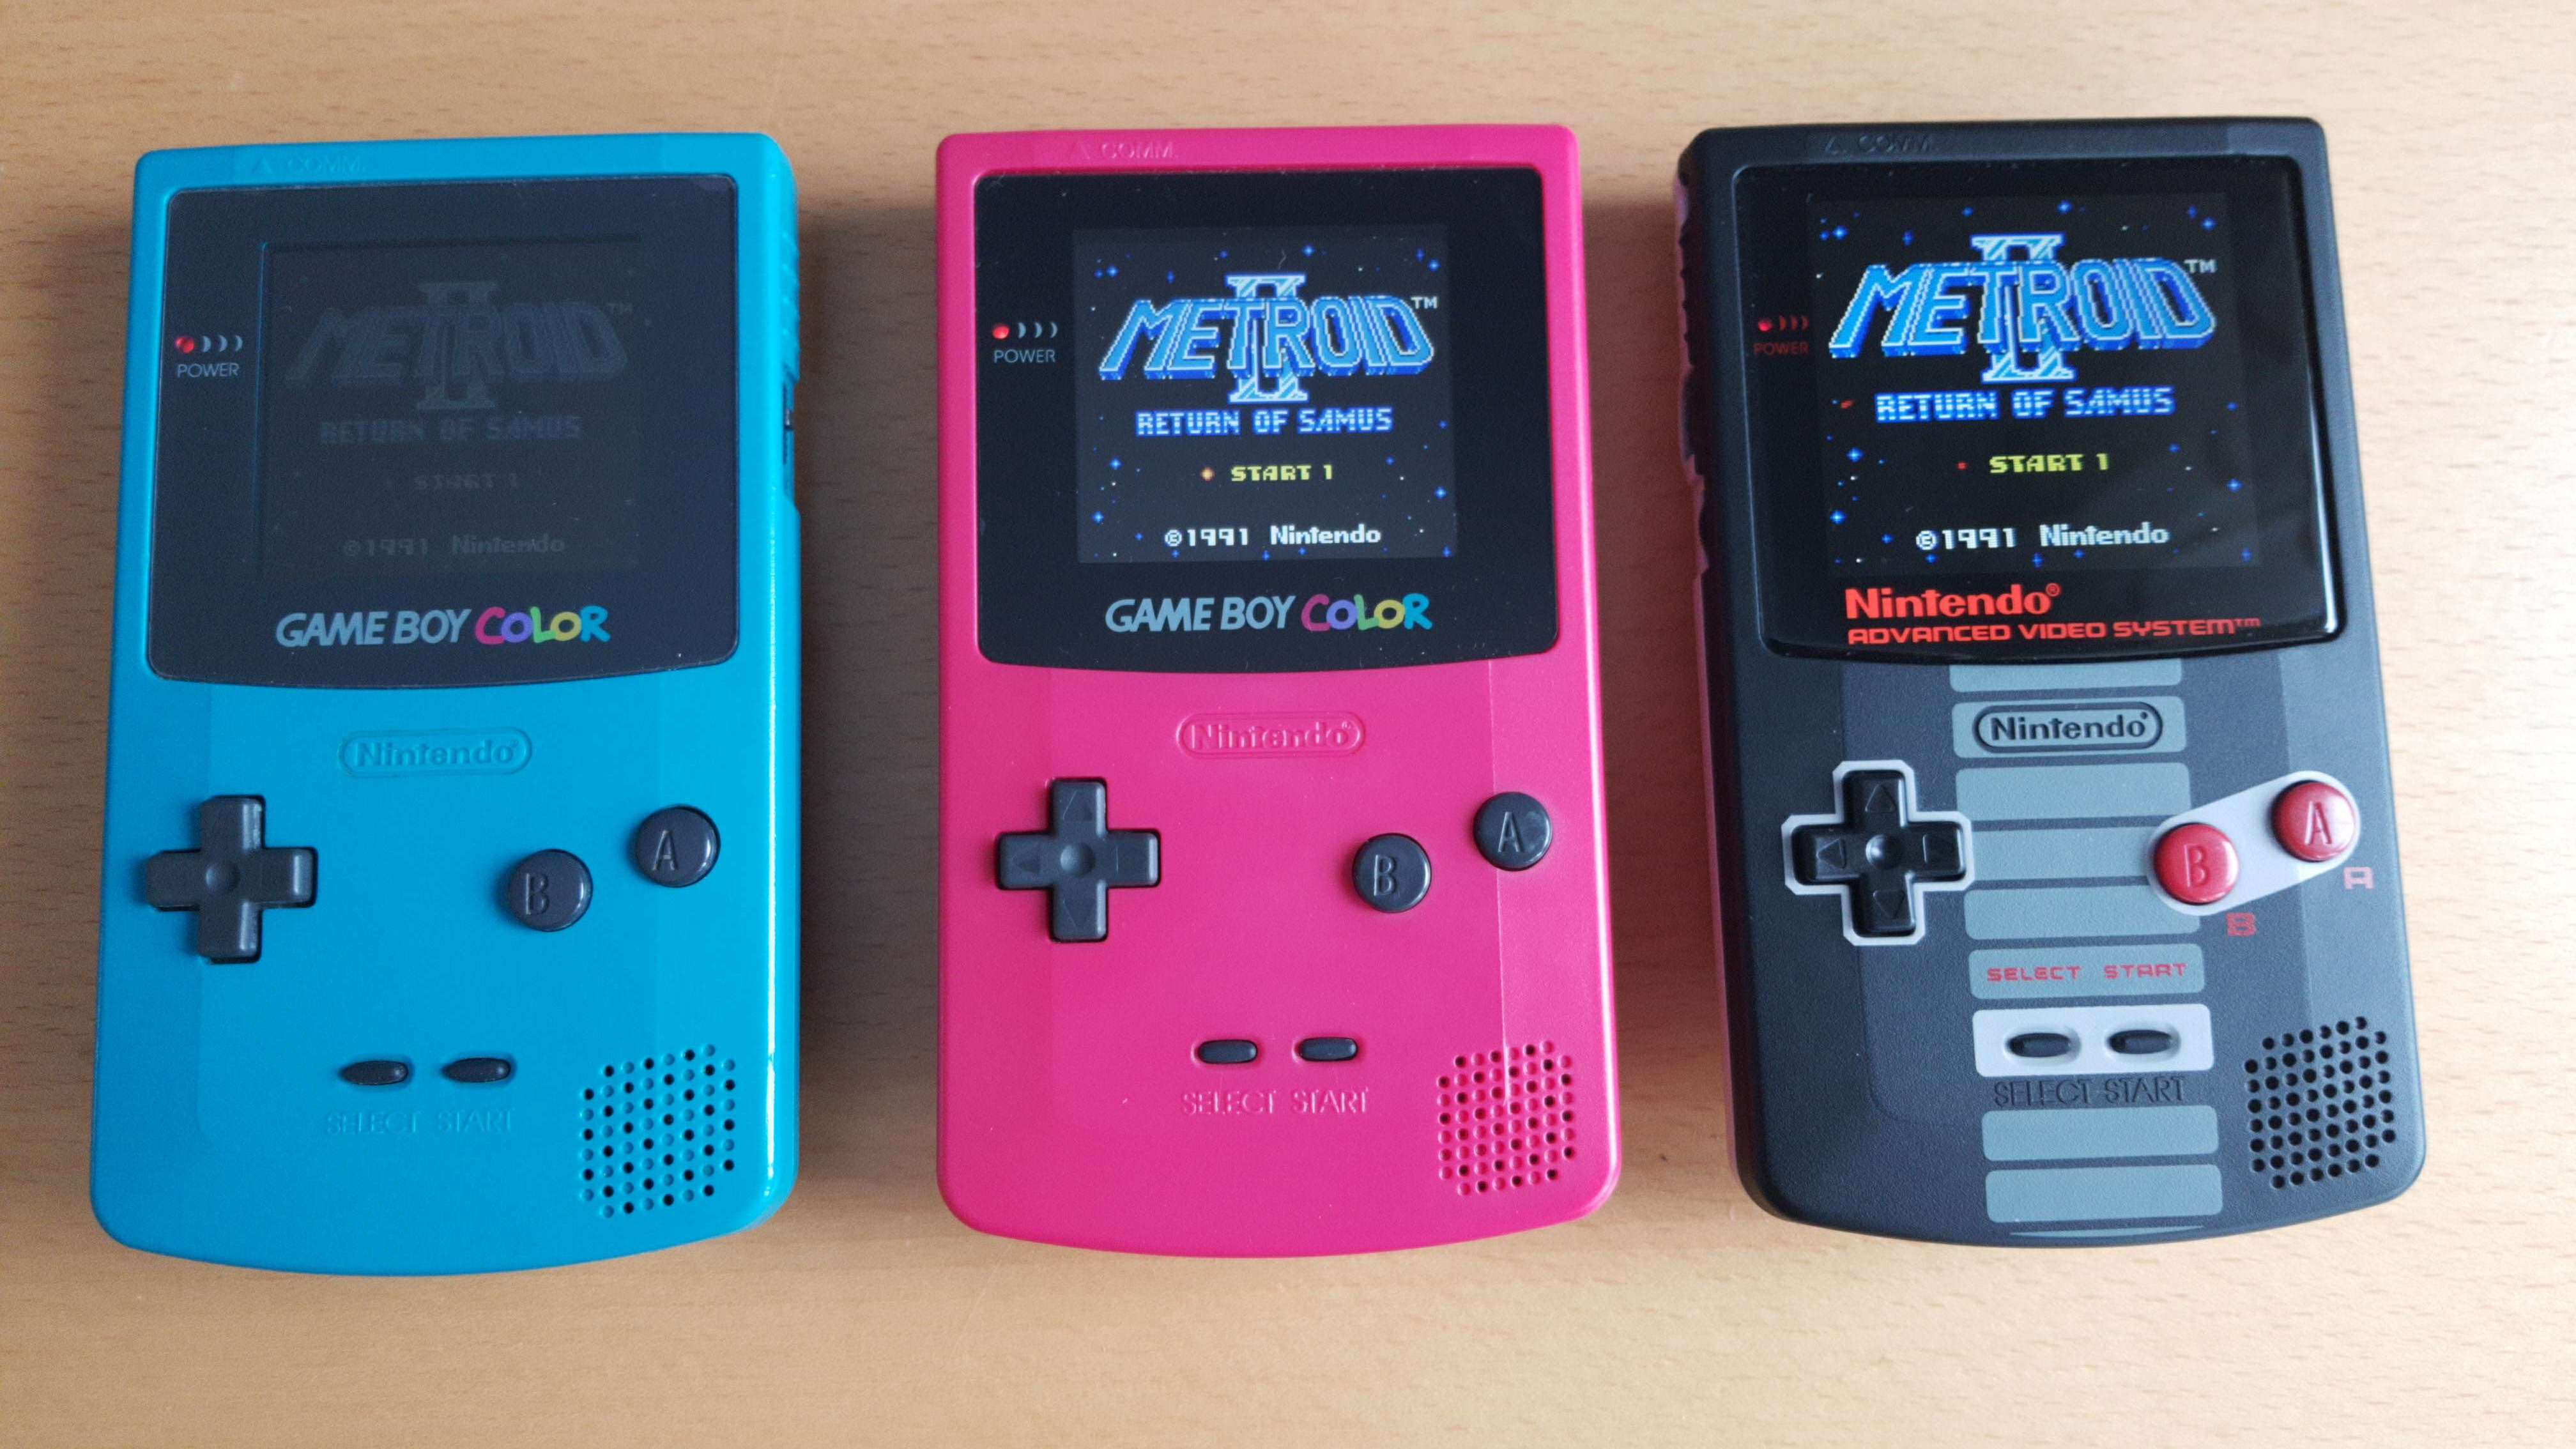
Above photo has three GameBoys from my collection, left to right:
Unmodded GameBoy Color (GBC) in teal shell. It has original shell as well as original screen. Note that the LCD screens back in the 90s and early 2000s didn’t have a backlight. This means that the only reasonable way of playing is by having some light directed at the screen. Personally I found playing outdoors on a sunny summer day to be the best experience.
Modded GameBoy Color in berry shell. This GameBoy had its screen replaced with a modern, backlighted IPS panel. It also has a replaced power board (more on the below) and the shell is also new.
Modded GameBoy Pocket (GBP) in clear shell. Again, original black-and-white screen has been replaced with a backlighted IPS panel. Shell and buttons are also new.
Note the screen sizes. GBC, while offering colours, has a smaller screen area compared to GBP and original DMG GameBoy. On the other hand, modern IPS screen for GBP/DMG isn’t black-and-white - it just pretends to be one, since it only receives monochromatic signal from the console. It was only a matter of time before someone came up with the idea of putting the IPS screen designed for GBP into GBC, thus giving us GameBoy Color with screen as large as in the GBP and DMG models.
I didn’t have a GBC with larger screen in my collection yet, so I decided to make one. After buying a new GBC to act as donor console I went to order a screen. My go-to destination for GameBoy IPS panels is FunnyPlaying, a Chinese company that over the years has shown commitment to making good products and innovating their mods. Towards the end of last year they releases a NES-themed GameBoy Color modkit that not only contains an IPS panel but also comes with NES-themed shell and all the other parts such as buttons and silicon pads. I searched for reviews and opinions on this kit but couldn’t find any, since the kit was newly released. I decided to give it a try and ordered it. While the package from China arrived quickly, I took me quite a while to find the time to assemble it. Without further ado, lets jump right in.
Kit overview
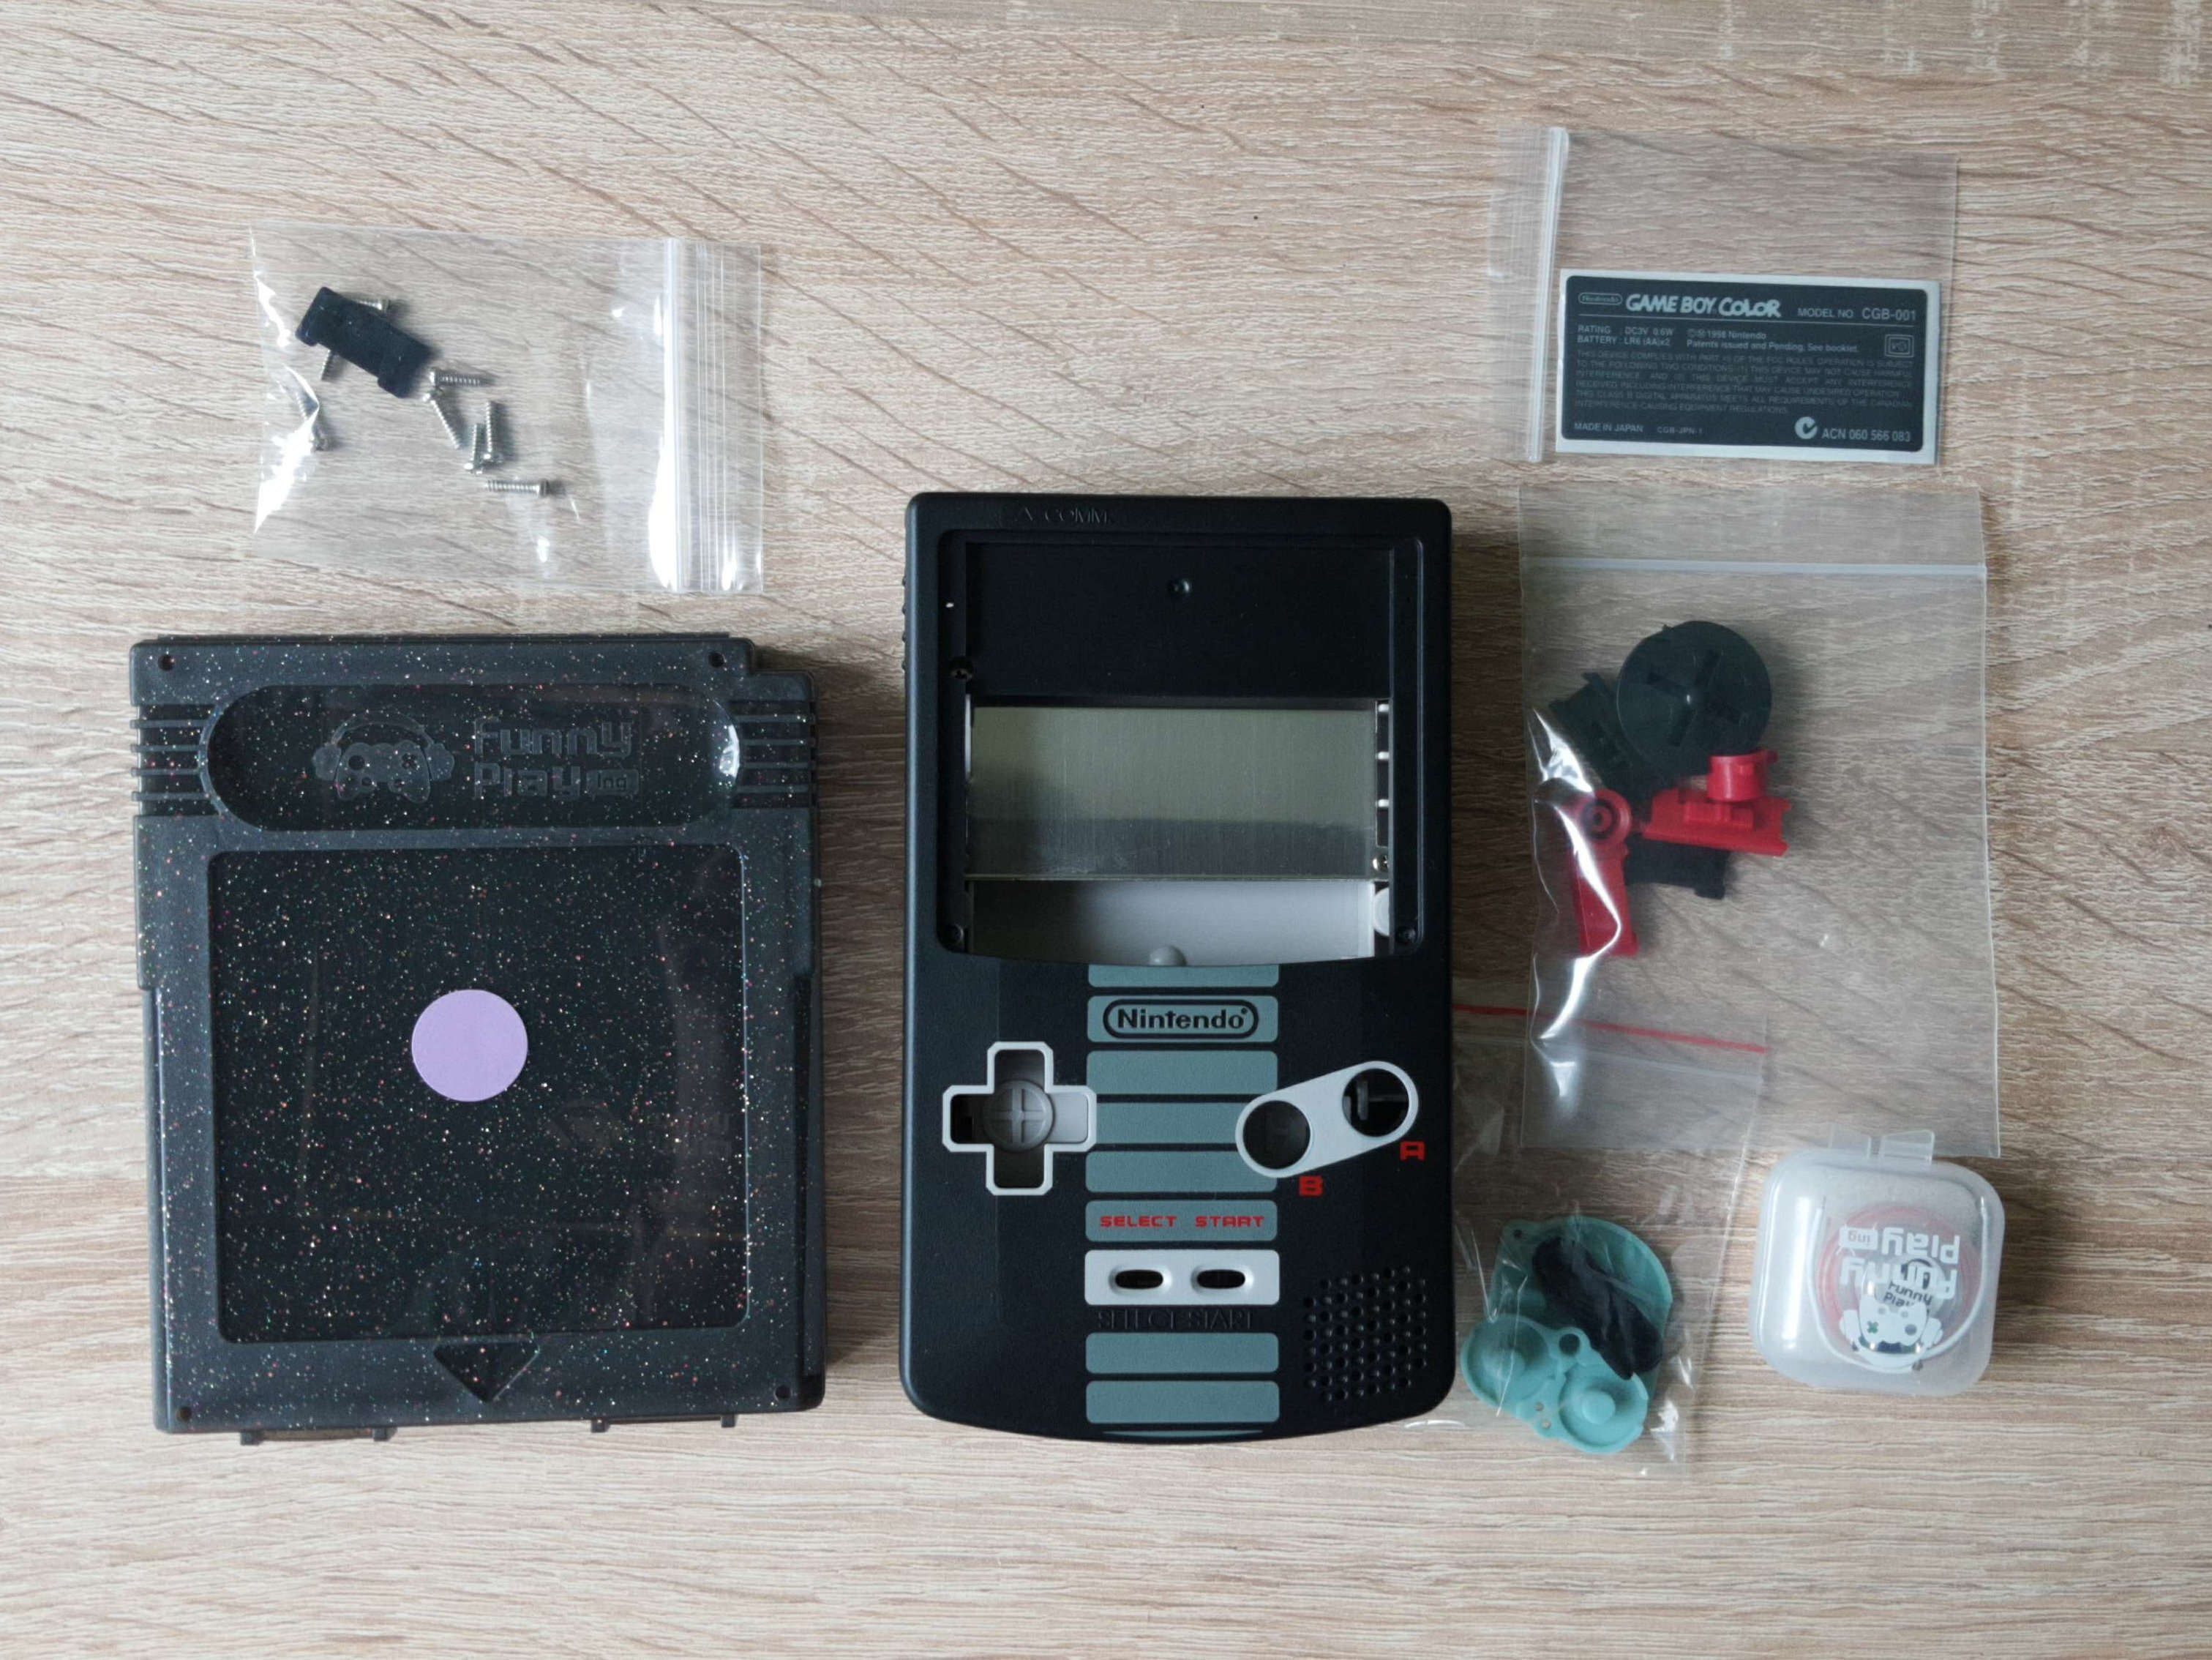
The kit contains:
- A NES-themed shell
- Laminated screen with a ribbon cable and wires, all stored in a stylish plastic case modelled on GB cartridge. Note that there are two versions of the kit: with standard glass lens and with 2.5D lens, which is rounded at the edges. My kit is the latter one.
- Buttons and silicon pads
- Screws
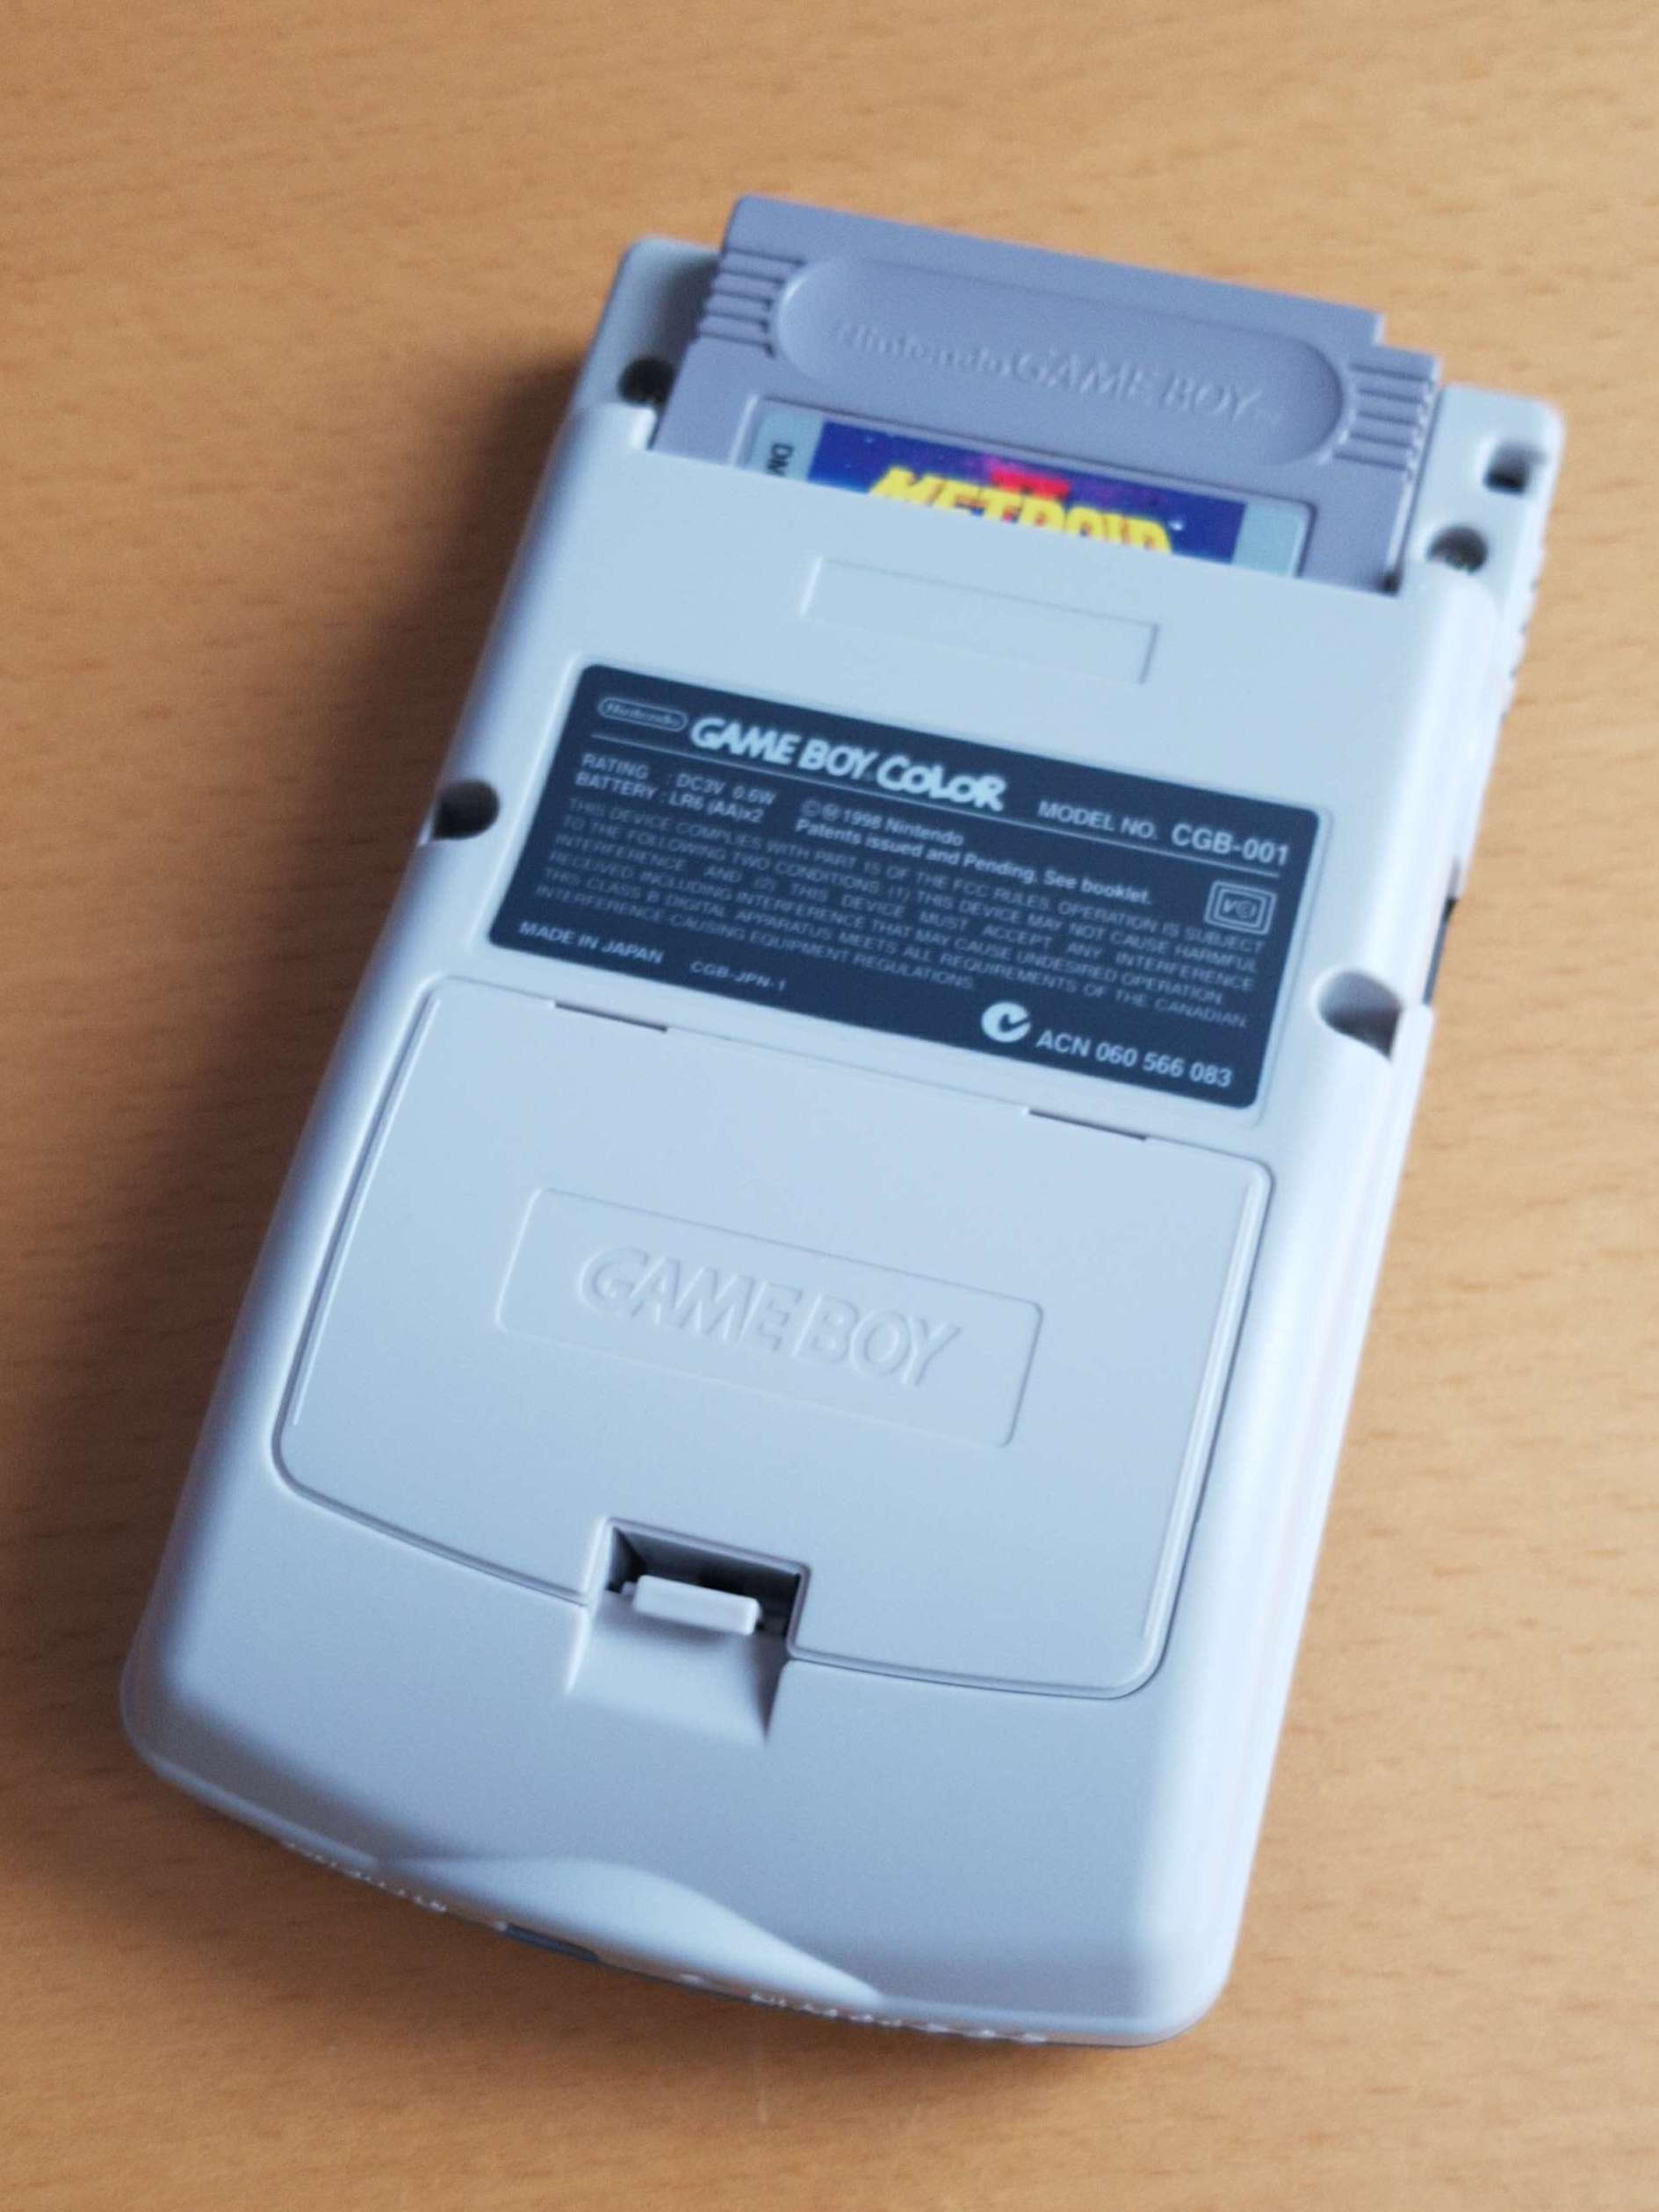
- Back sticker. This sticker is very high quality. It’s not printed on paper but on a thick and durable metal-like material.
The photo also includes a replacement speaker, which I bought as an extra - it is not part of the kit! Here’s one more photo of the kit with the donor GBC and unpacked screen:

One thing I quickly noticed is that the front and back of the shell don’t seem to fit together well:
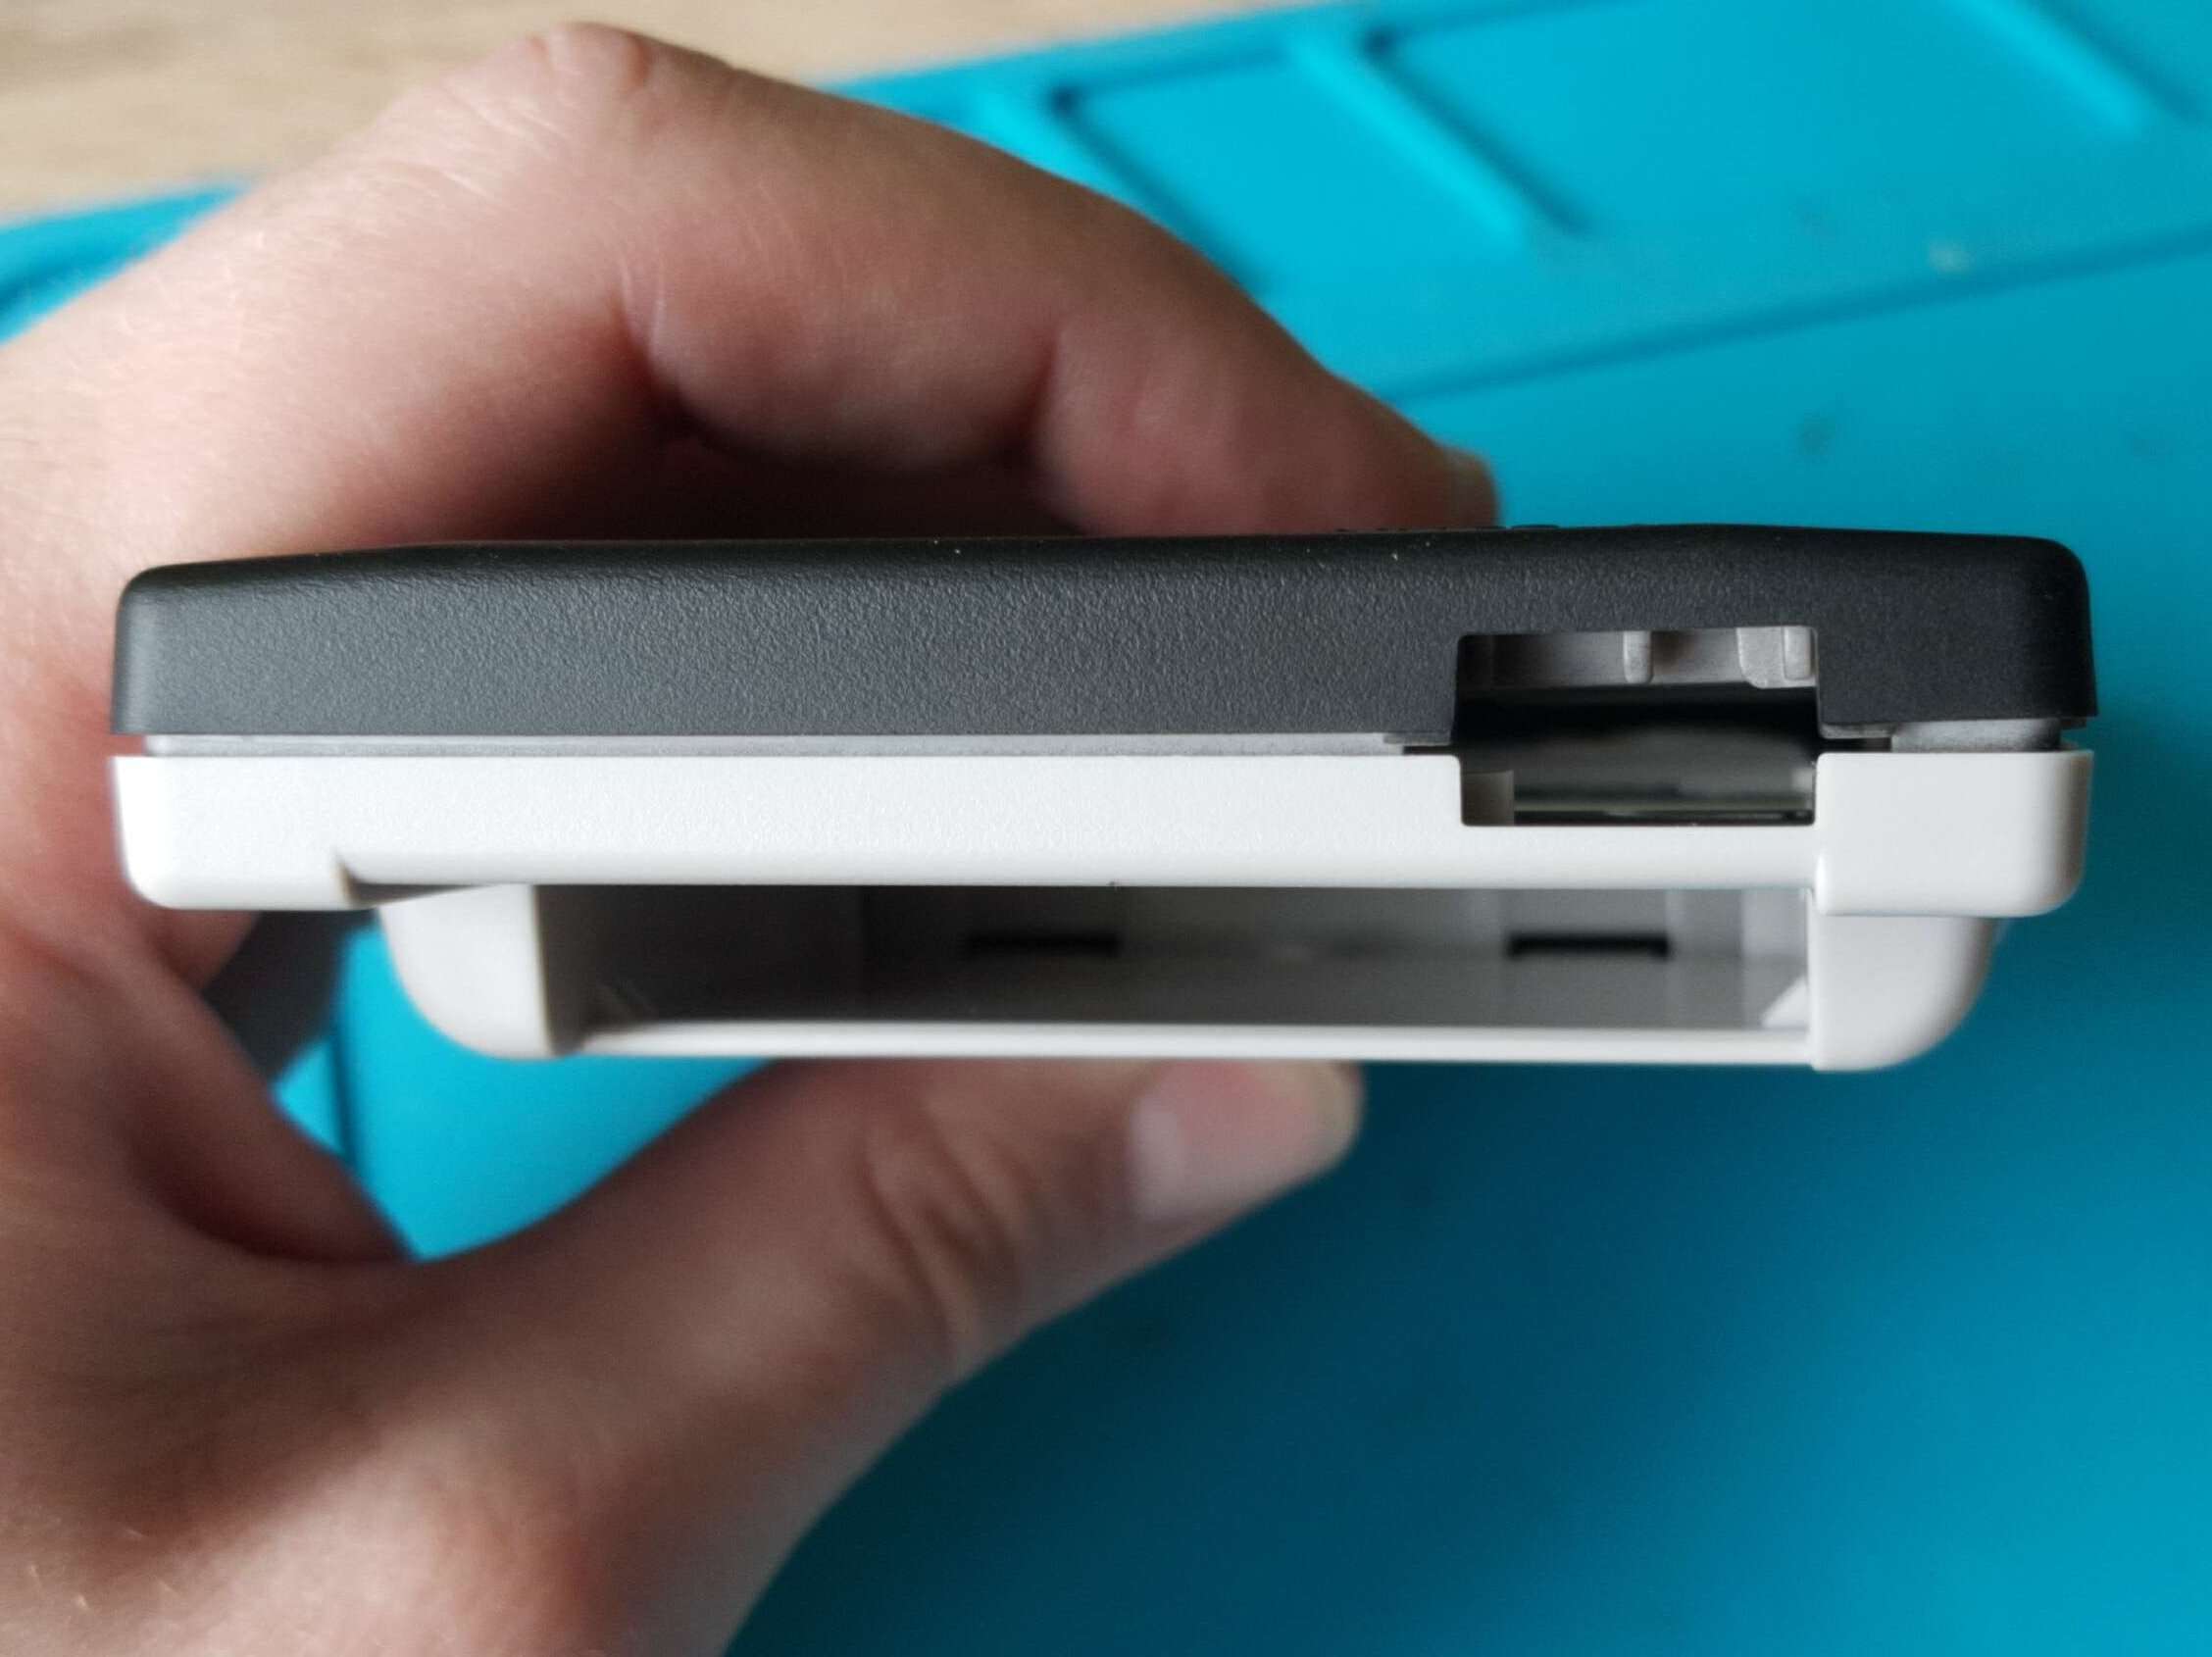
This was a big surprise since all FunnyPlaying shells I had before had very good fit and didn’t cause any issues. I was seriously worried at this point but I need to get ahead of myself and say that after assembling the kit everything fits nicely and my initial concerns were unwarranted.
Putting the kit together
My plan when making this mod was to also replace the original power board1. The problem with original power boards is that they are not very efficient and can struggle with higher power draw from IPS panel. This was an issue in my berry GBC (middle one in the first photo), where the screen would randomly dim to lowest brightness setting. That problem was solved by replacing original power board with a modern one. I decided to do the same in this unit as well.
I began by disassembling the shell, disconnecting the screen ribbon and removing the main board from the shell. Then I desoldered the power board and the speaker:
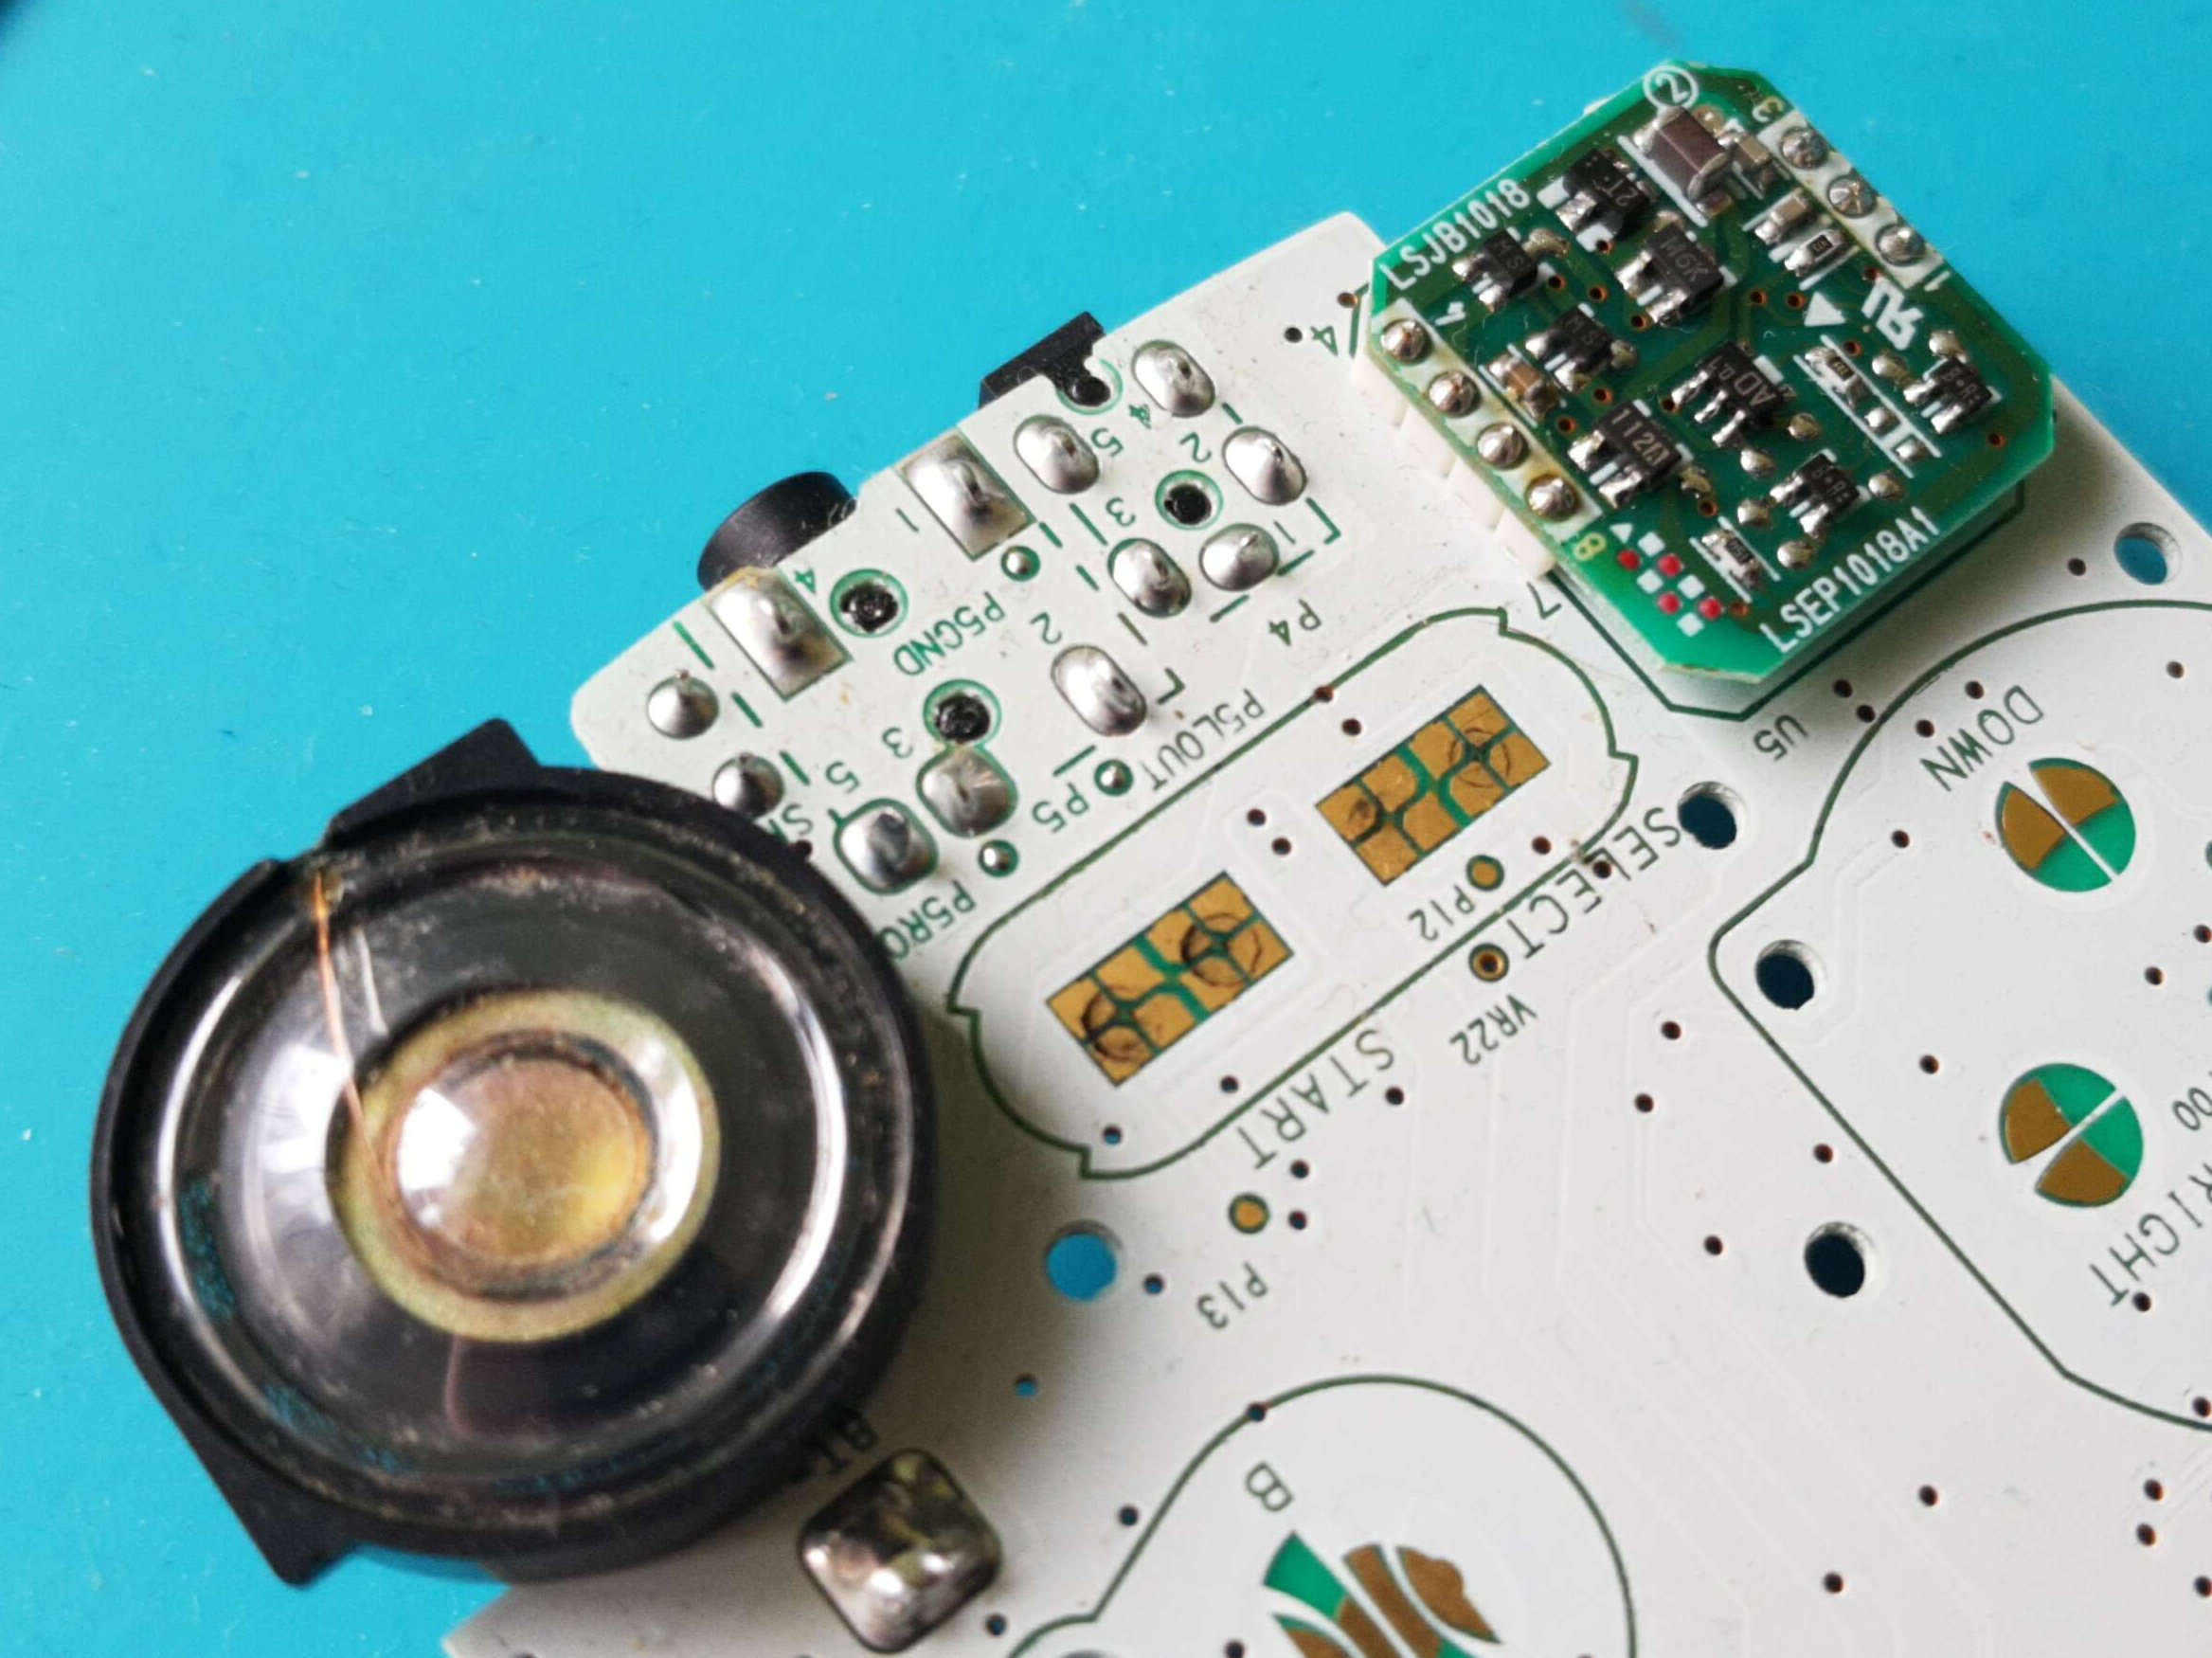
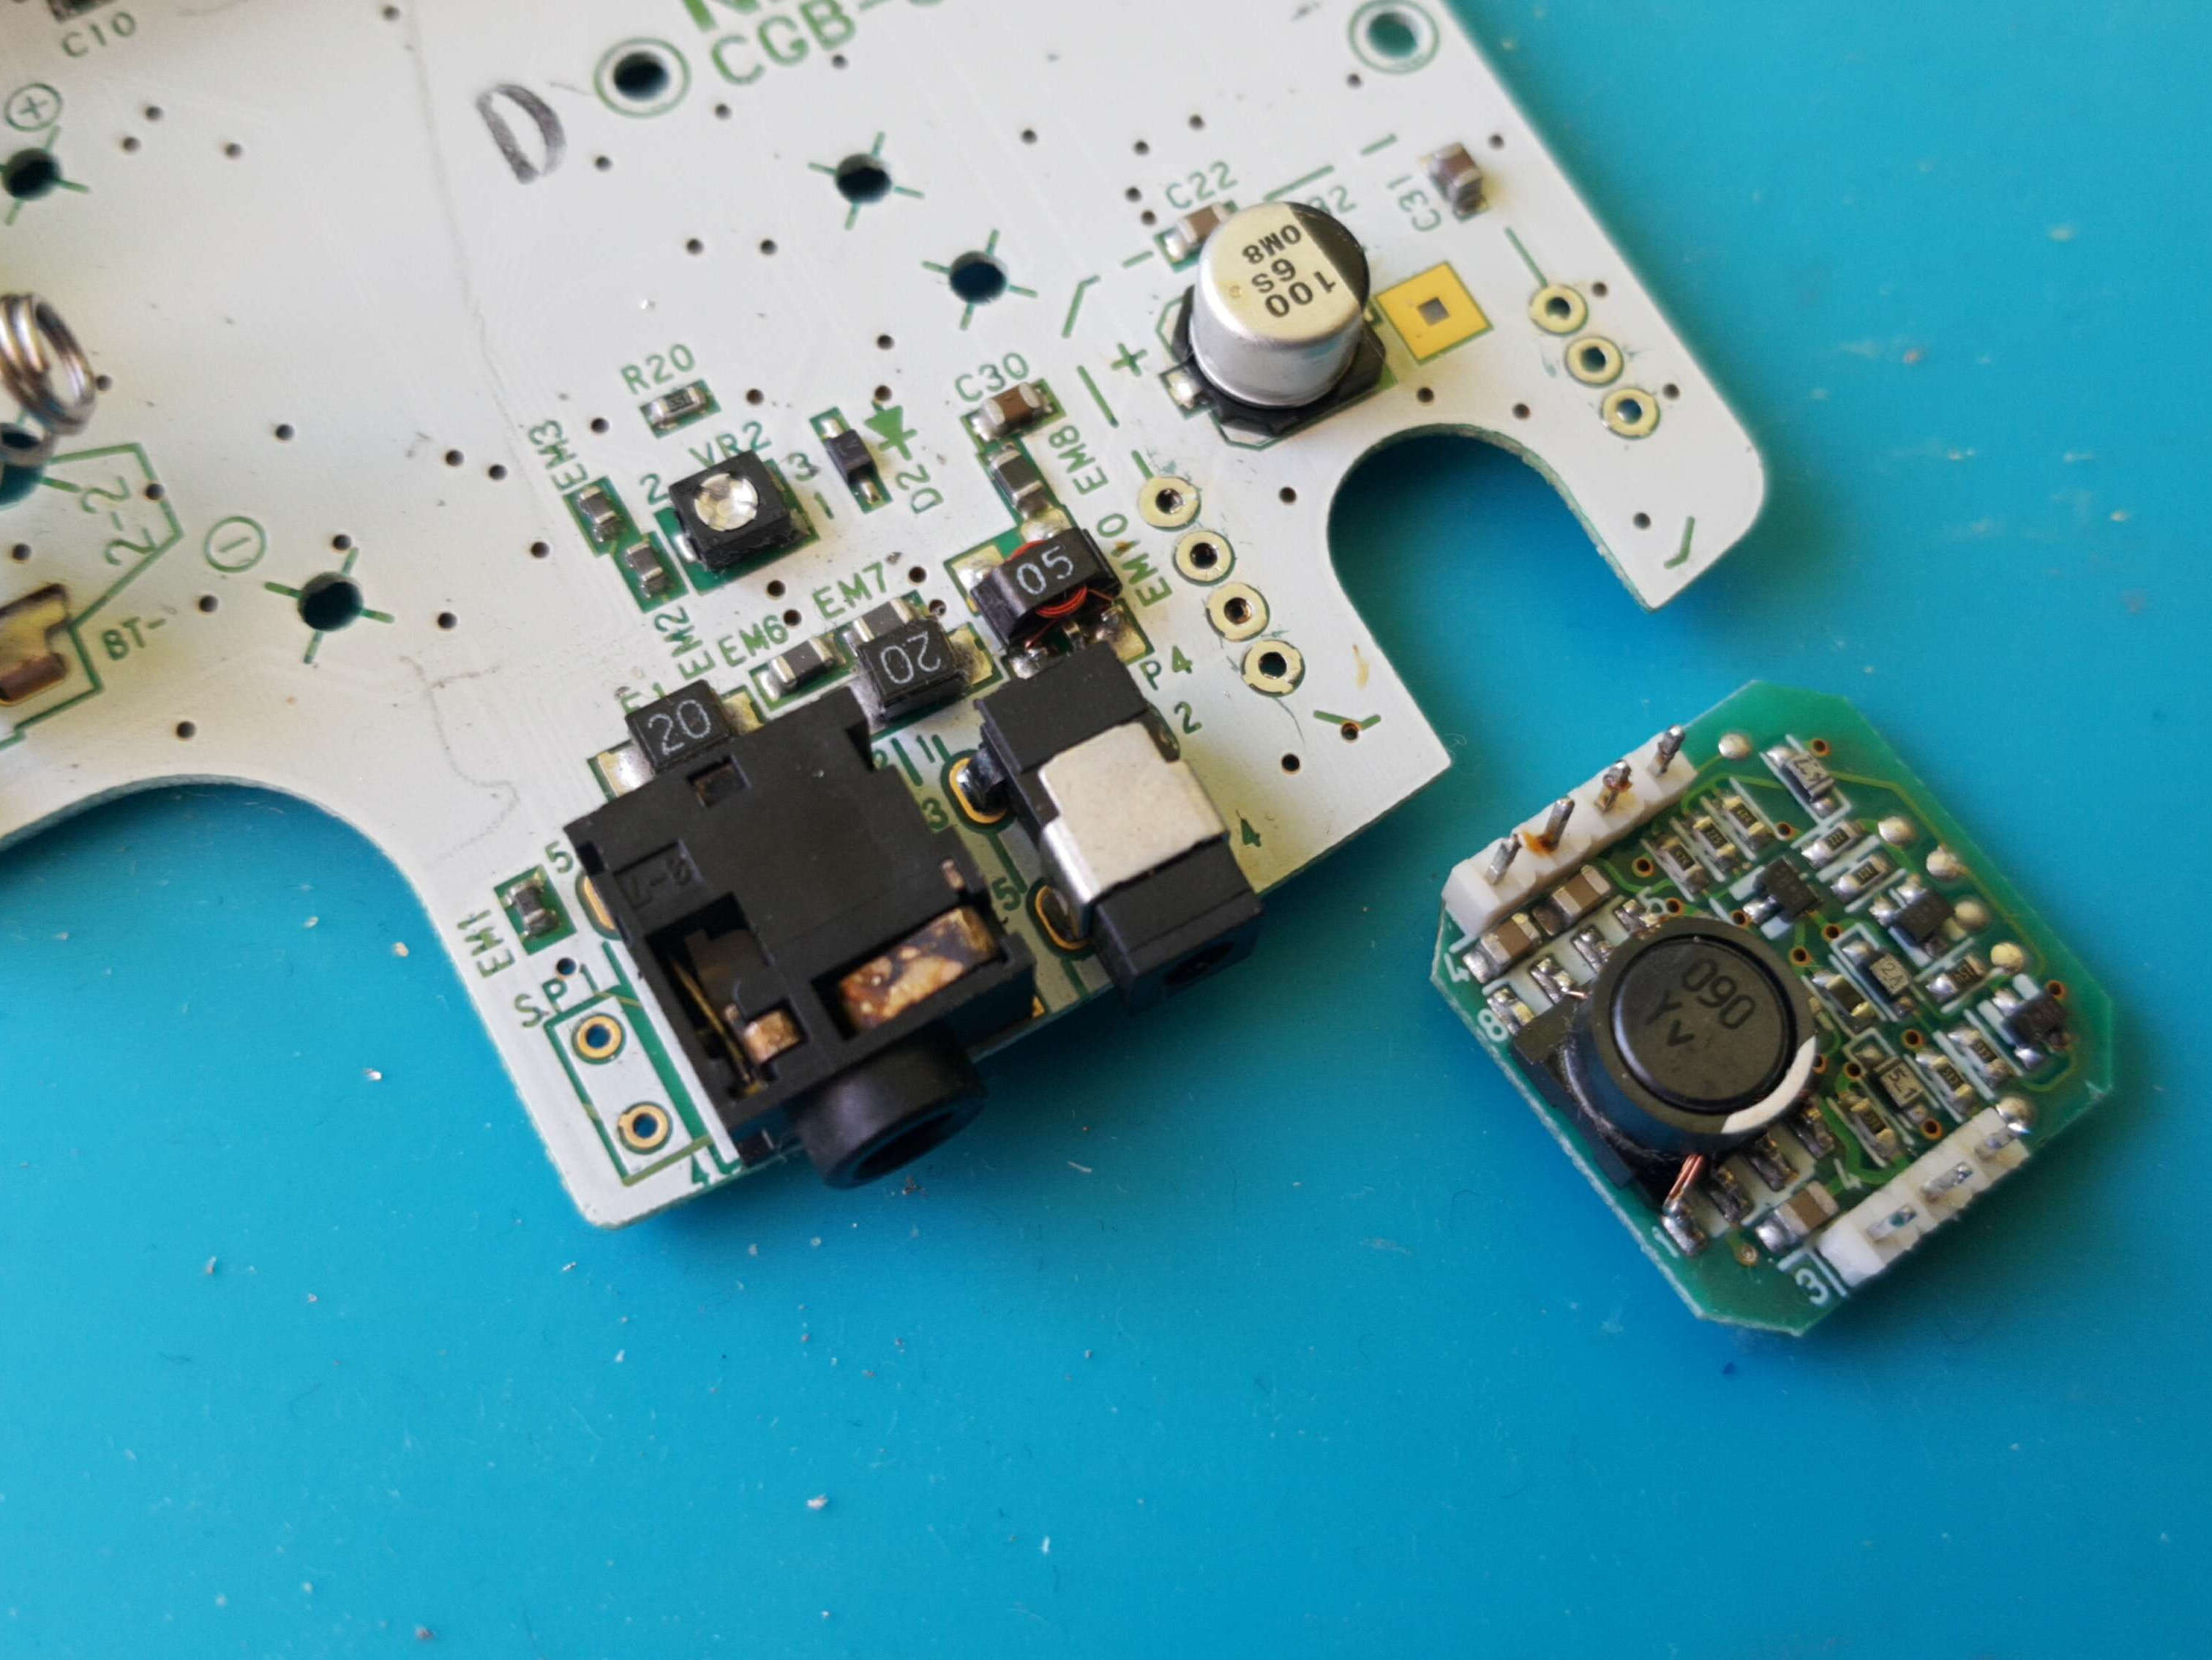
I don’t have a desoldering gun and overall don’t feel too confident with desoldering. This was something that has caused me the most trouble with past mods, sometimes even requiring me to destroy the part being desoldered. That being said, things went much smother this time and I managed to desolder both the speaker and the power board without damaging them in any way.
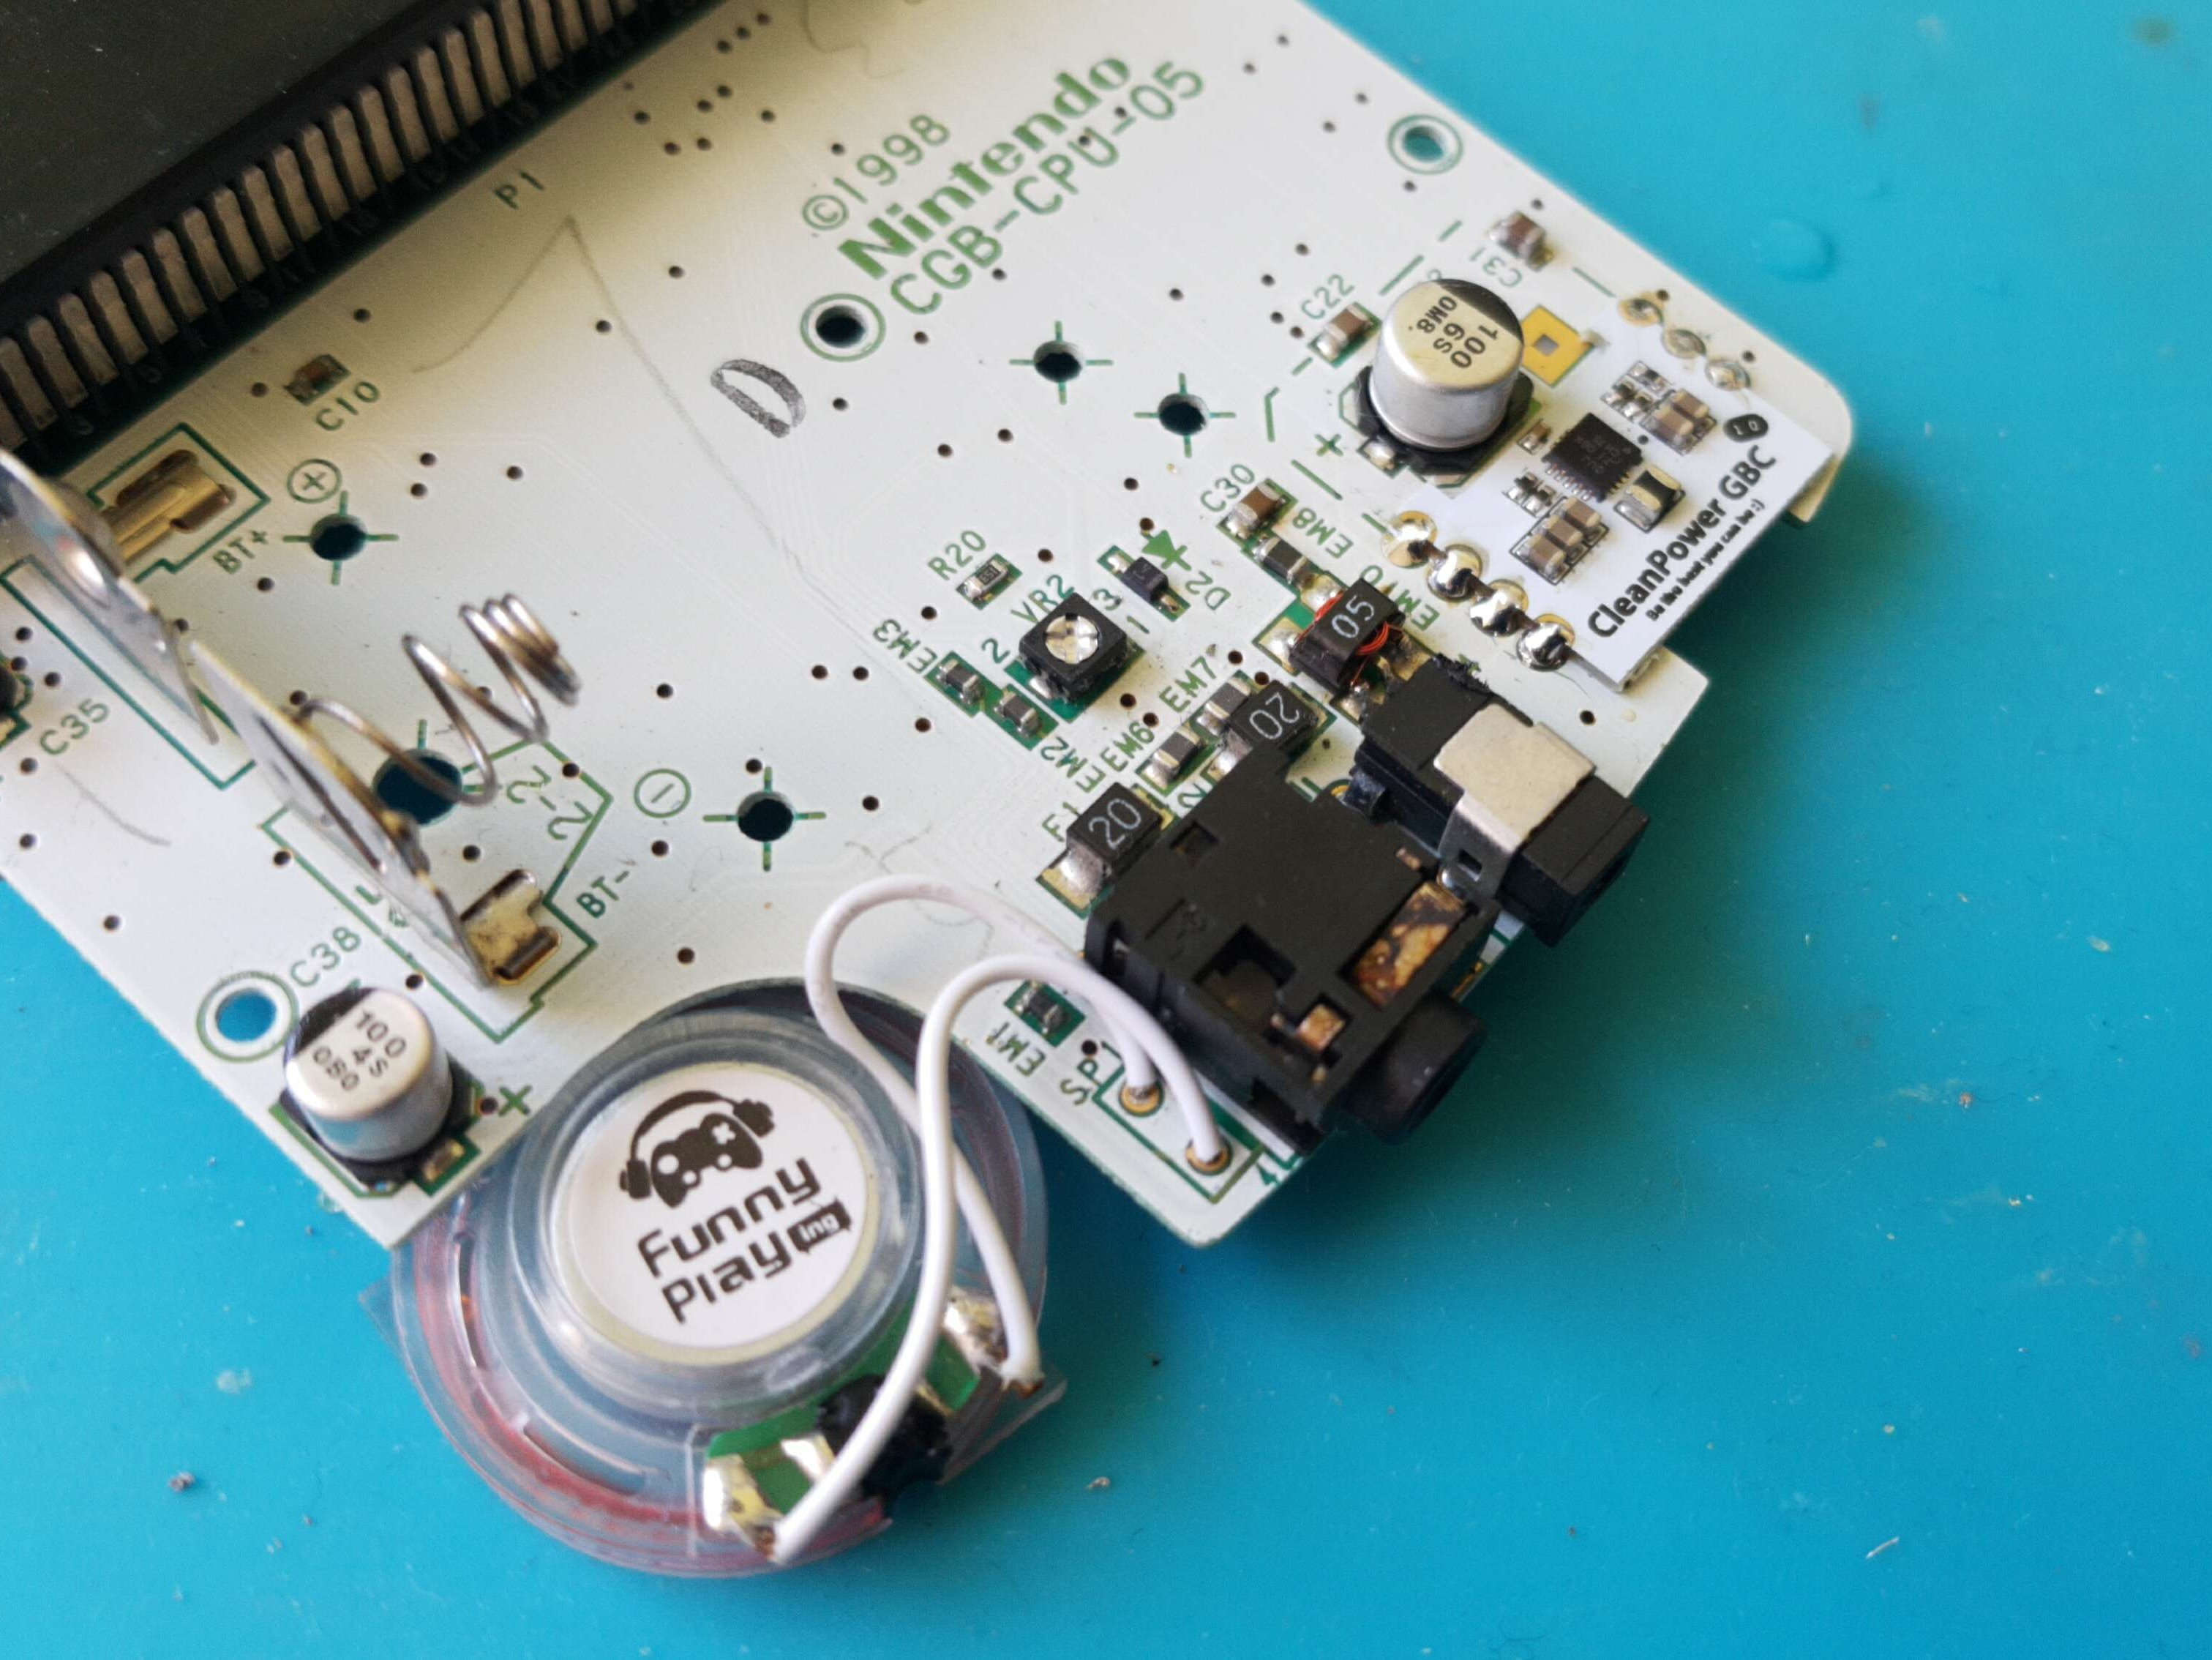
Next I soldered in the speaker and the new power board:
FunnyPlaying instructs clients to test the IPS panel before soldering anything to the ribbon like so:
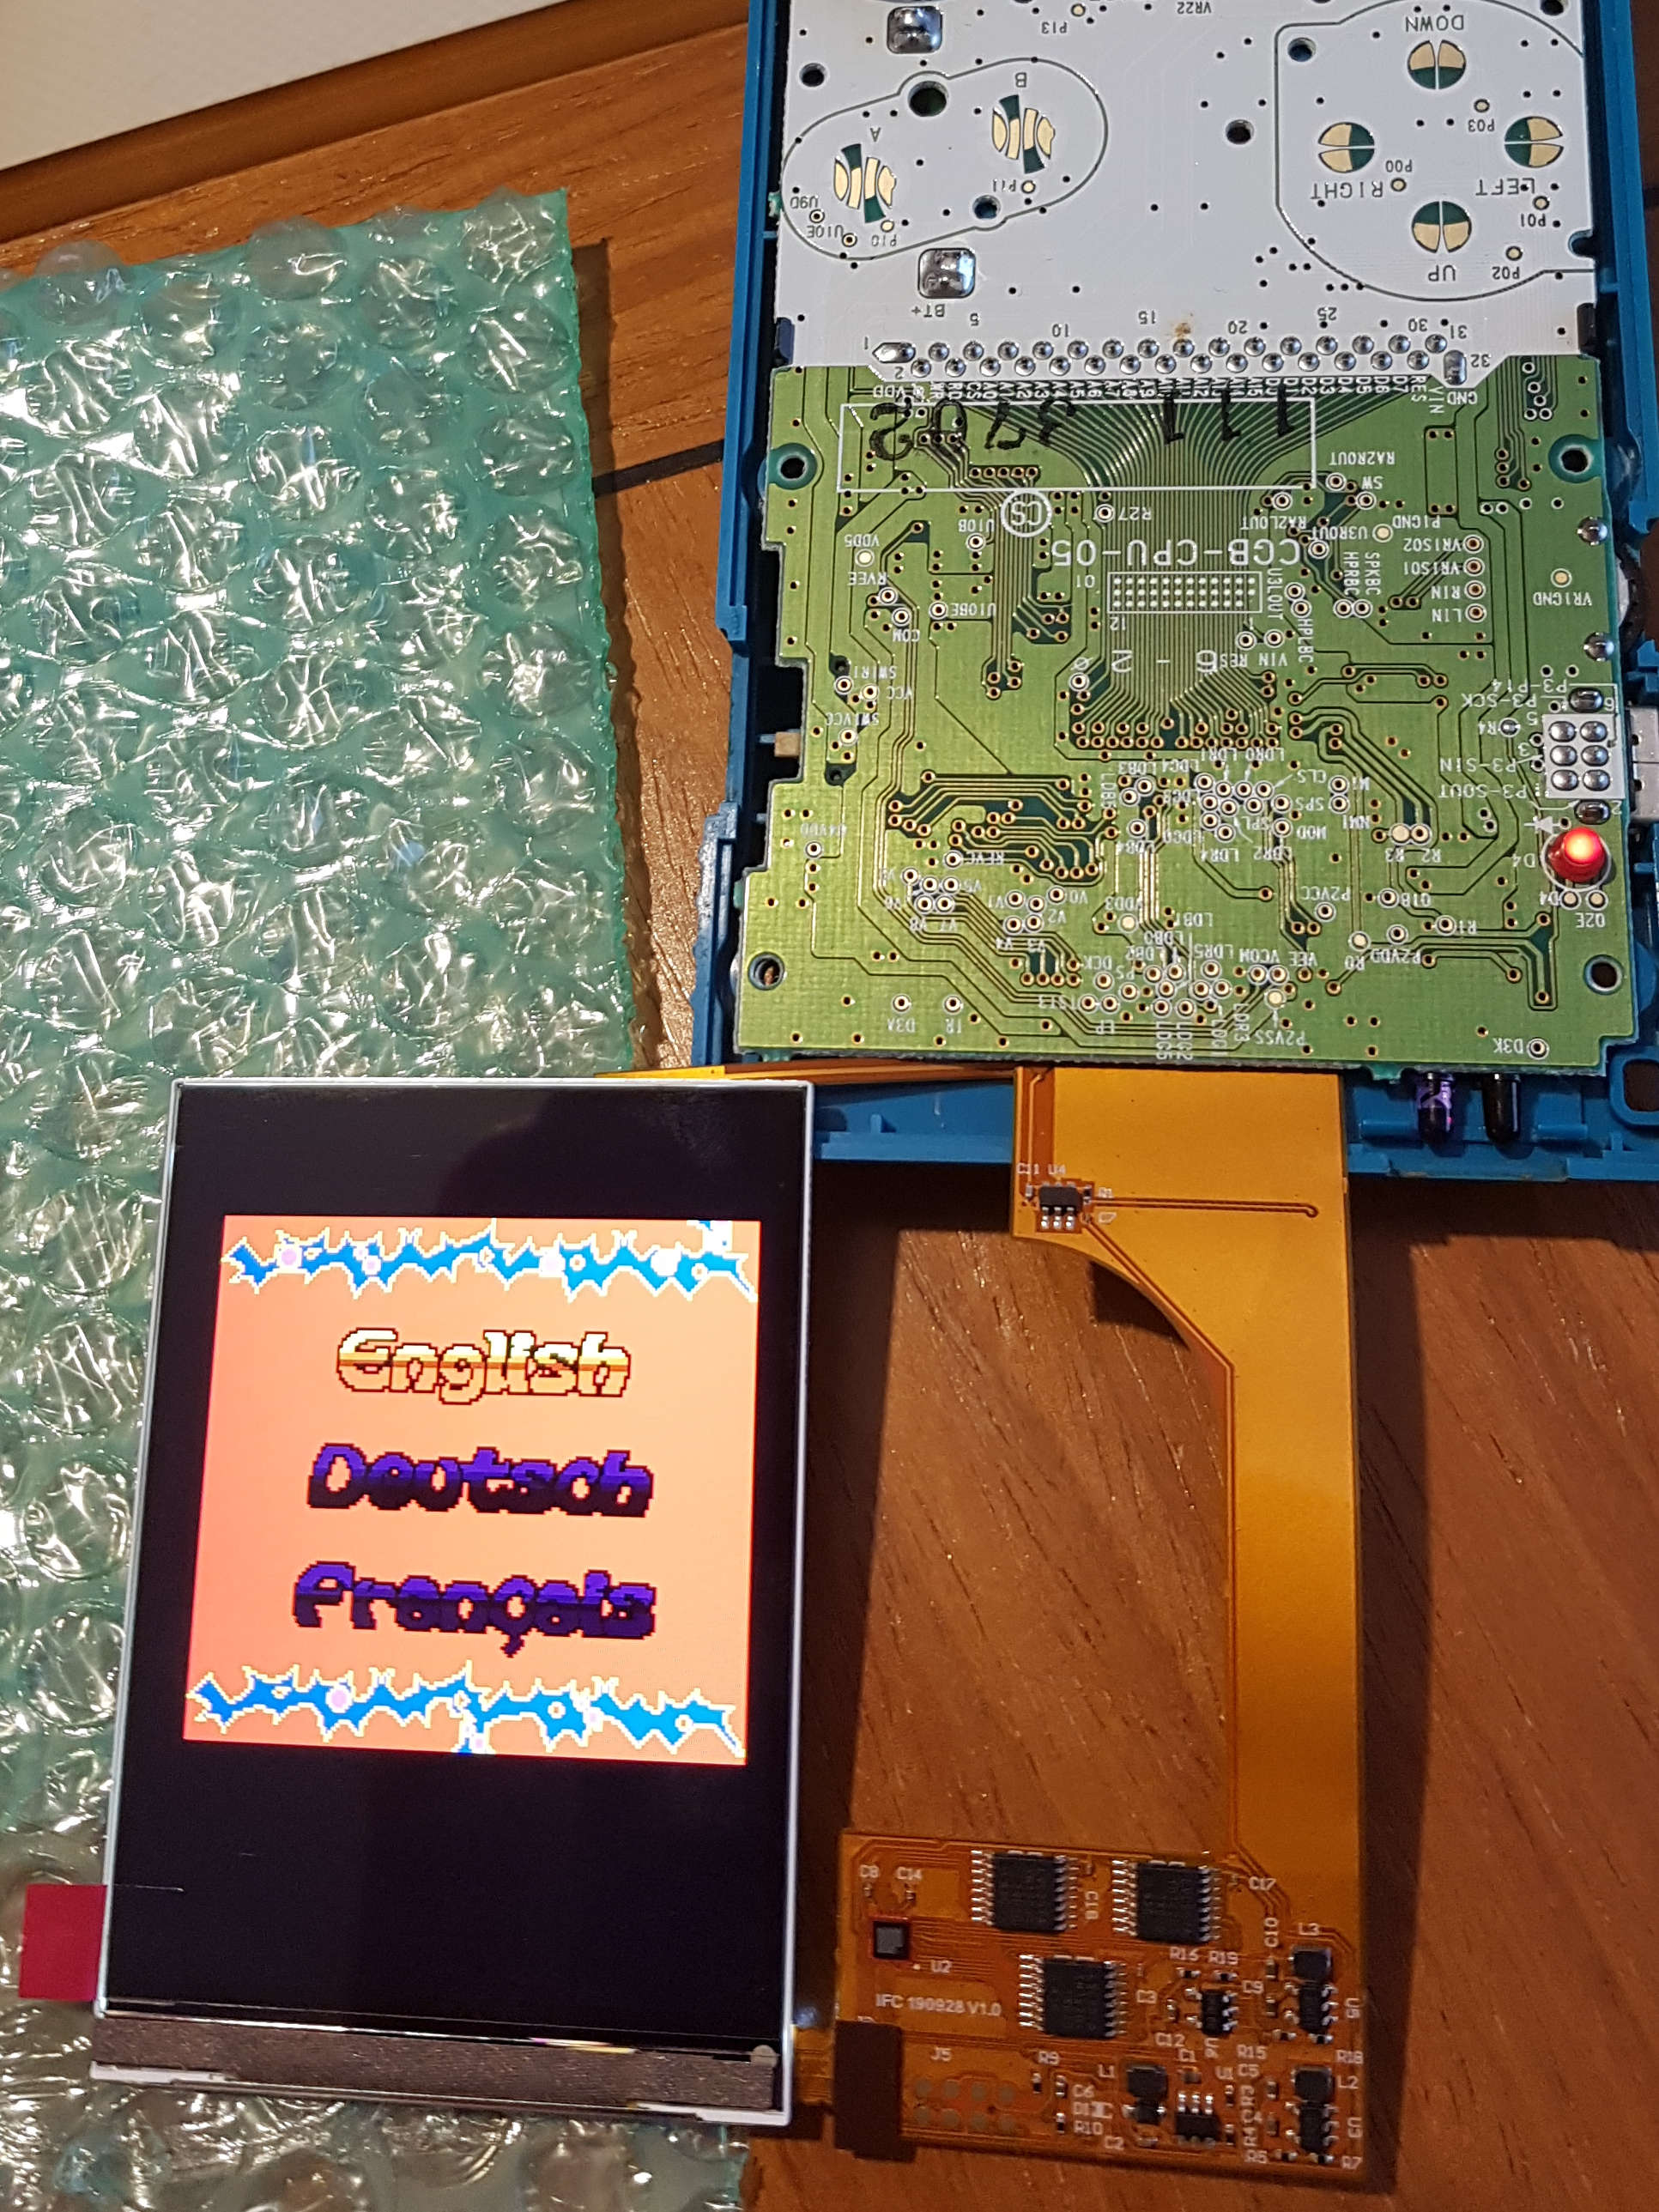
This was my next step. I connected the screen via the ribbon cable, attached the back of the shell, which contains the battery compartment, powered on the console and… nothing. The console seemed dead. No sound, no image on the screen, and no light from the power LED. As the first debugging step I restored the original speaker. After powering on the console sound was working, but the screen still didn’t display anything. This has caused some serious head scratching for me. At first I thought that perhaps the power board replacement isn’t compatible with the IPS panel I was using, but then it dawned on me. The screen mod used in this kit requires soldering a wire between the ribbon cable and the power switch. After reading the description on the FunnyPlaying’s website it turns out that the ribbon cable has a built-in power supply and draws current directly from the power switch to bypass the original power board. So it seems that the modern power board that I installed might be completely redundant. It also looks that it’s not possible to carry out FunnyPlaying’s instructions of testing the board without soldering any wires. I decided to take a leap of faith and solder all the wires where they should be. But before proceeding with the wires I trimmed the pins on the cartridge slot:
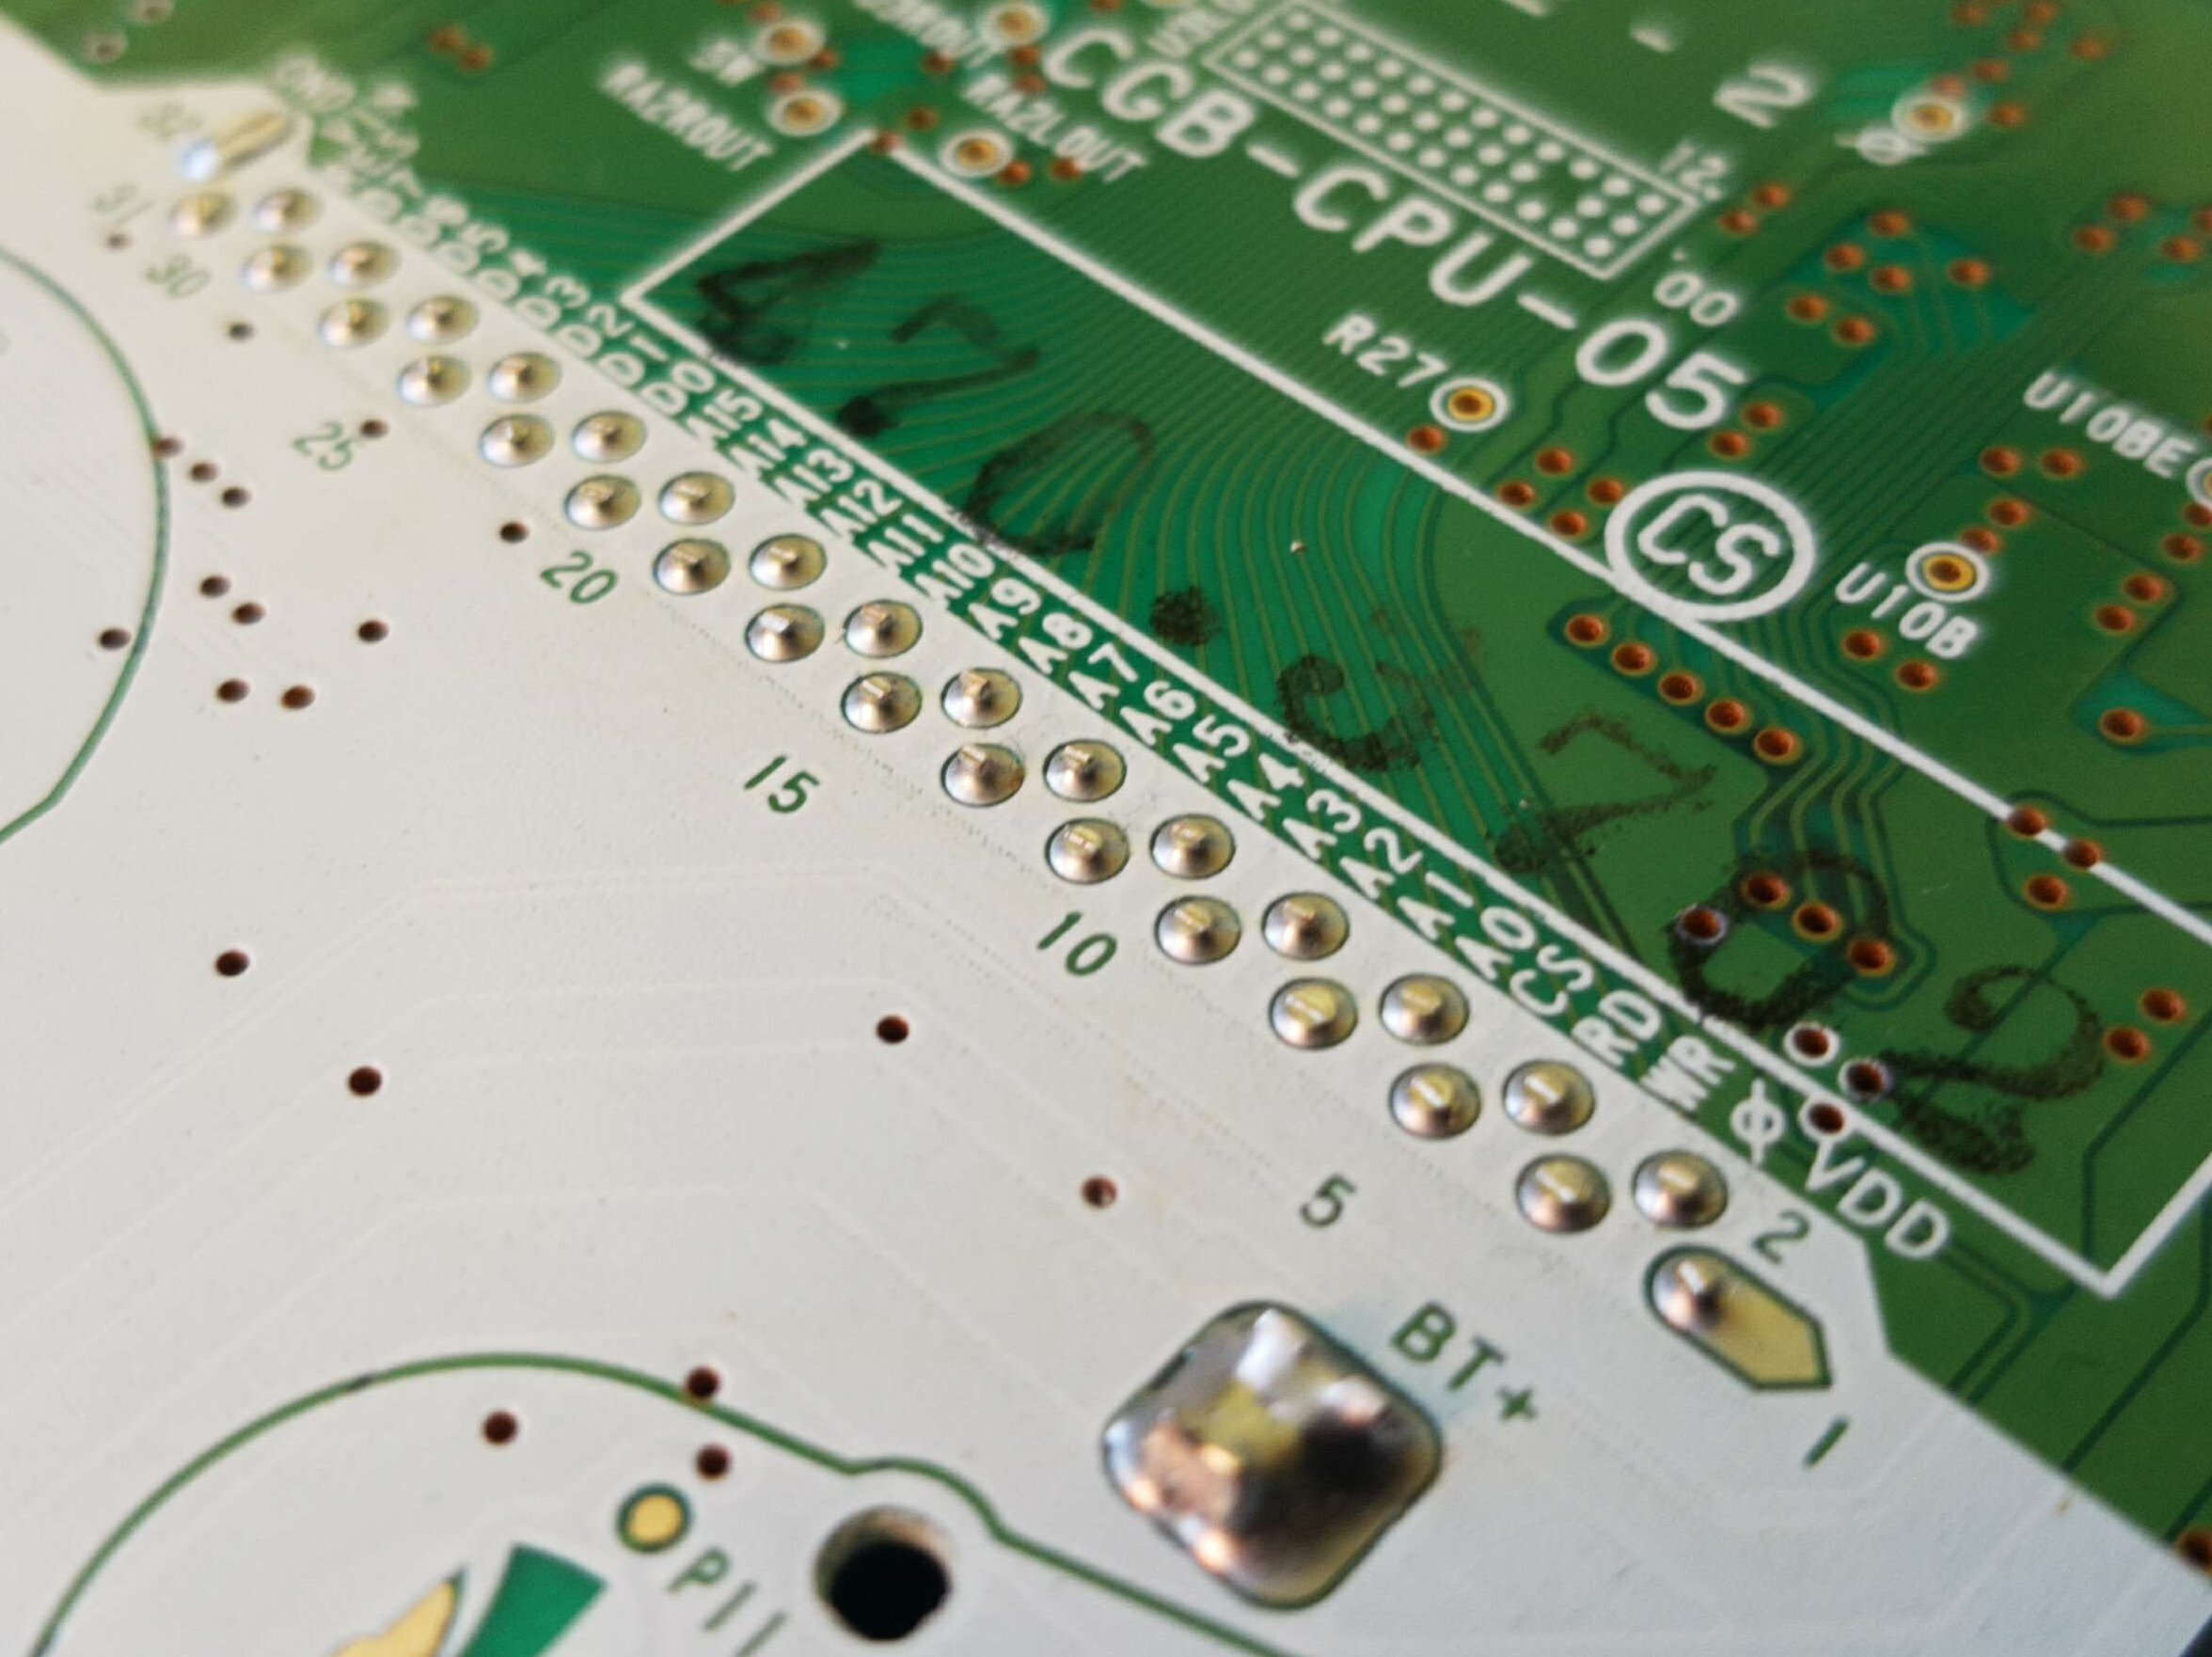
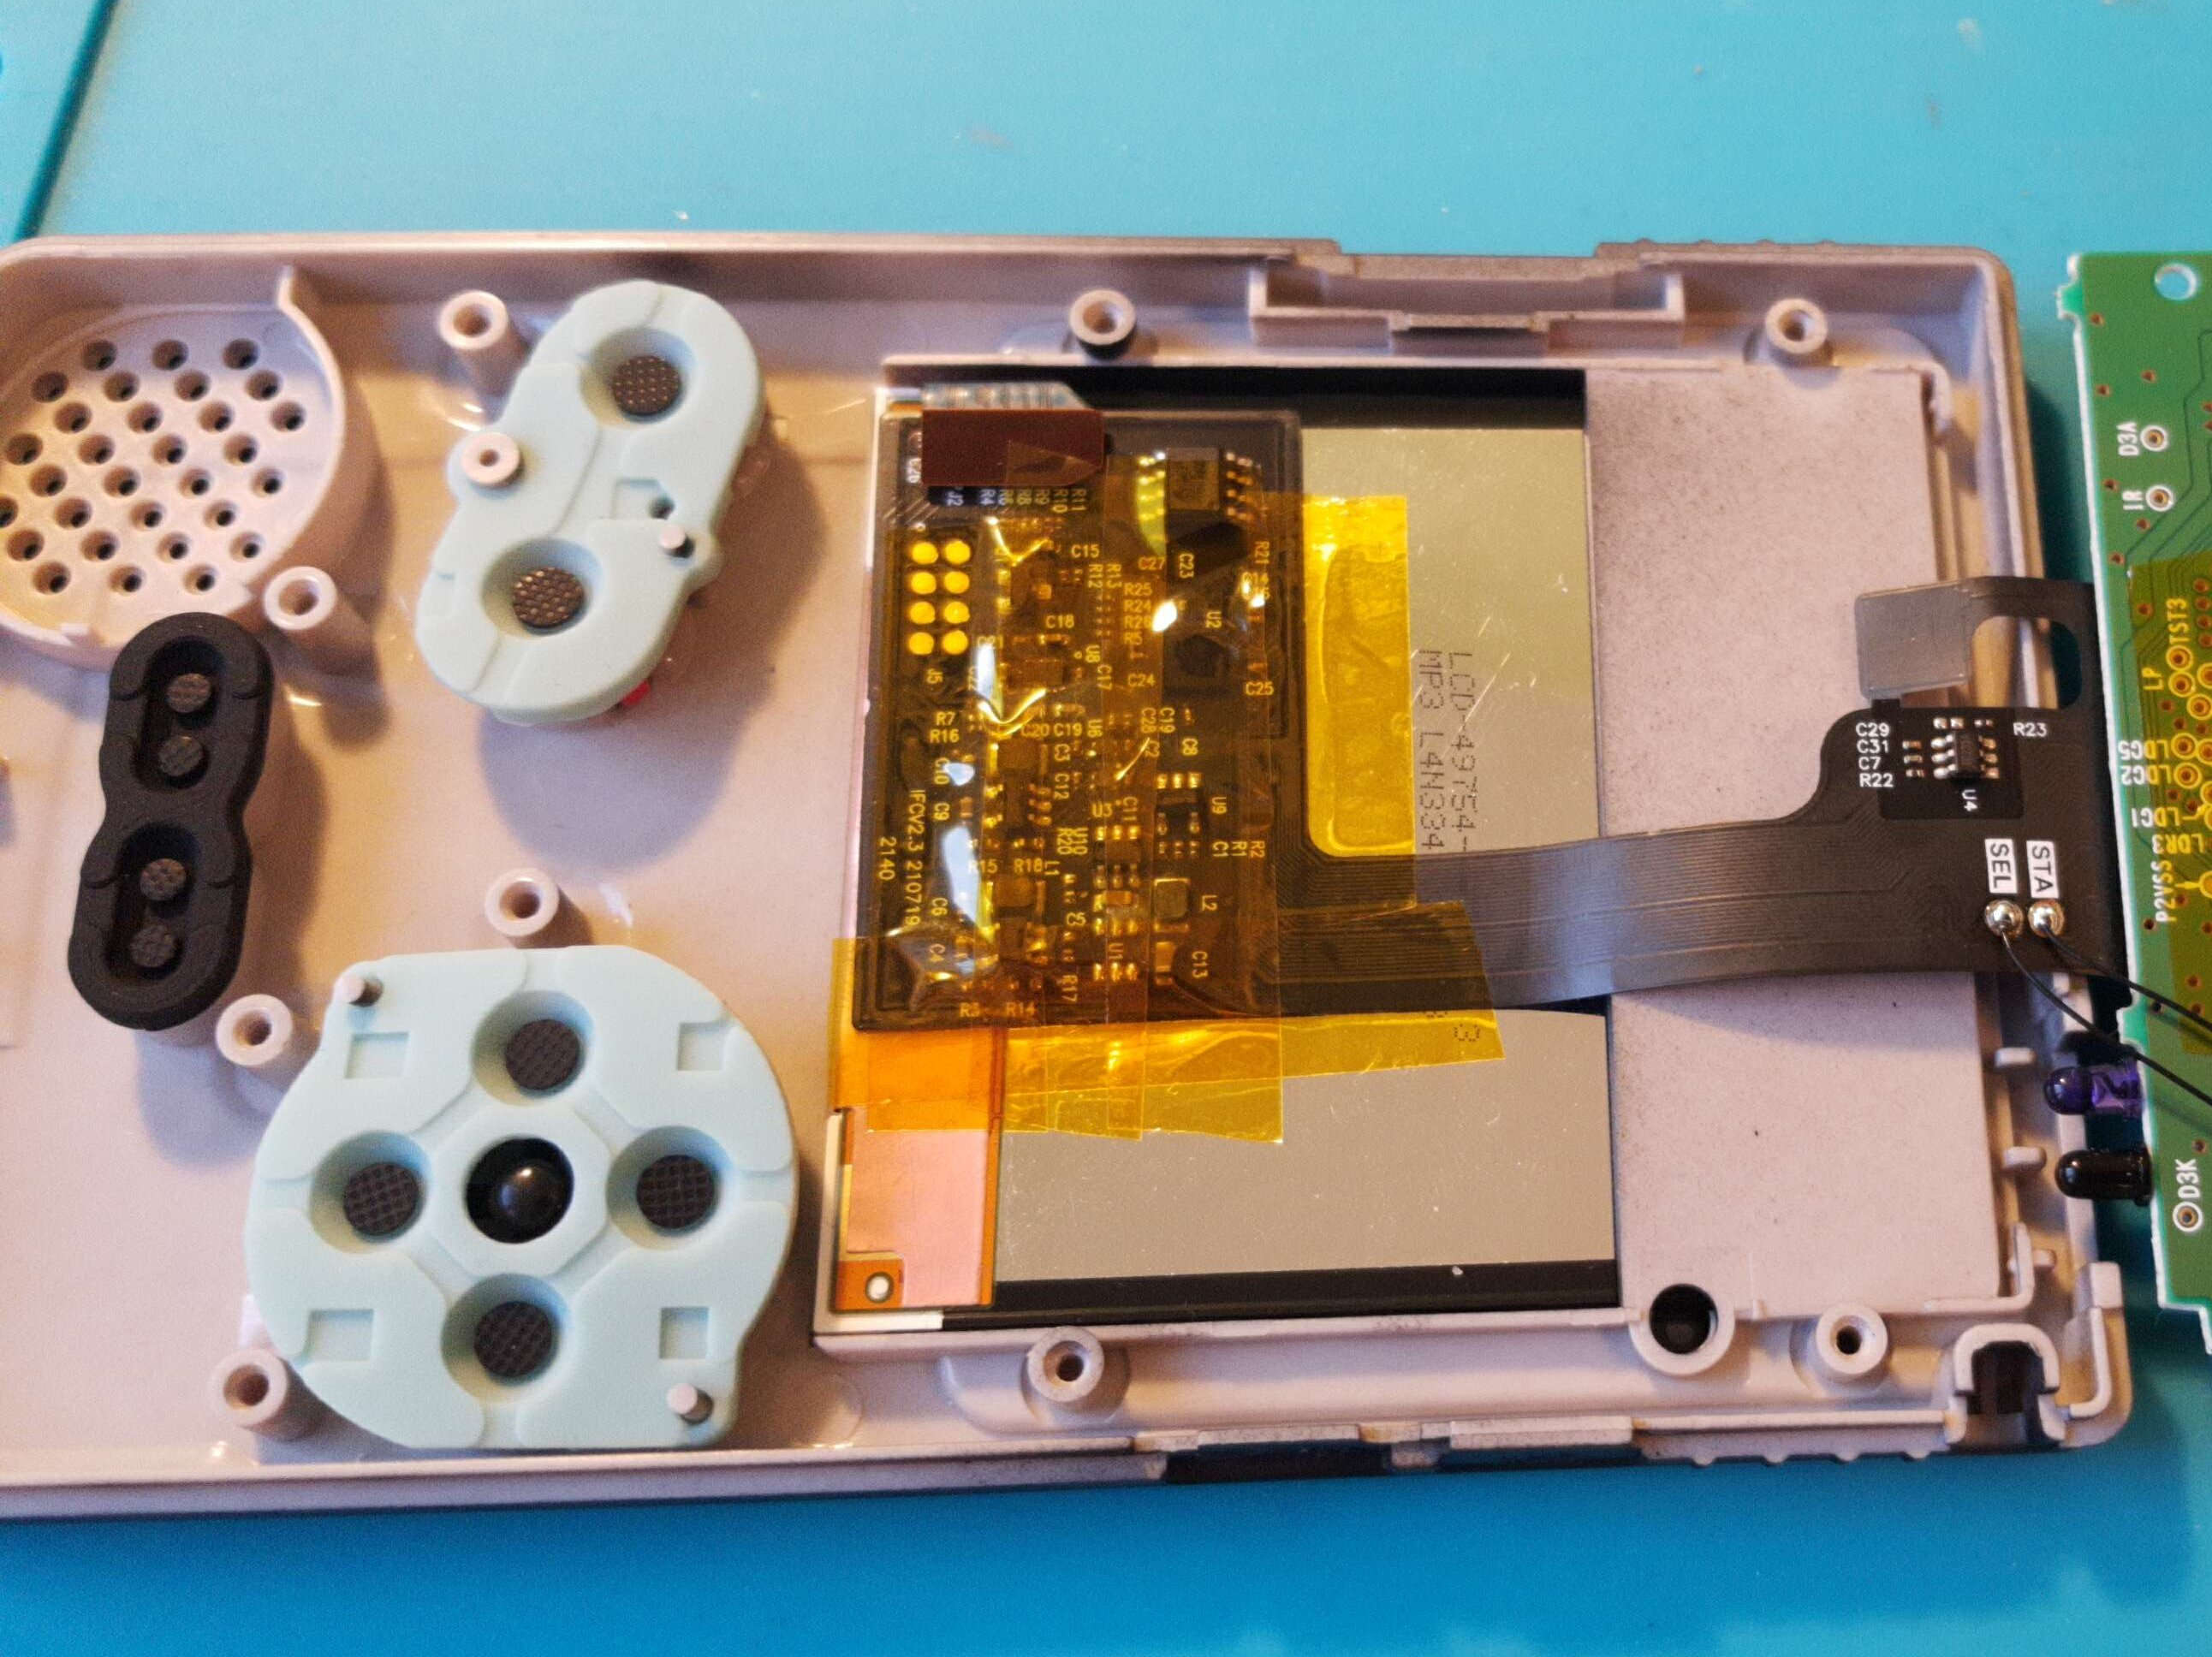
While the instructions on FP website don’t mention this as a required step, I think this is a reasonable safety measure to prevent the pins from pushing on the ribbon cable. Other screen mods I made required this and I didn’t want to take any risks. Next I installed the screen in the shell. This kit comes with a laminated screen, meaning that the glass is already fixed to the IPS panel. There’s no need to worry about screen alignment or any dust getting under the glass. Once screen was in place I connected the ribbon cable to the motherboard and soldered the wires for Select and Start buttons:
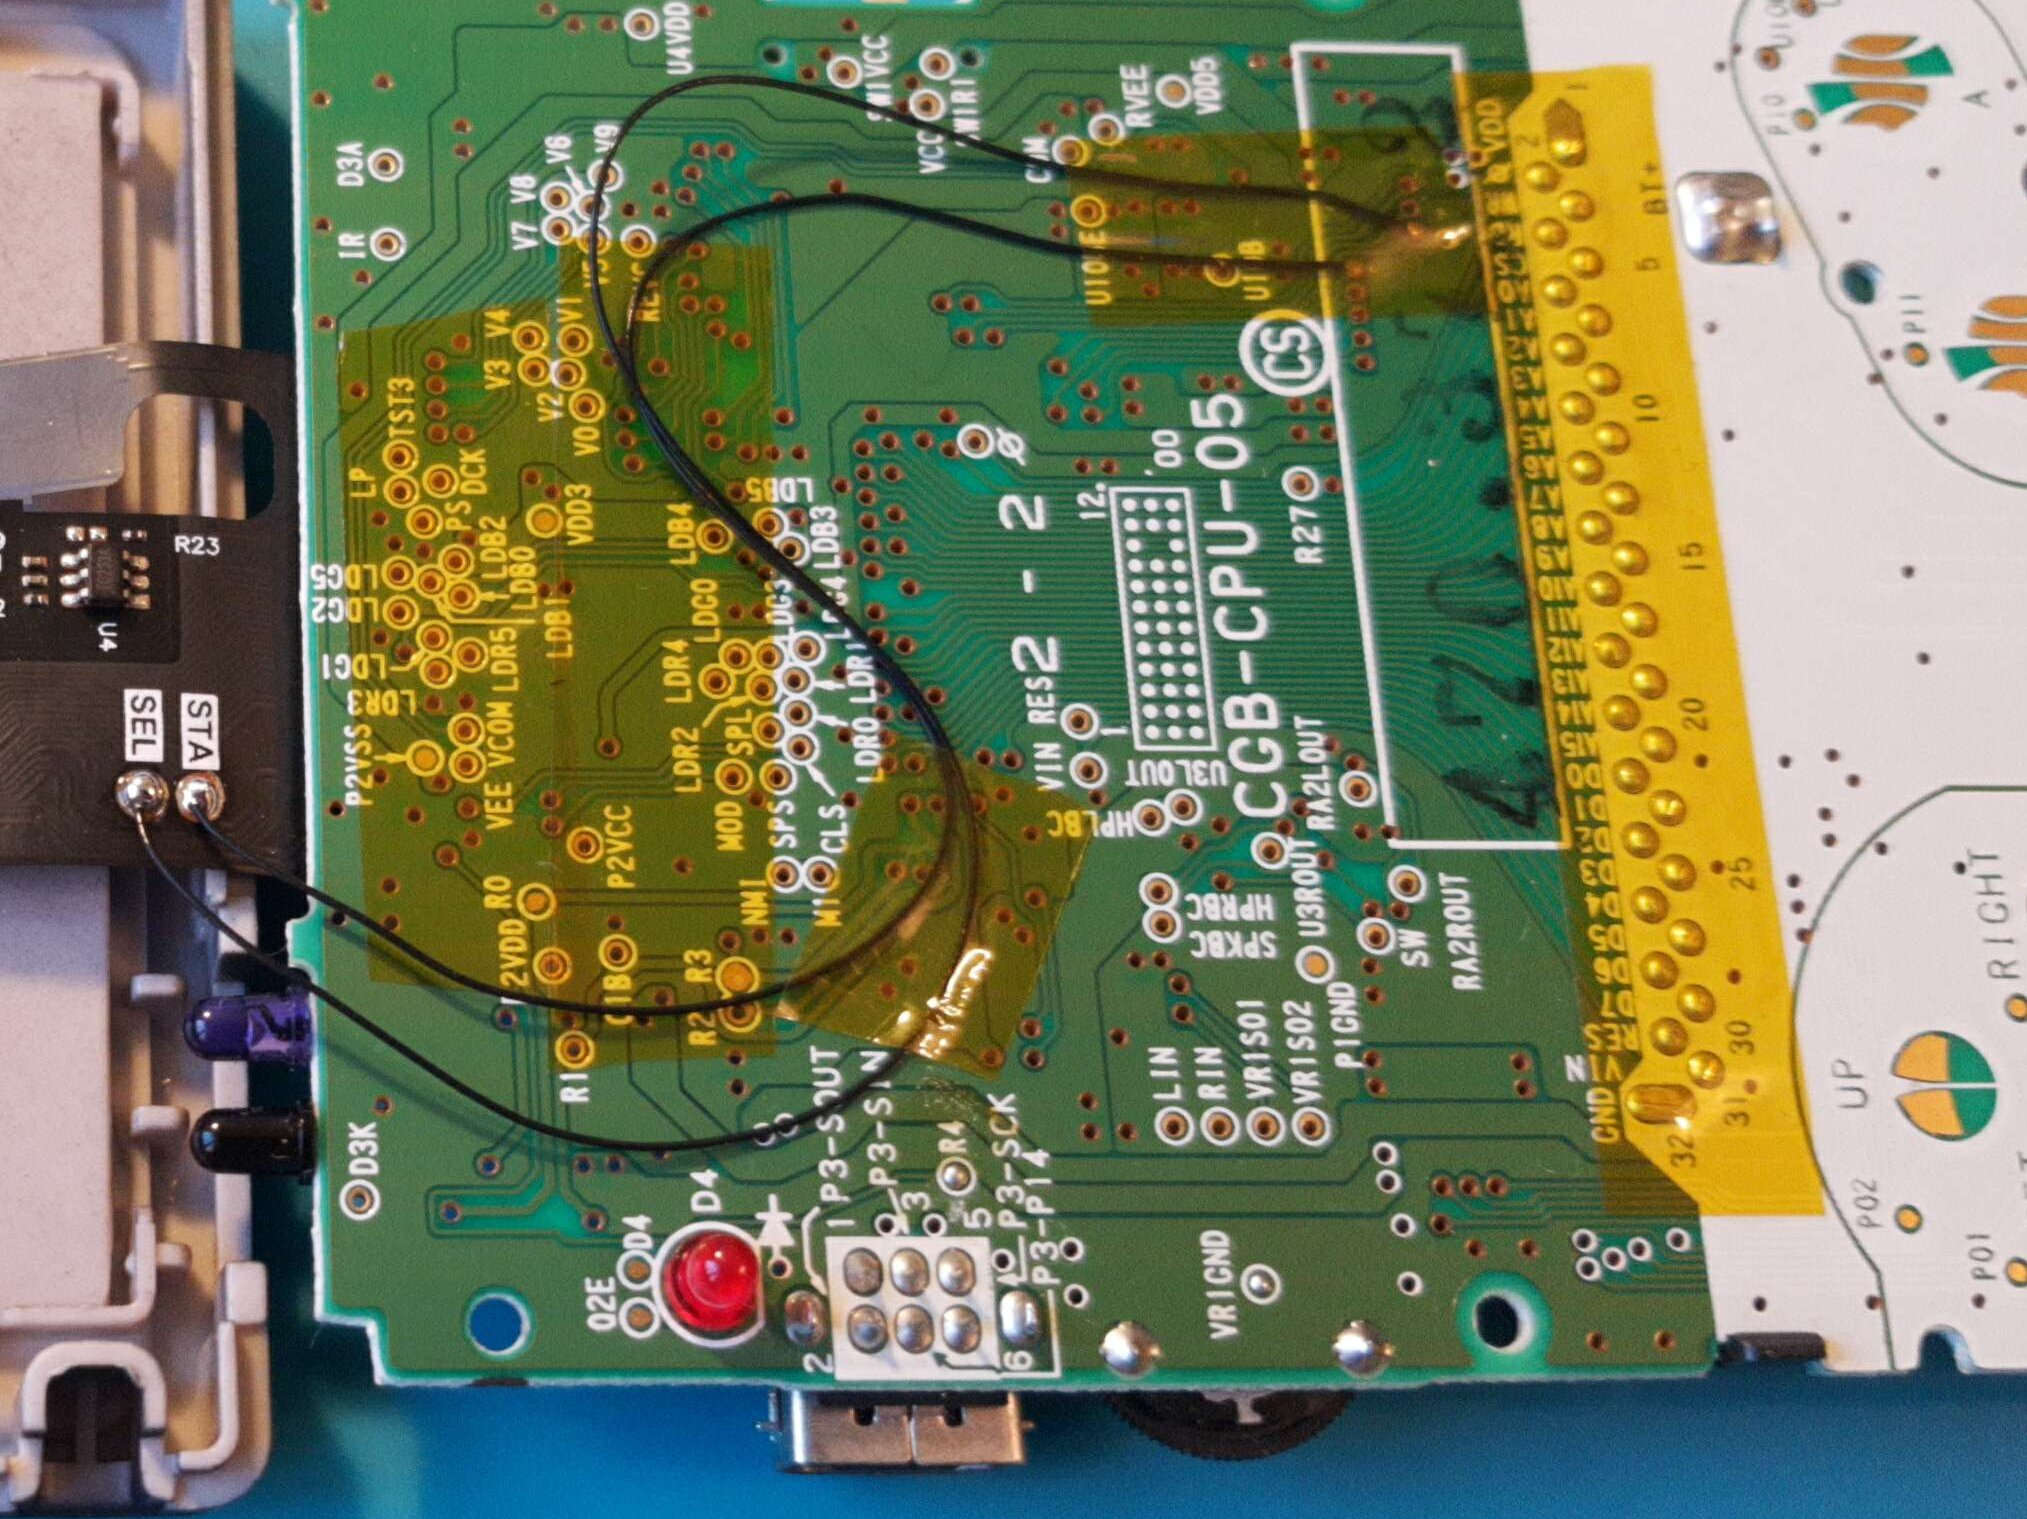
As you can see I used lots of Kapton tape to:
Attach the ribbon cable to the back of the screen, so that it doesn’t move around, and cover the exposed parts on top.
Attach Start and Select wires in place since they are significantly longer than they need to be. In hindsight, I should have made those wires shorter.
Secure cartridge slot pins.
There’s one thing done incorrectly in these photos and I only realized that after assembling the shell. Kit comes with a protective sticker that’s supposed to be attached to the back of the screen to isolate the metal back from the ribbon cable. There’s also a smaller sticker that, I’m guessing, is intended to secure cartridge pins, but I already used Kapton tape for that. I didn’t want to take any risk, so I disassembled the shell and applied the sticker, at least to the degree it was possible.
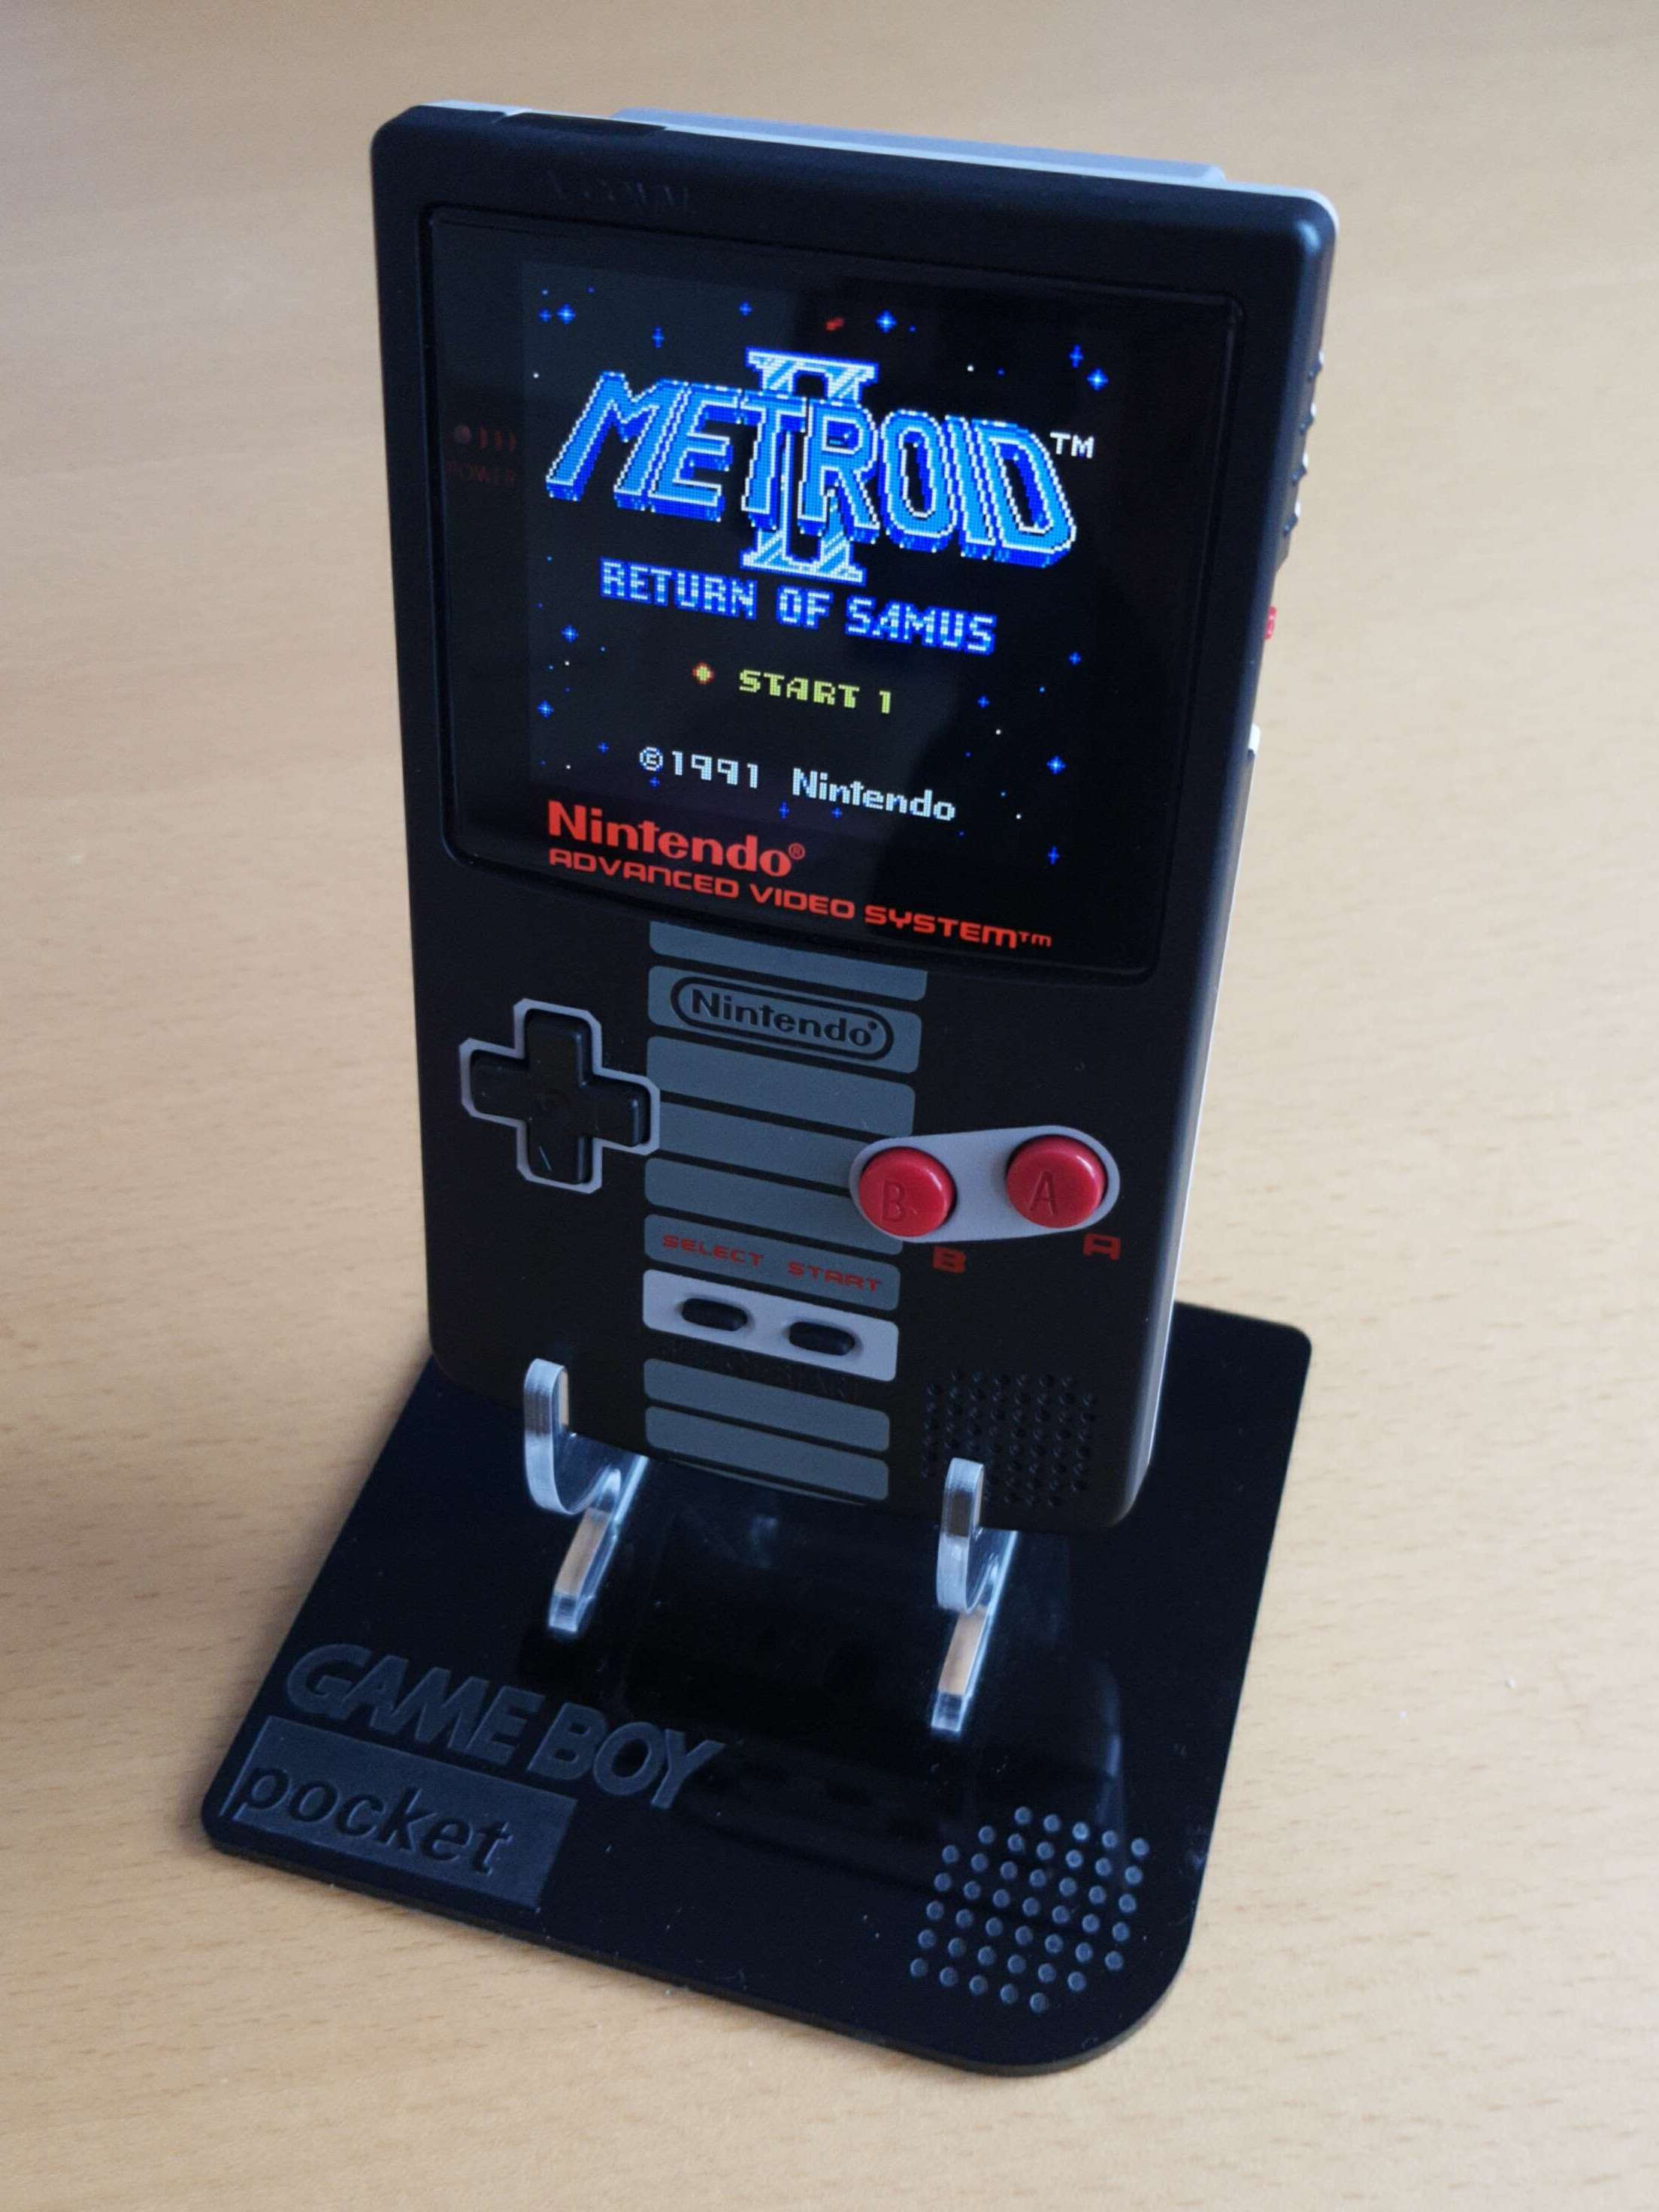
Finally, I soldered the power cable and touch sensor, assembled the shell, and applied the sticker to the back of the shell. Final result looks like this:
Here’s my new GameBoy next to the ones I already owned:
Summary
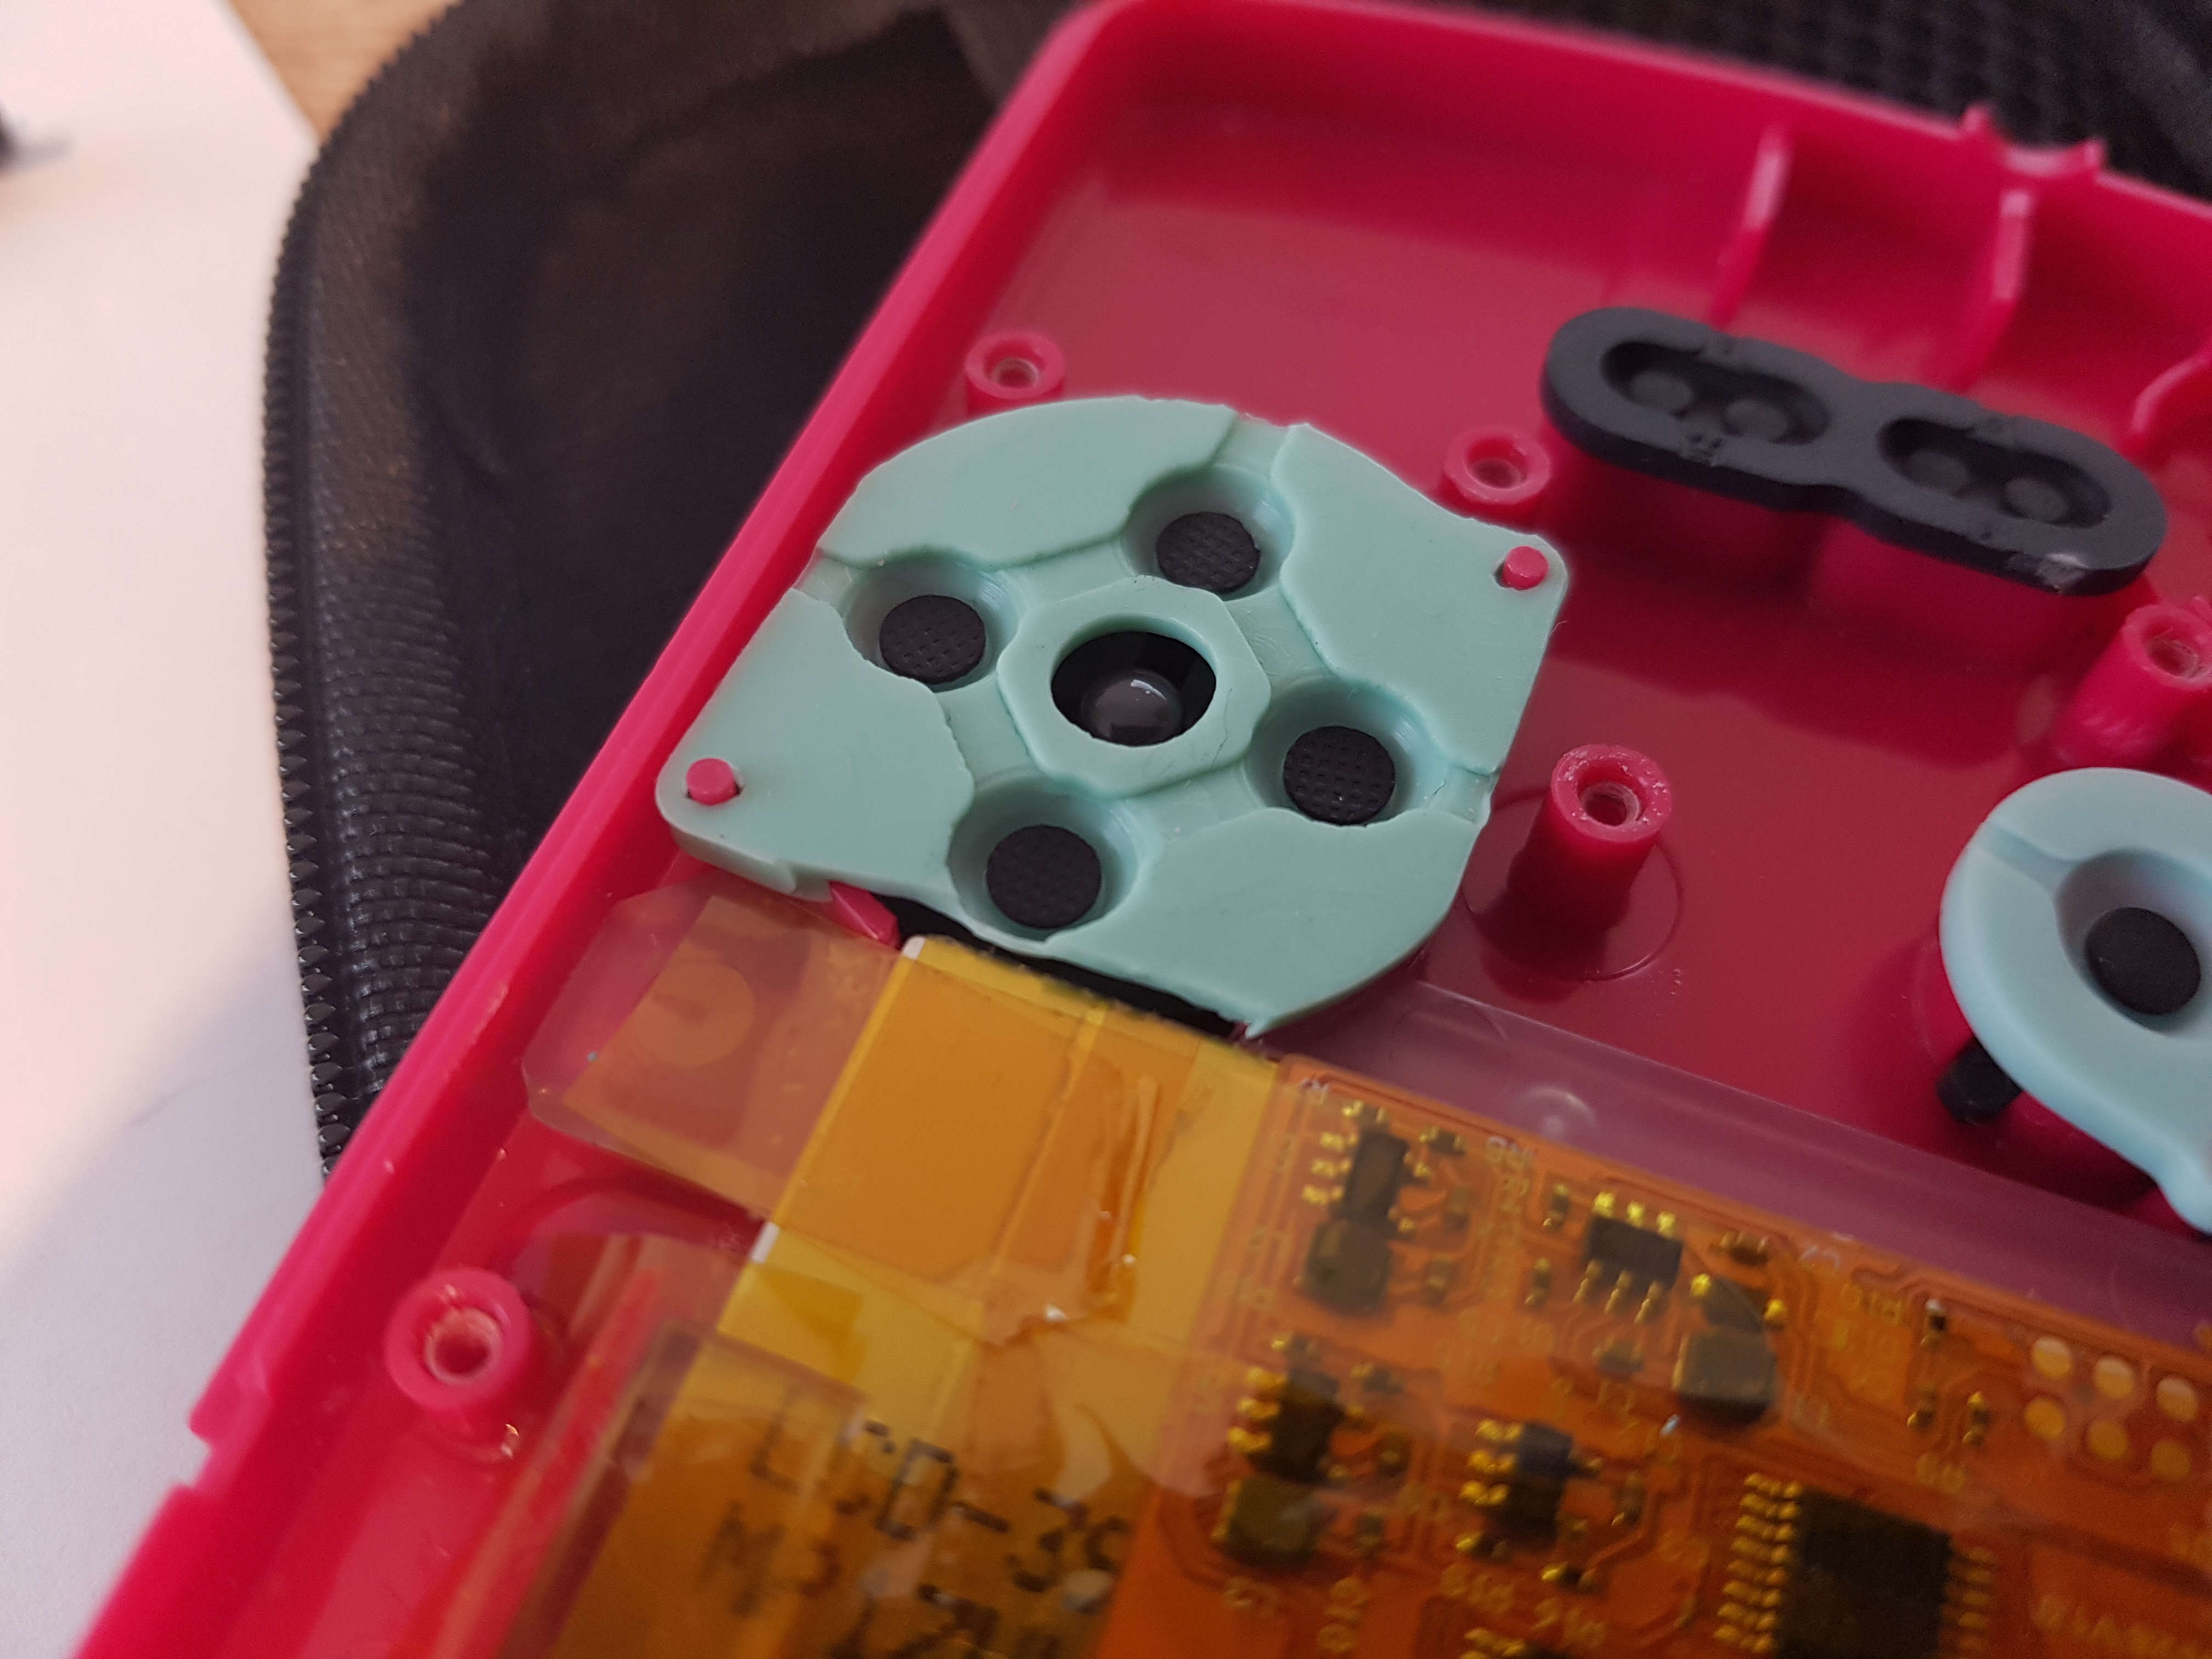
This kit was a very nice build. I really liked the laminated screen. It makes building a lot faster and I no longer need to worry about dust or getting my fingerprints where they shouldn’t be. The screen is also small in size so it doesn’t require cutting the the silicon pads, as was the case with earlier screens from FunnyPlaying:
Obviously, the shell is also designed specifically for this mod and doesn’t require trimming the plastic. This is nice progress compared to earlier mods.
Of course if I were to build that kit again it would take me much less time. I wasted quite a lot of time on figuring out why the screen doesn’t power on. It also seems that the replacement power board isn’t necessary so I could have skipped that as well.
I’m not sure why the replacement speaker didn’t work. I probably should have given it another try after figuring out the screen issue, but at this point the build was taken much longer than anticipated and I wanted to finish it ASAP.
One thing I was concerned about when buying the kit was the logo under the screen. That logo is backlighted by the IPS panel itself. I was concerned that it will be distracting while playing, but it really isn’t. And in case it is, it can be disabled in the settings.
Speaking of settings, the screen offers several brightness levels (adjusted using the touch sensor on top edge of the shell), several vertical scanline modes as well as RetroPixel mode. In this mode the screen displays a grid that imitates pixel grid seen on older displays:
This is possible because the IPS panel has higher pixel density, with each original pixel being represented by a 5 by 5 square of pixels. According to information on FunnyPlaying’s website and other places on the web it should also be possible to adjust vertical and horizontal position of the display area, but for some reason this does not work in my unit. Perhaps these settings are disabled when laminated screen is used?
Overall, I am very happy with the final result. The shell looks great and the larger screen is really impressive. I am yet to test how long the batteries last.
Note that the power board is made by a company that has very bad reputation in the retro community and I have made a point not to buy from them again.↩︎