Installing XStation
When reviewing RGB Dual I mentioned how Recalbox struggled with emulating PlayStation (PSX) games. Although Raspberry Pi should have enough computing power to run PSX games at full speed, emulator used by Recalbox (SwanStation), is not up to the task. This was a big disappointment since my primary goal when getting RGB Dual was being able to run PSX games. This left me with only one choice: buy the original PlayStation. Luckily, PSX was a popular console so finding one wasn’t much of a problem. Just like with other retro consoles problems start once you actually get the hardware since it requires modifications or extra accessories. Luckily for me I already have an RGB cable and a BlueRetro receiver for PS2, and these are compatible with PSX allowing me to connect the console to my PVM and use DualSense controller. I was left with two missing pieces. Firstly, the memory card. I was lucky and managed to grab MemCard Pro from 8BitmMods1. This modern memory card replacement allows to store memory card images on an SD card allowing for easy backup and save transfer between real hardware and emulators. The second missing piece was an optical drive emulator (ODE), since running games from original CDs is not feasible these days.
When it comes to PlayStation ODEs there are following options:
PSIO. Connects to expansion port at the back of console. This is very non-invasive and easy to install, which is a big plus. Unfortunately, PSIO has been out of stock for the past year if not longer. Moreover, I’ve seen people complaining a lot about compatibility, though according to official FAQ PSIO is compatible with 99.5% games. Last but not least, PSIO seems to be DRMed and needs to be registered with the manufacturer, which makes it a no-go for me.
XStation. This ODE replaces the original CD drive of the console. Installation is difficult as it requires precise soldering. According to the internets XStation offers better compatibility than PSIO.
TerraOnion MODE. MODE was originally developed for Saturn and Dreamcast but now it also works with PSX. Unfortunately it’s out of stock and requires registration to receive firmware updates. As a bonus, it’s also quite expensive and runs games from a hard drive rather than a memory card.
Bonus: PicoStation. An open source alternative to XStation that is based on Raspberry Pi Pico. Unfortunately it’s still in development so not really an option at this moment.
I went with the XStation. As with lots of retro mods these days XStation was out of stock but luckily the pre-orders were up. I ordered one unit and, after some delays, finally received it in mid February.

I already learned it’s a good idea to install console mods during the weekend. Installation usually takes longer than expected and it was no different this time. Installation of XStation requires two main steps:
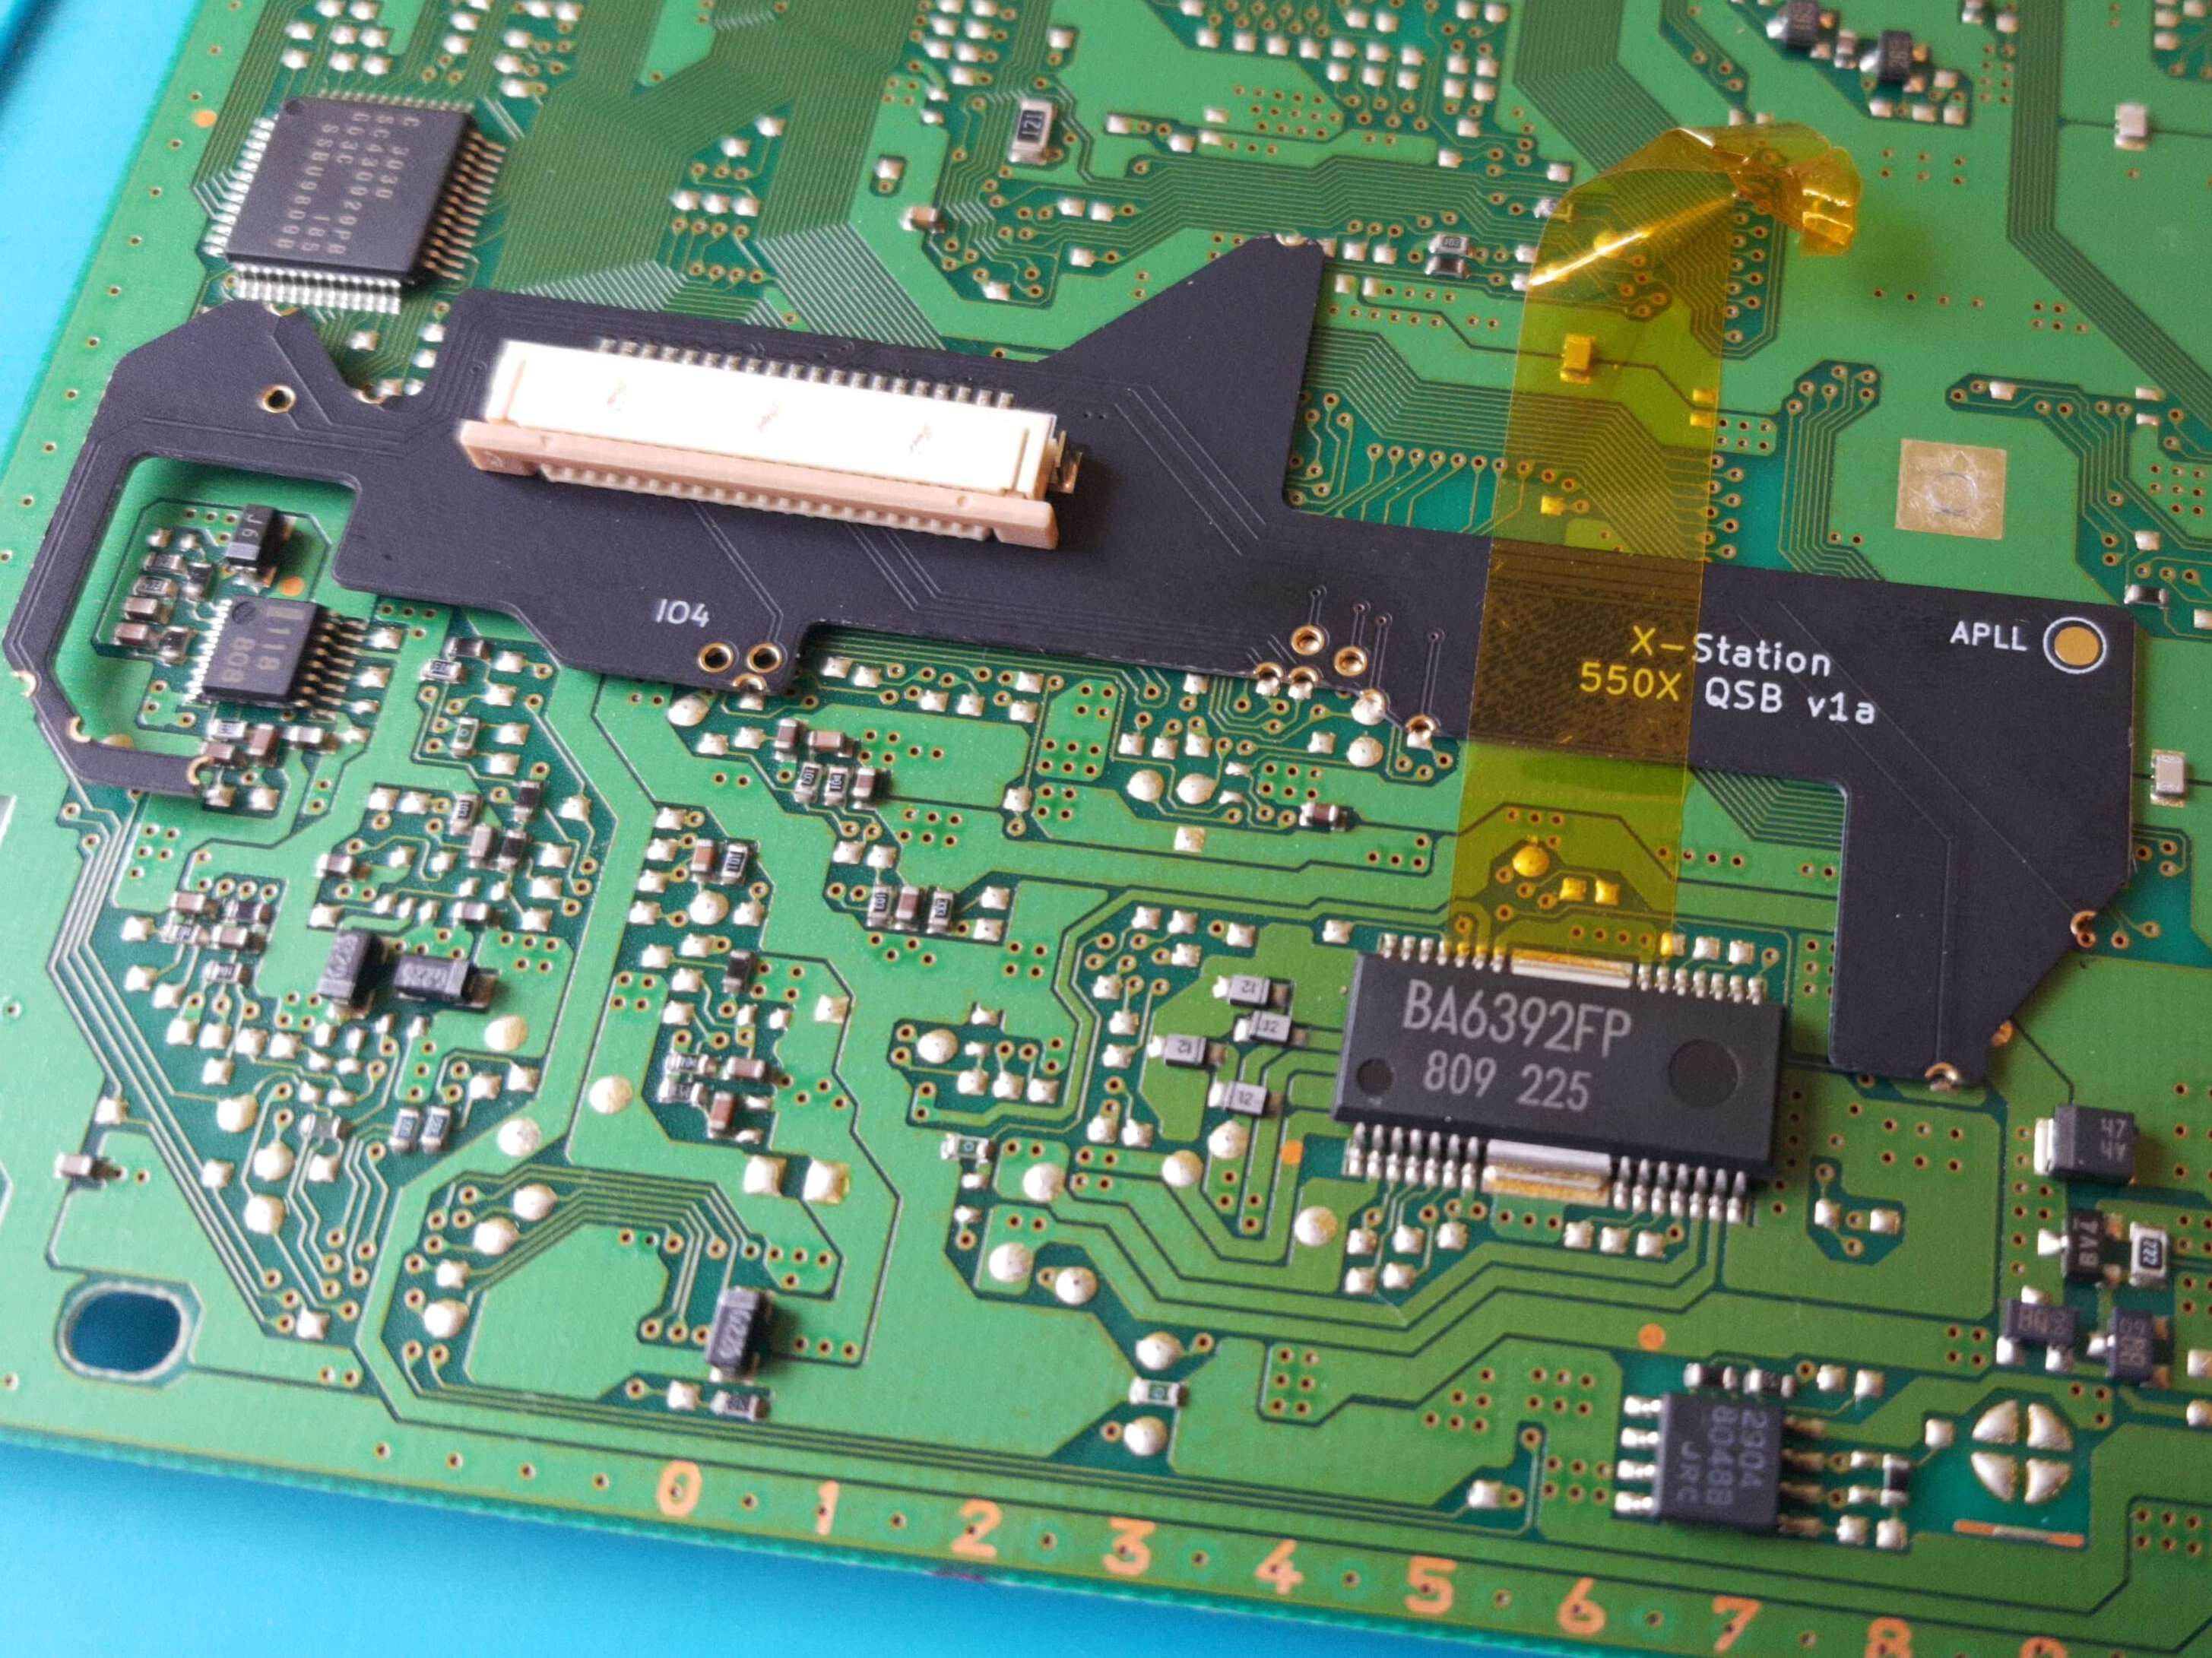
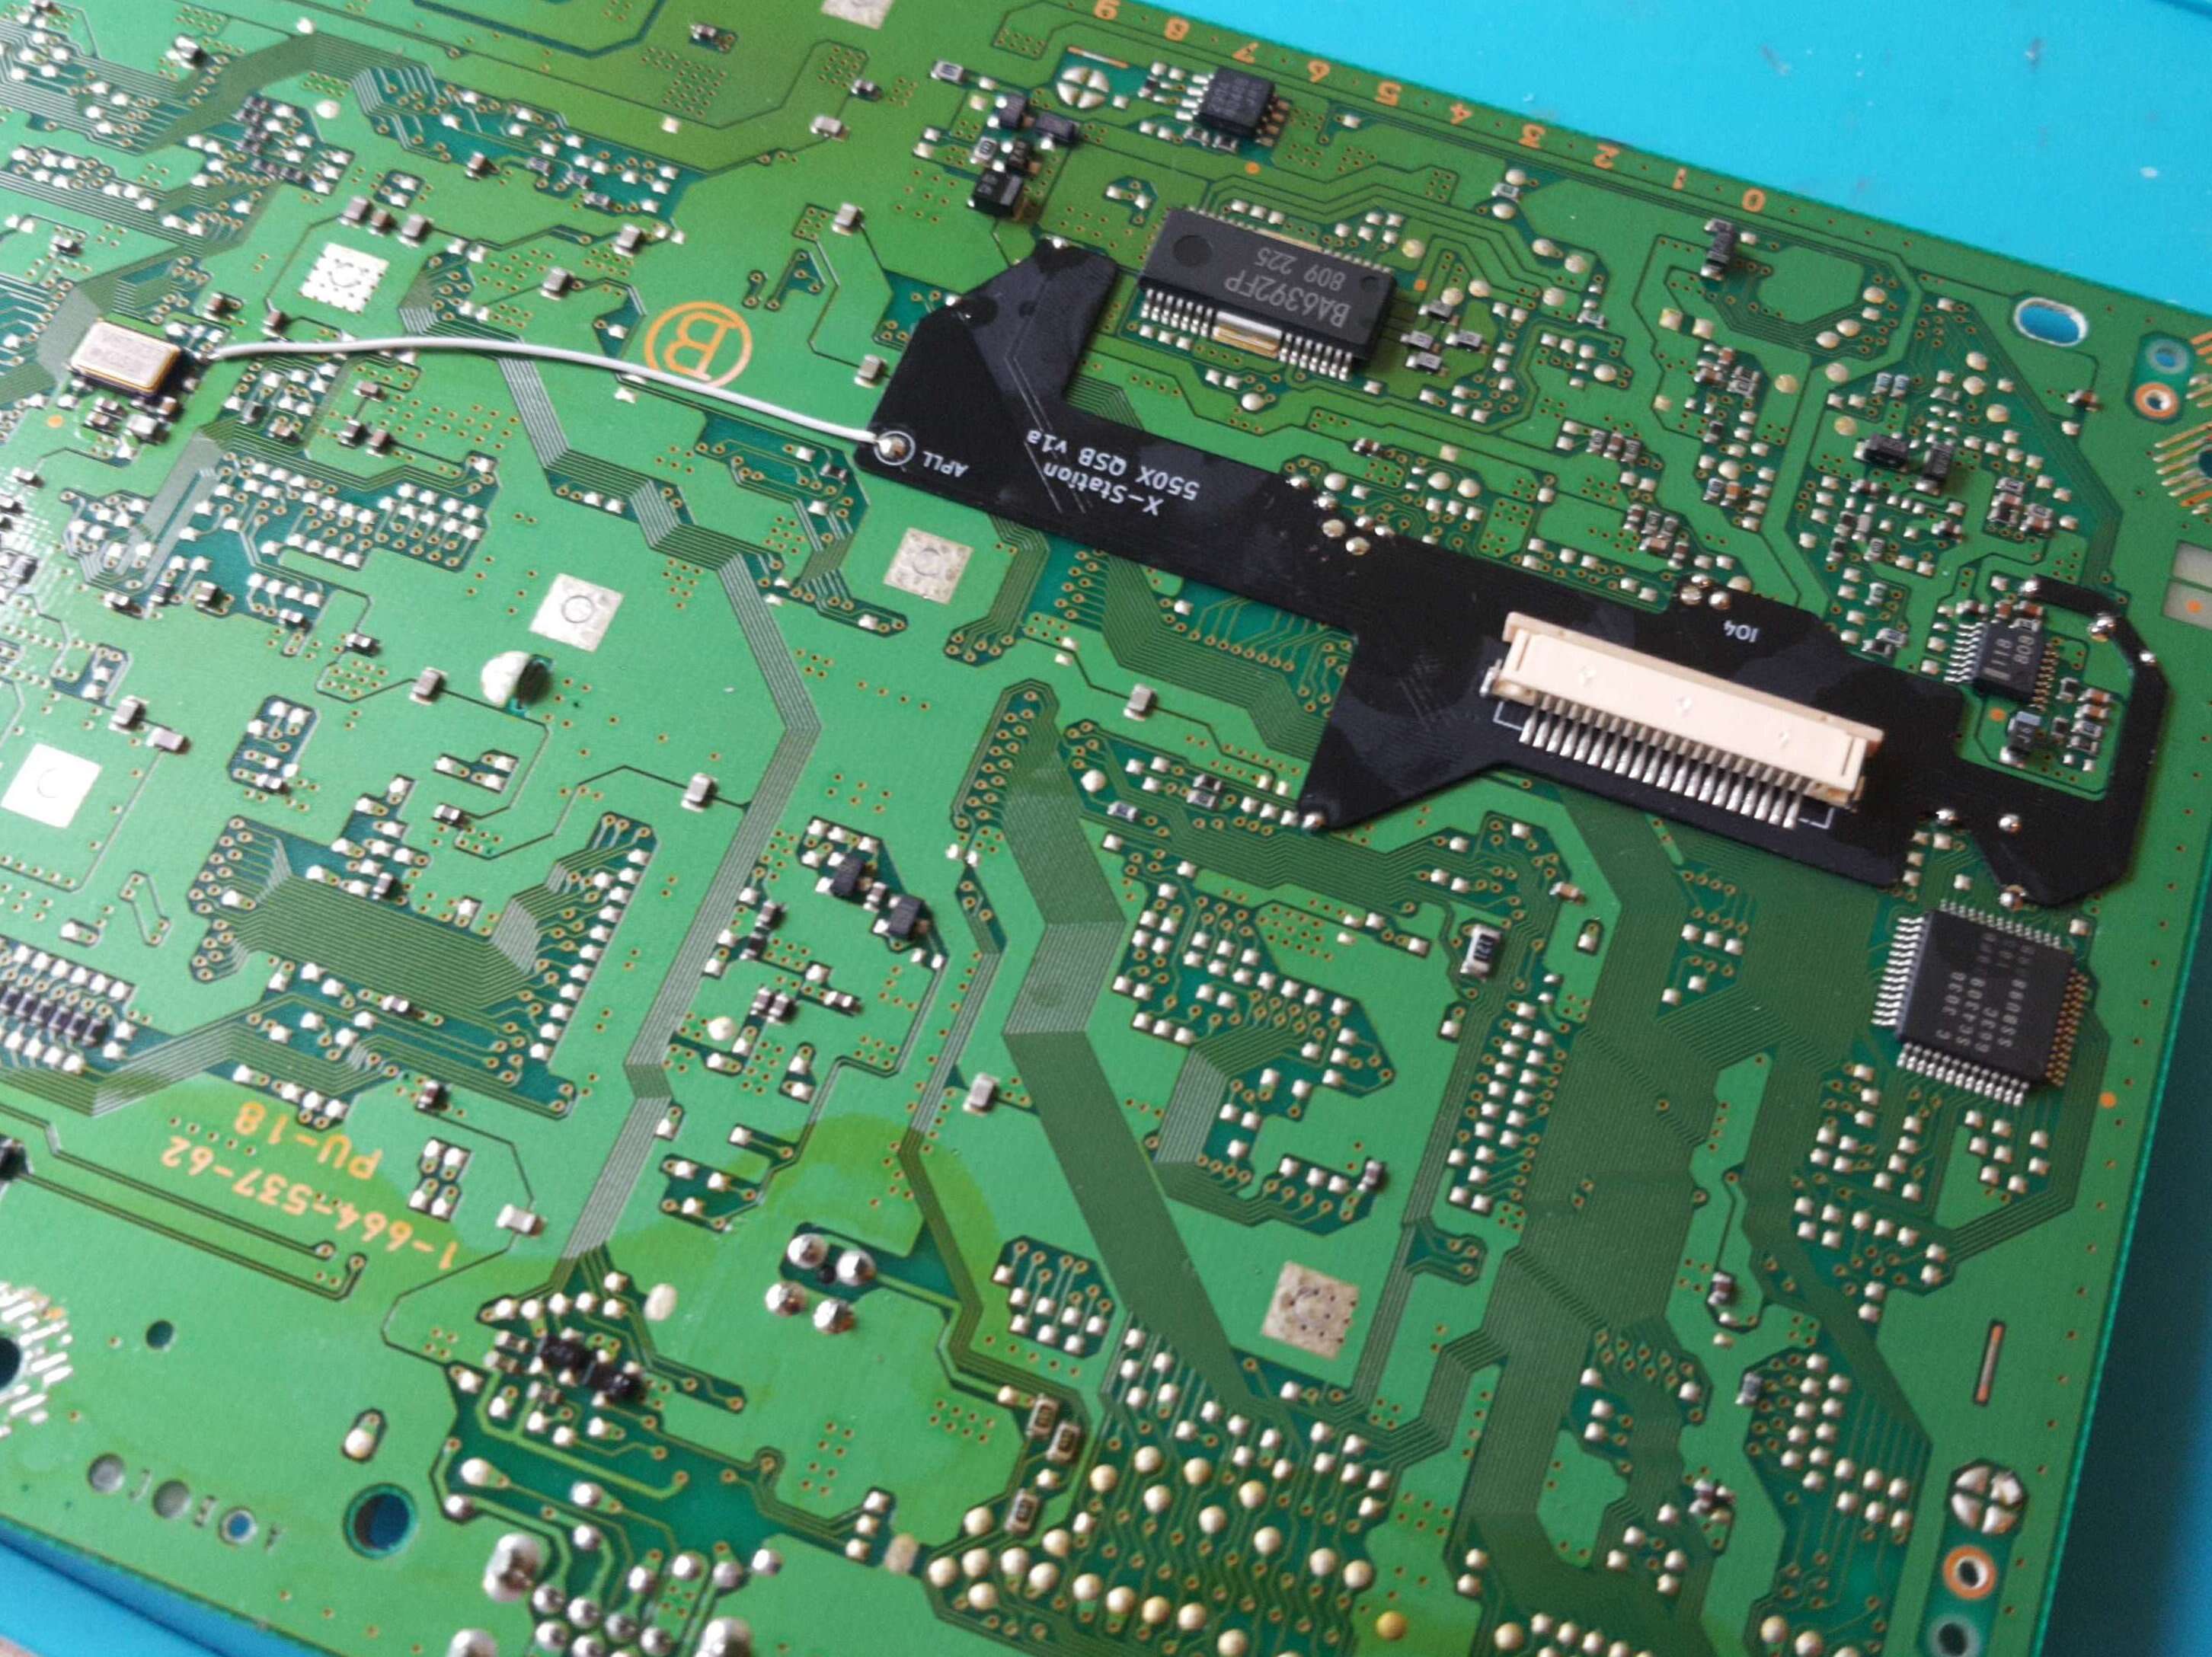
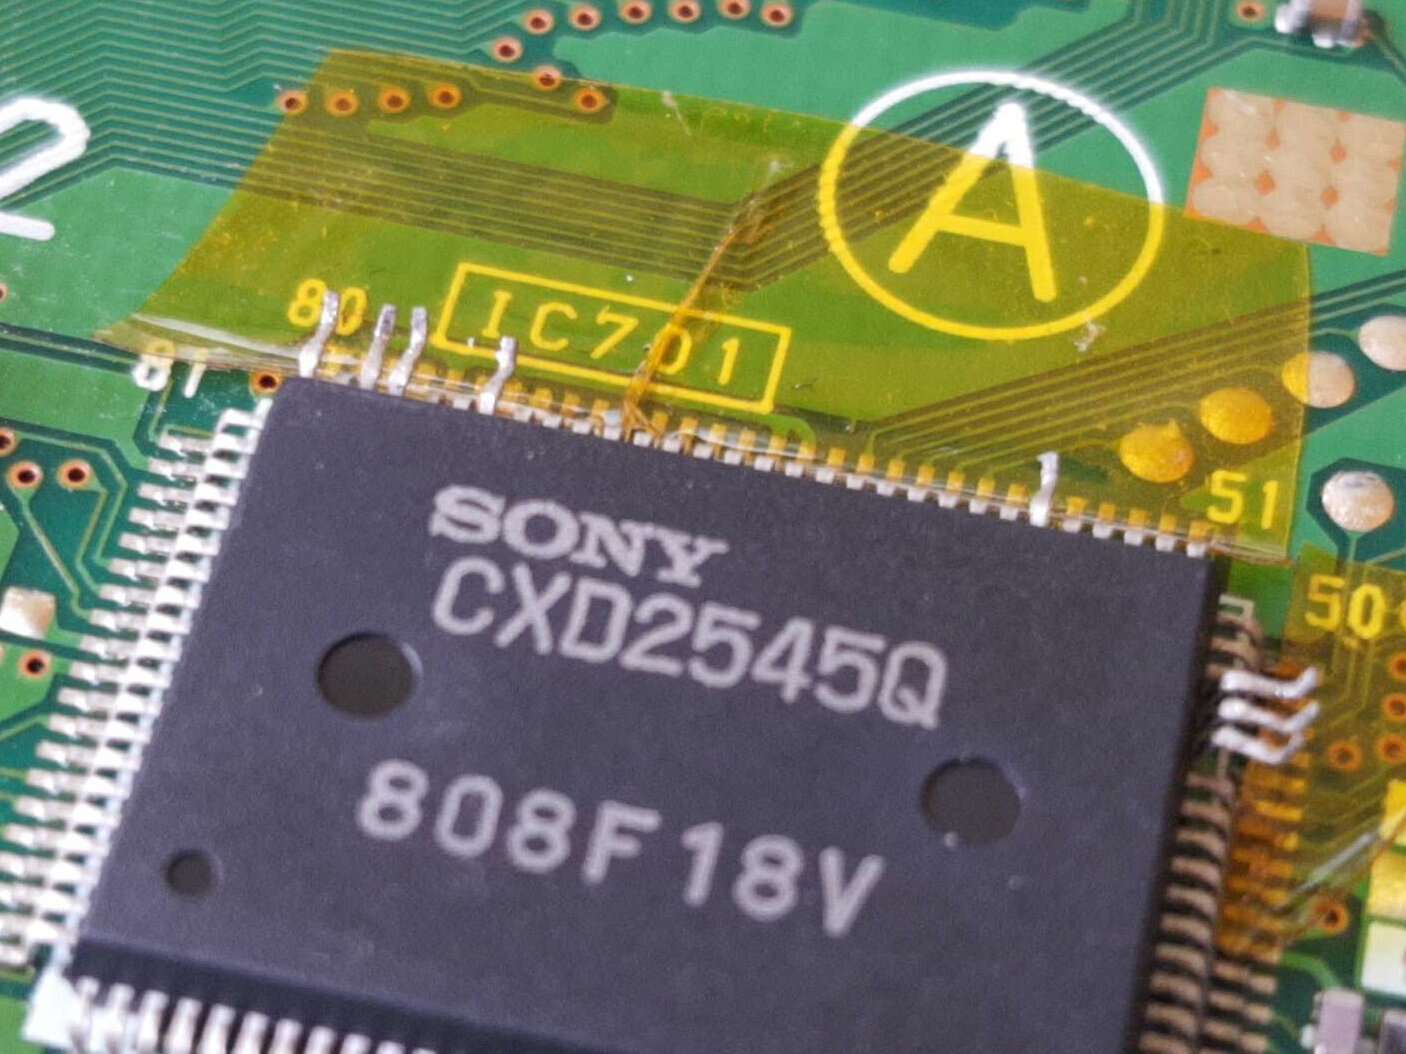
- Soldering a QSB (Quick Solder Board) to the motherboard of PlayStation.
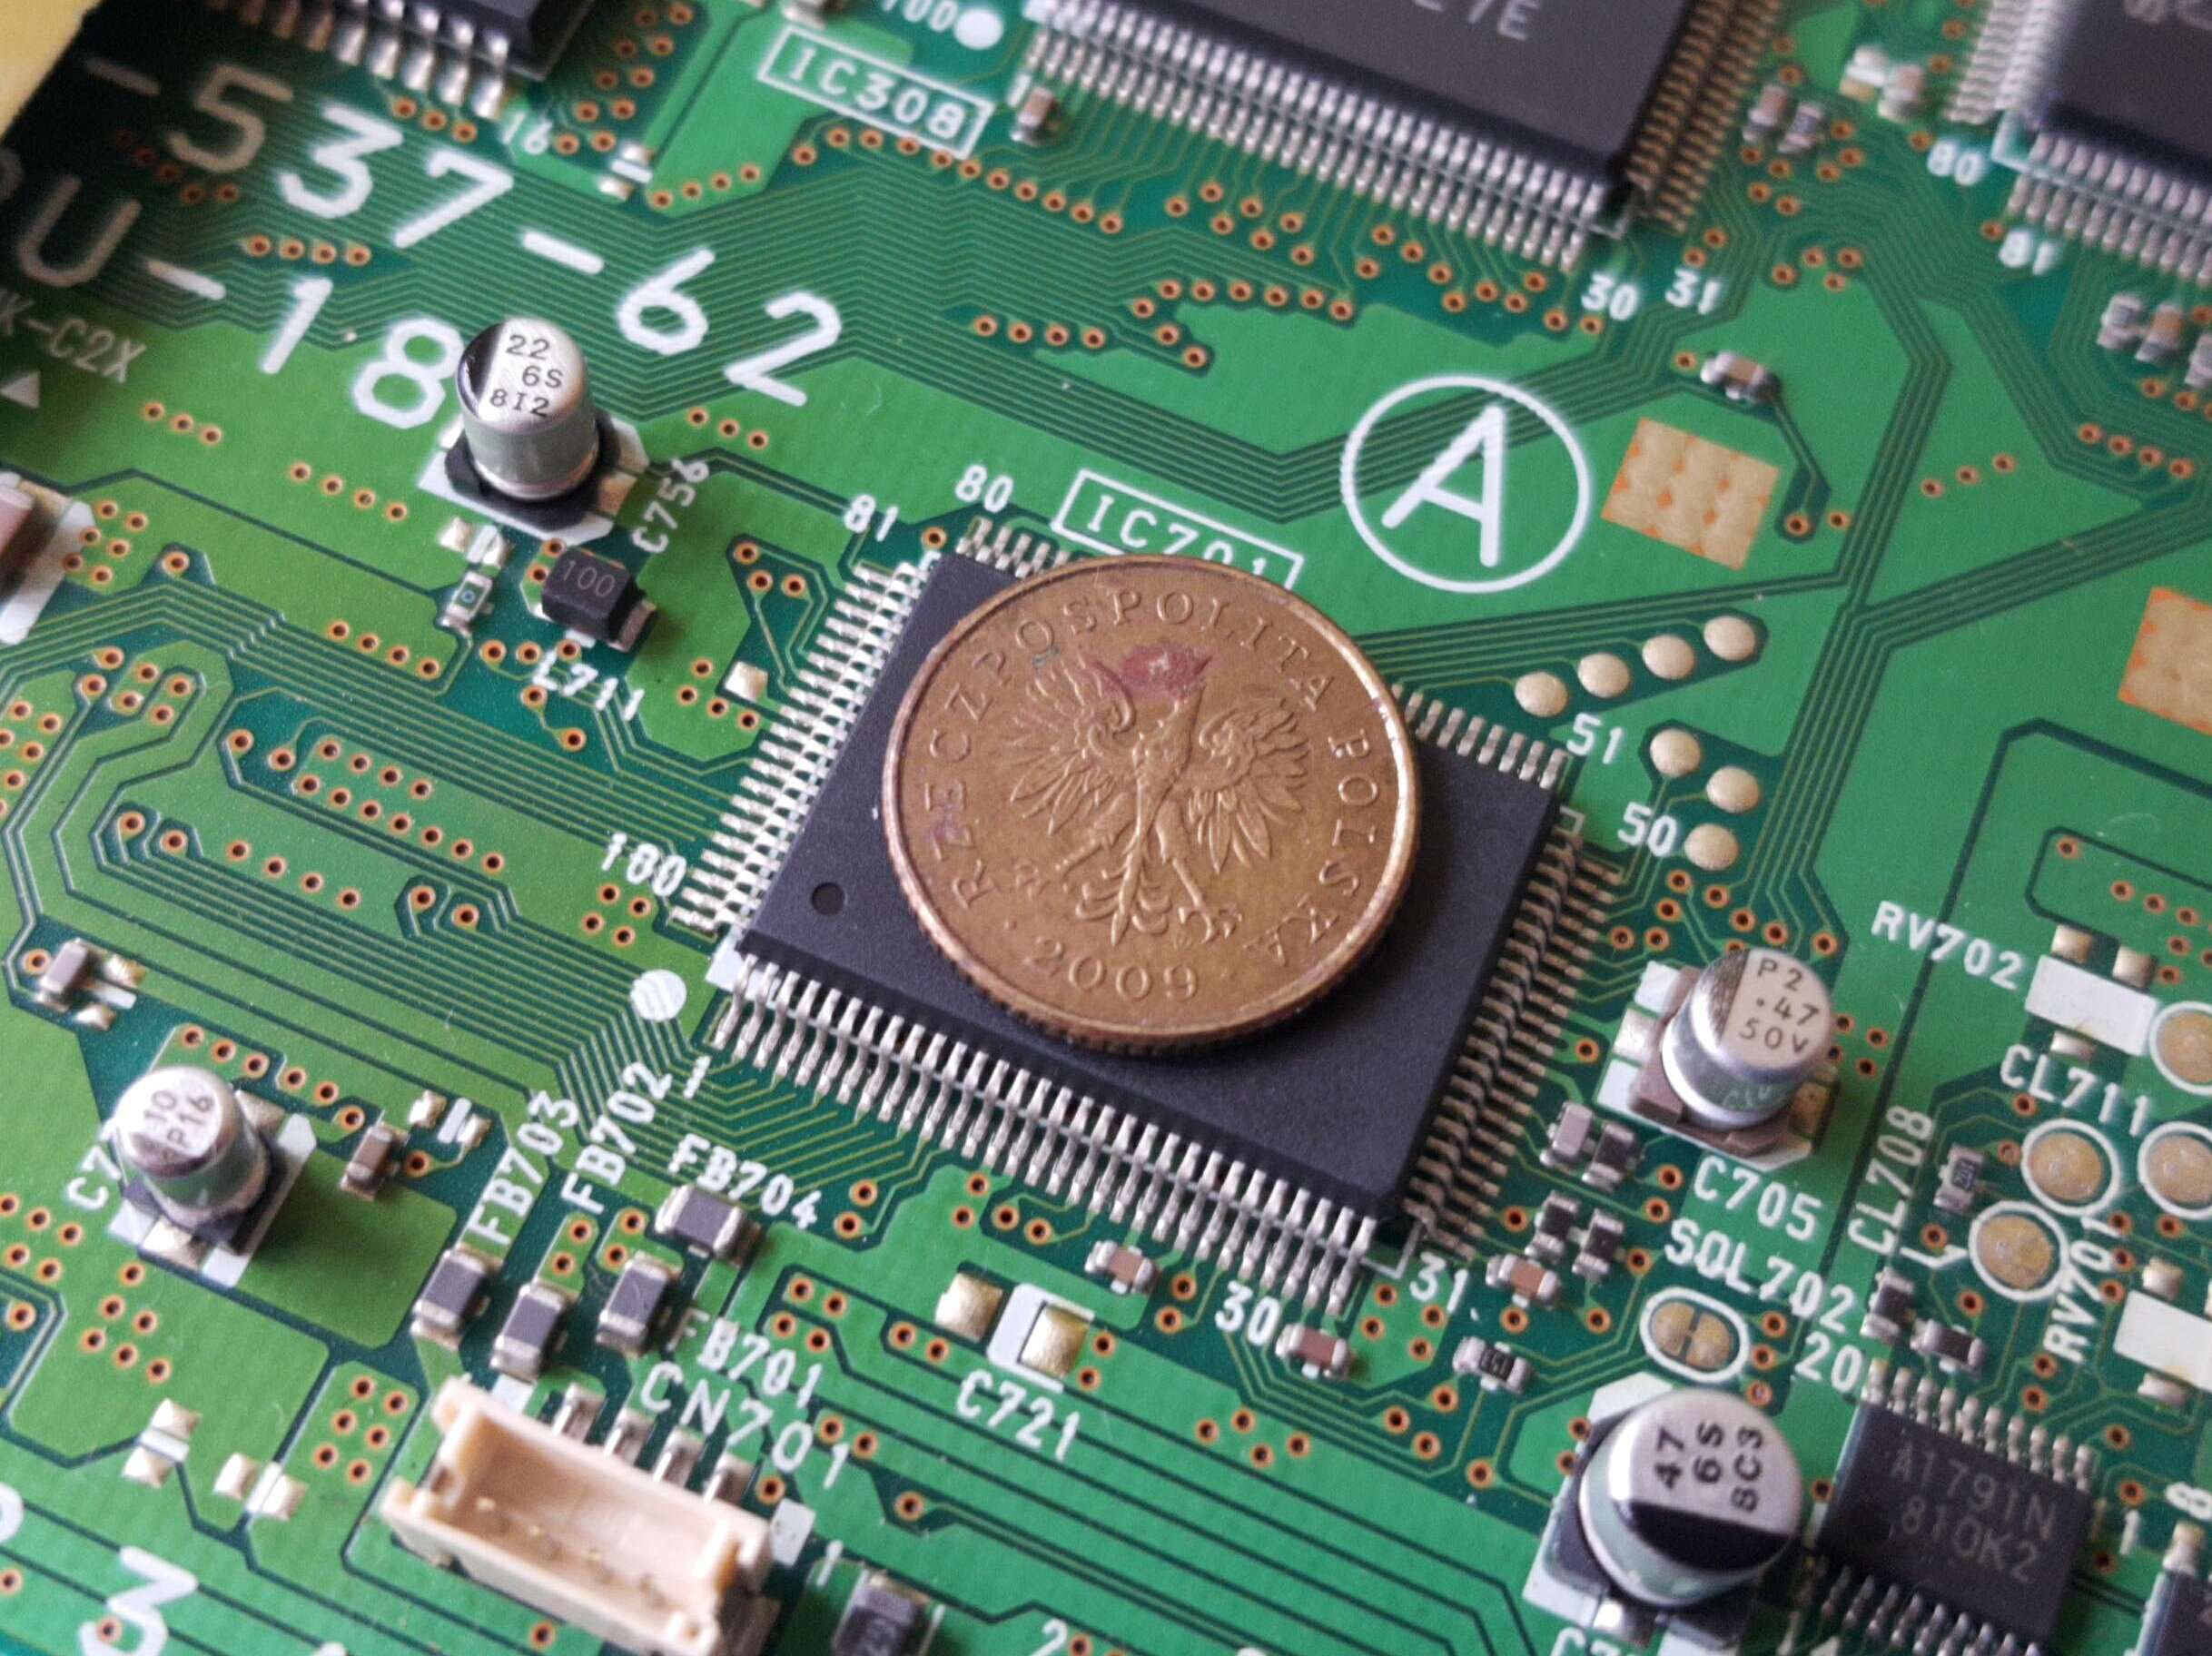
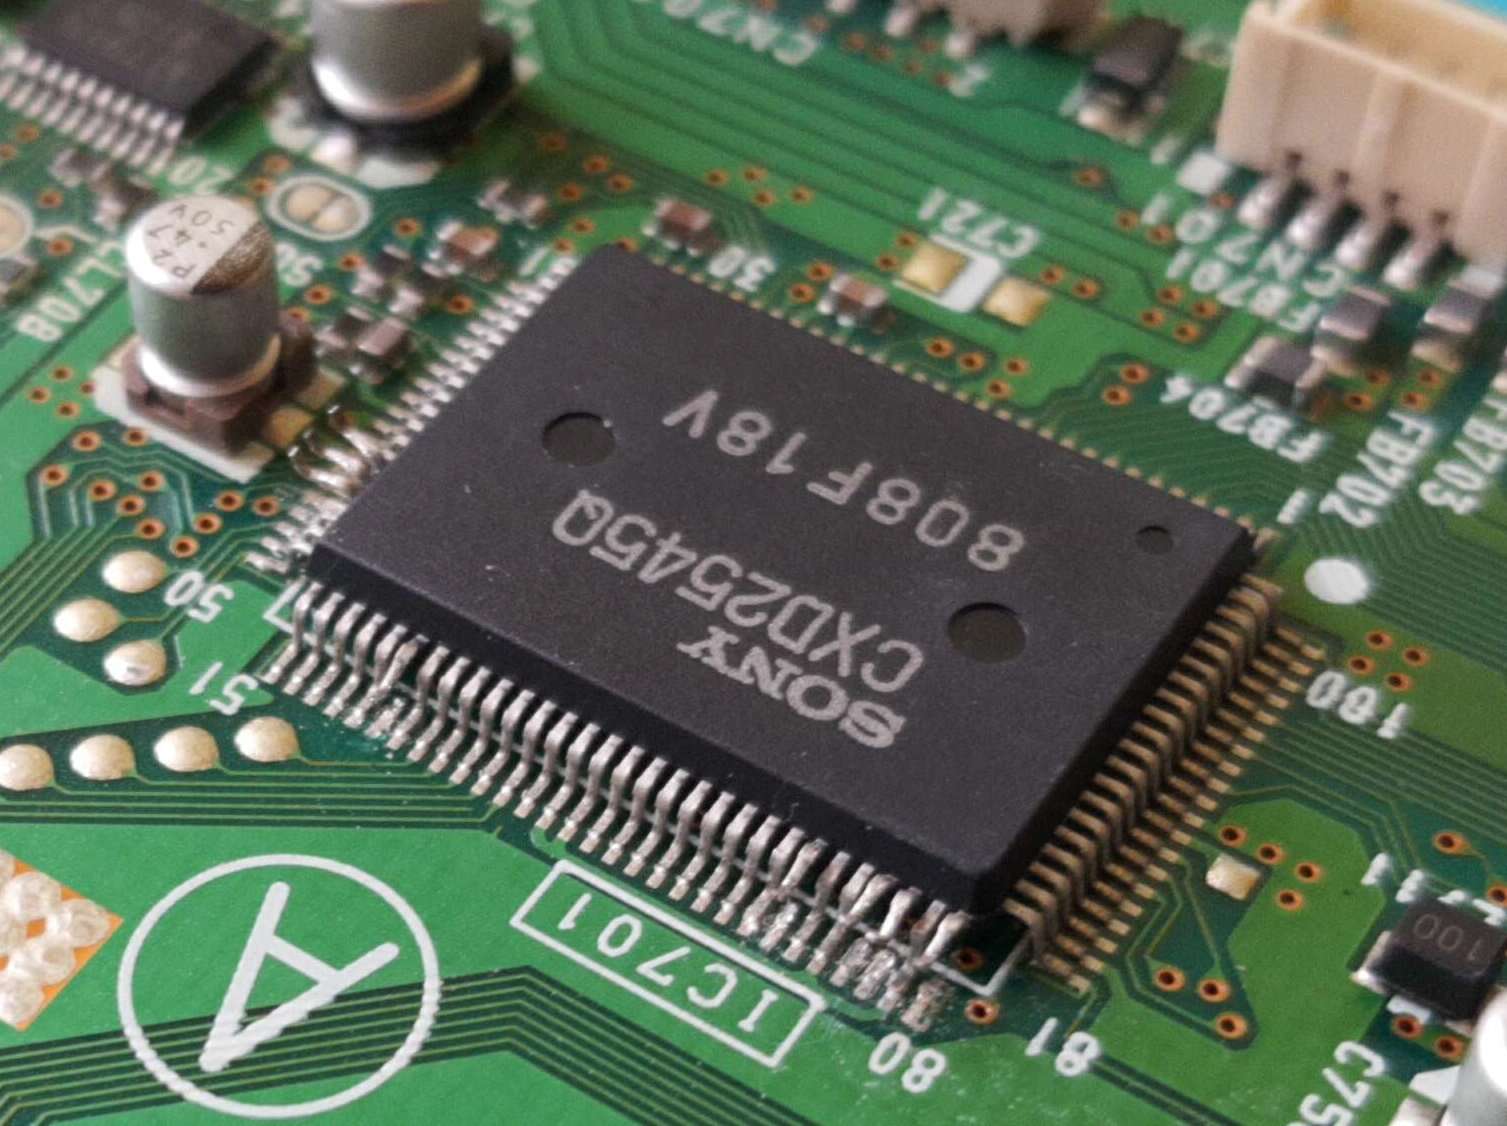
- Lifting pins on one of the integrated circuits, the IC701.
I wasn’t too concerned about the soldering. Lifting pins was the scary part. It’s something I haven’t done before and something, I imagine, that could easily go wrong given how small the pins are. Here’s a photo with a coin that’s the size of a penny coin:
Soldering seemingly went smooth. There are around 20 solder points, some of them requiring uncovering the via pads with a sharp tool (Olfa knife comes in handy). Having already some soldering experience from the previous mods this wasn’t too difficult.
Lifting pins also wasn’t as difficult as I imagined. I followed Voultar’s advice and used a dental pick. Again, things seemingly went smooth.
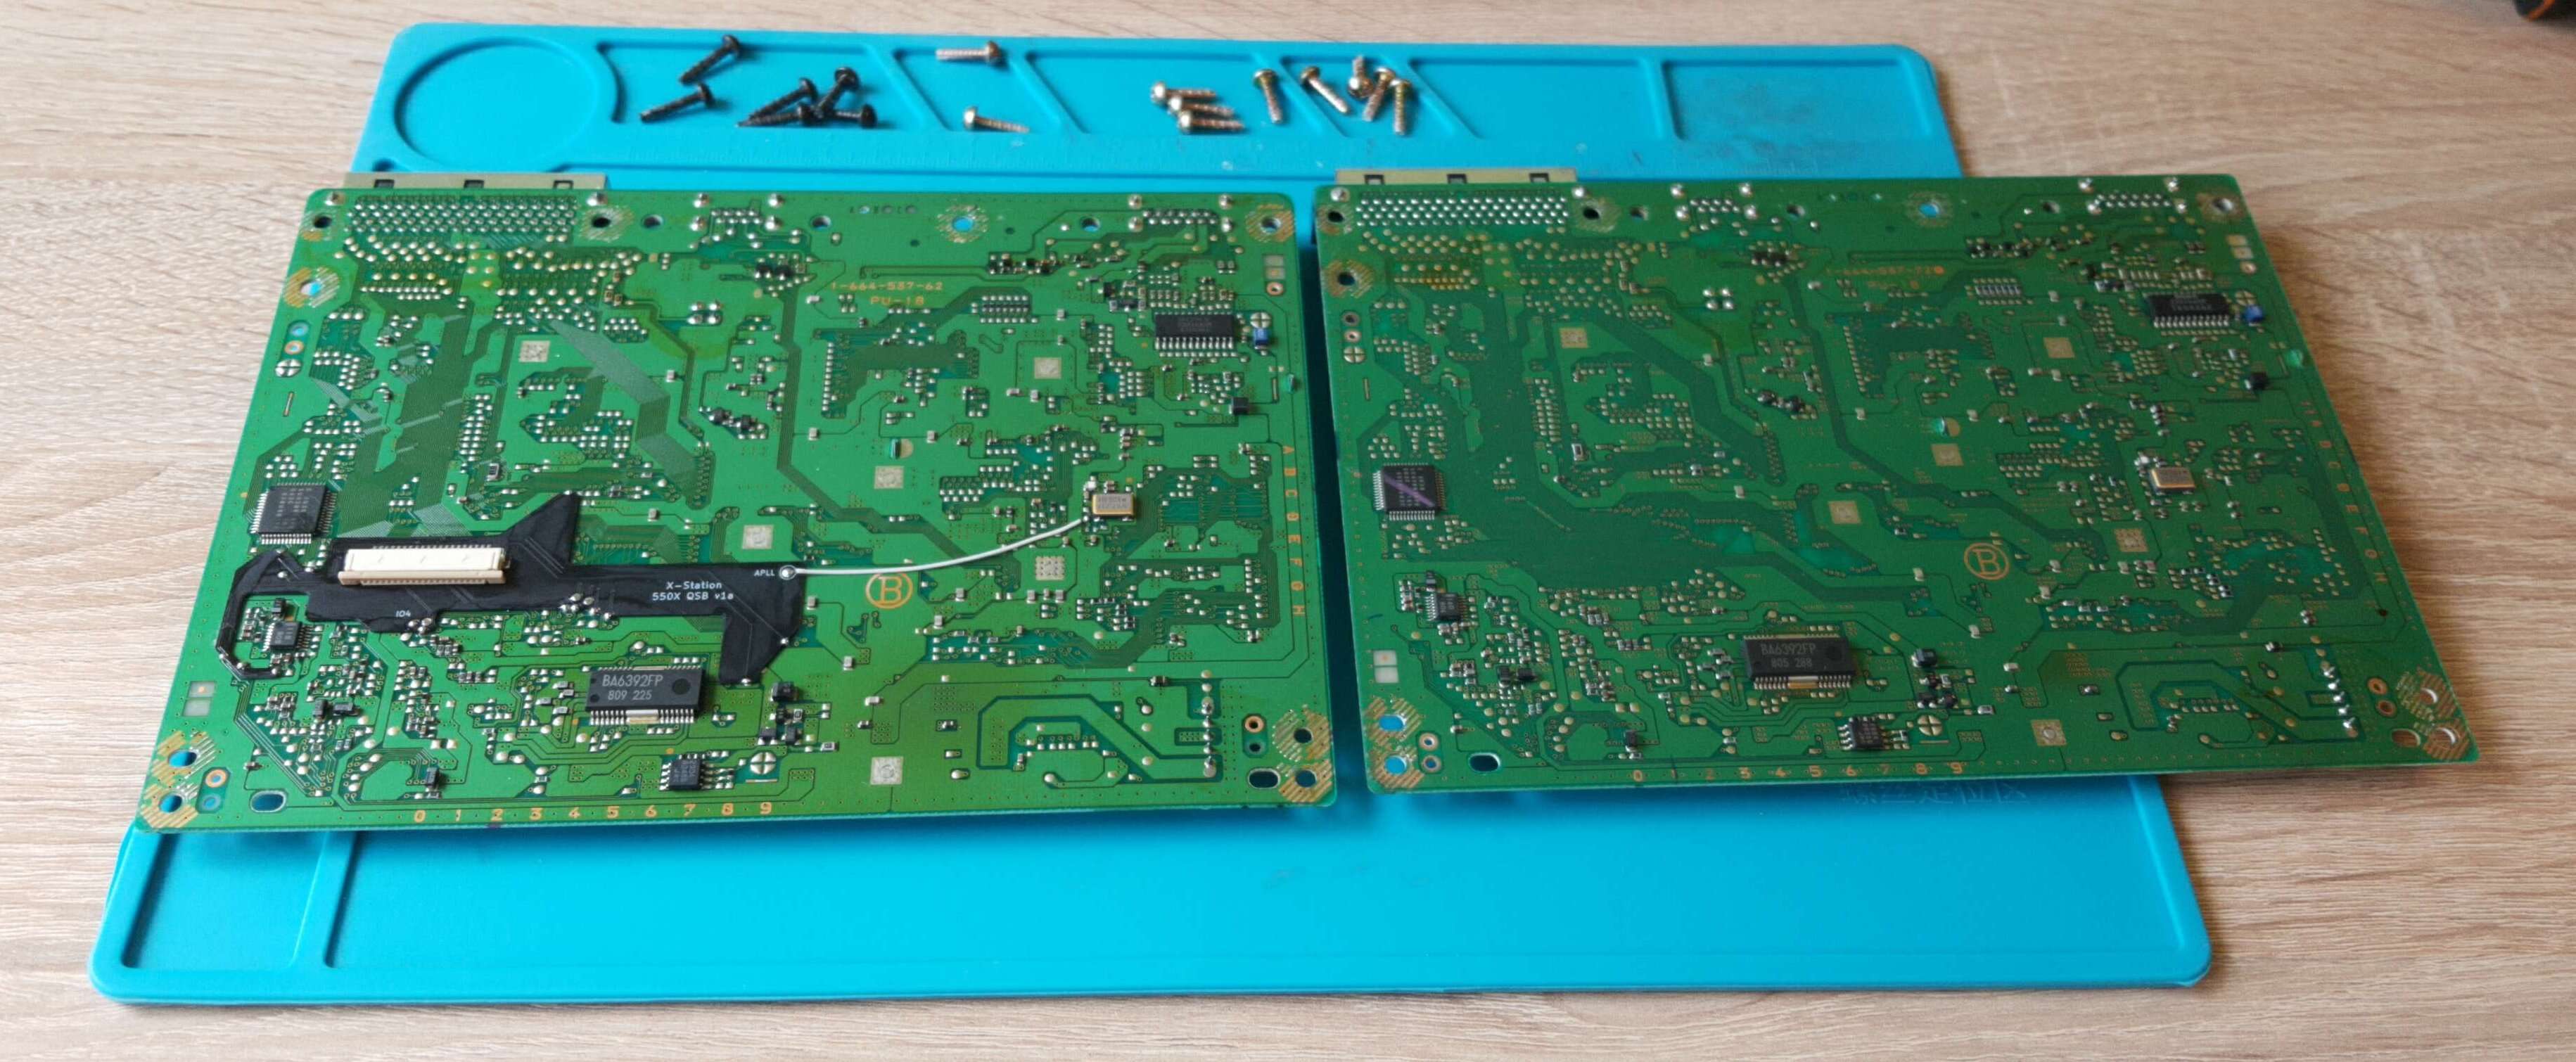
As you can see in the last photo I have two PlayStation motherboards. Given that this is a difficult mod I decided to get a spare one in advance. Luckily it wasn’t necessary, although you will see things didn’t go smooth.
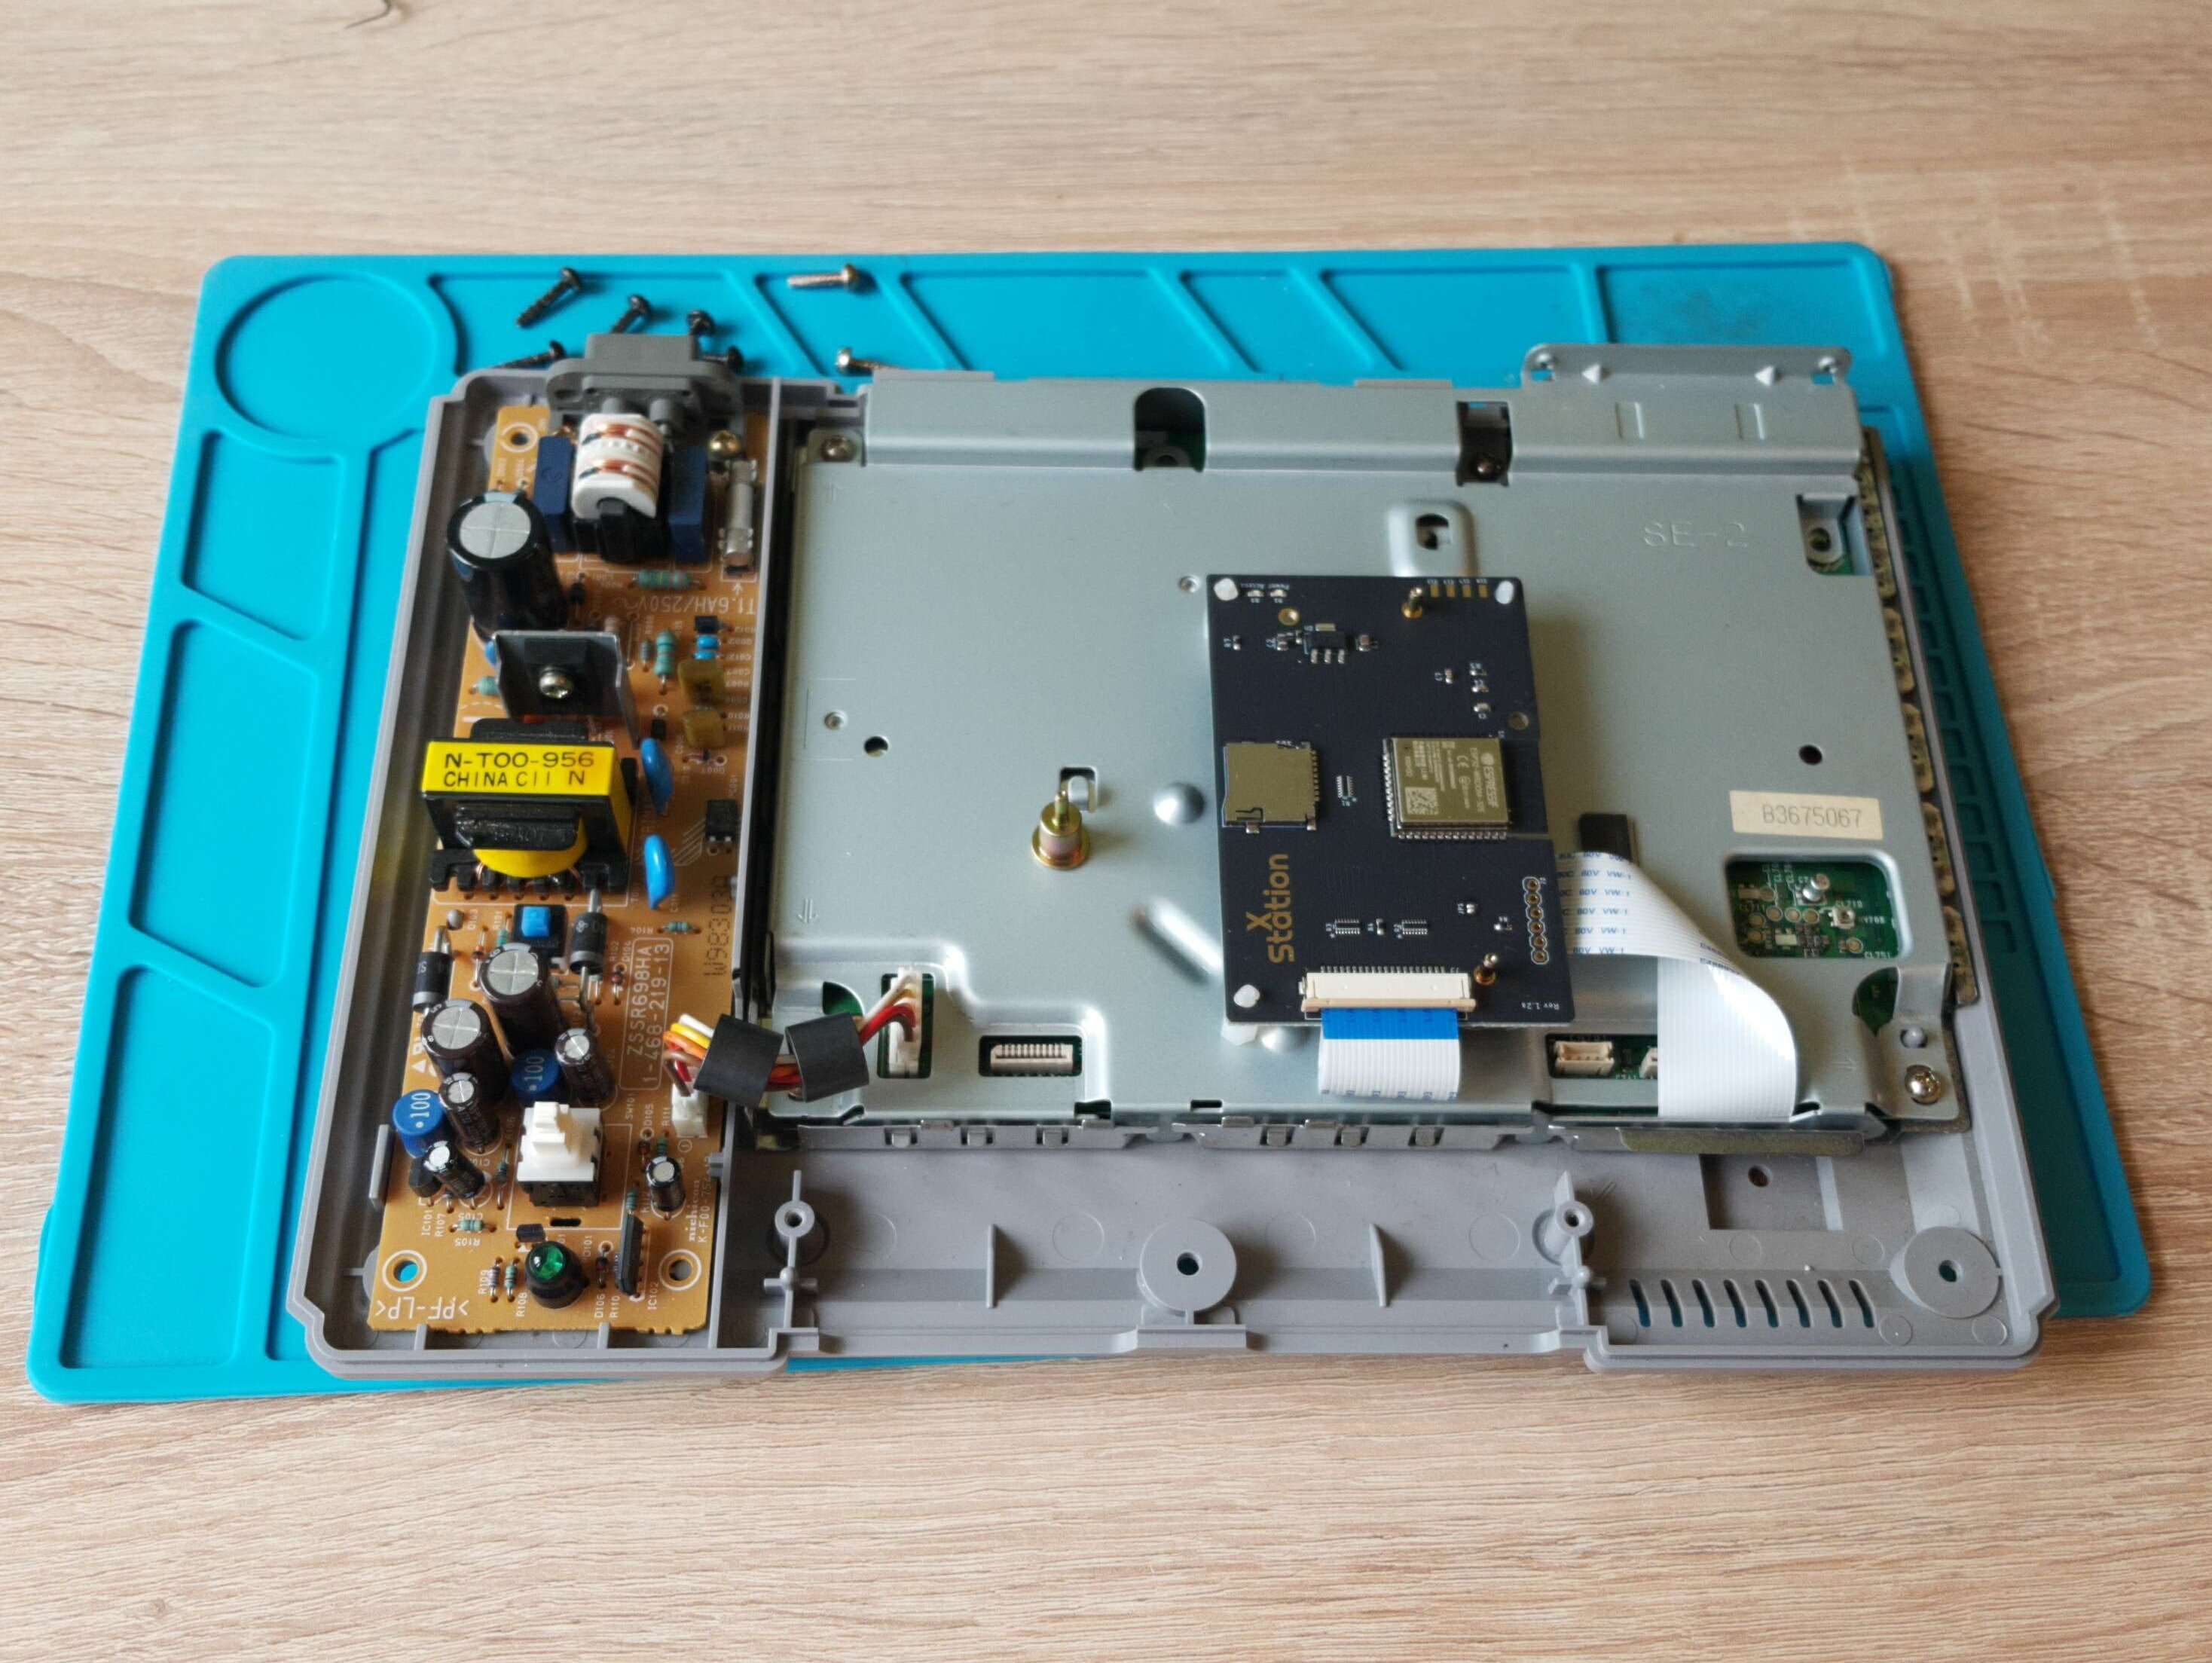
As the final step I installed the XStation board, connecting it with a ribbon cable, and re-assembled the console:
After assembling the PlayStation I connected it to the TV, turned it on, and… got a black screen. Console seemed dead. It was time for hardware debugging, which is something I don’t have a lot of experience with. Luckily, there are detailed photos for the XStation showing test points on the motherboard. I took my multimeter and began testing connectivity. Now, logic dictates that connectivity should be a transitive property, meaning that if there is current flow between points A and B, and there is current flow between points B and C then there is current flow between points A and C. Surprisingly this didn’t seem to be the case here. I first measured connectivity between all solder blobs and their corresponding pins in the ribbon cable slot, and found no problems. Then I measured connectivity between solder blobs and test points on the motherboard. Again, no problems here. But then I began measuring connectivity directly between the ribbon cable slot pins and test points on the motherboard, and clearly in four cases there was no connectivity. This caused a lot of head scratching on my side, but I finally figured it out. Apparently some solder blobs didn’t make connection with their corresponding solder point on the motherboard, but pushing the blob down with a probe during measurement made them connect, resulting in connectivity being reported incorrectly. I re-soldered those four points, measured everything again, and this time all pins showed as being correctly connected. It was time to re-assemble the console and test again. This time it did power on and boot into console BIOS.
This was progress, but it was still wrong, since the console should have booted into XStation menu. Time for another debugging session. This time I went to Discord and was lucky to be assisted by the creator of XStation. We went through lots of test, including measuring resistance between points on PlayStation motherboard and XStation SoC. The diagnosis was that, while XStation seems to power on and work, data isn’t being transmitted between the SD card and the console. At this point I’ve been working on XStation for 7 hours, with most of time being spent on debugging. I was exhausted and ready to call it a day, but decided to try one last thing. What concerned me from the beginning was the pin lifting on the IC701. I feared that this is where I went wrong by accidentally breaking a solder point between the motherboard and one of the pins that should not have been lifted. This, luckily, has an easy fix. I took my soldering iron with K tip (large tip resembling a chisel or a scalpel) and reflowed the remaining pins on IC701. And this did the job! After yet another re-assembly of the console XStation booted correctly:
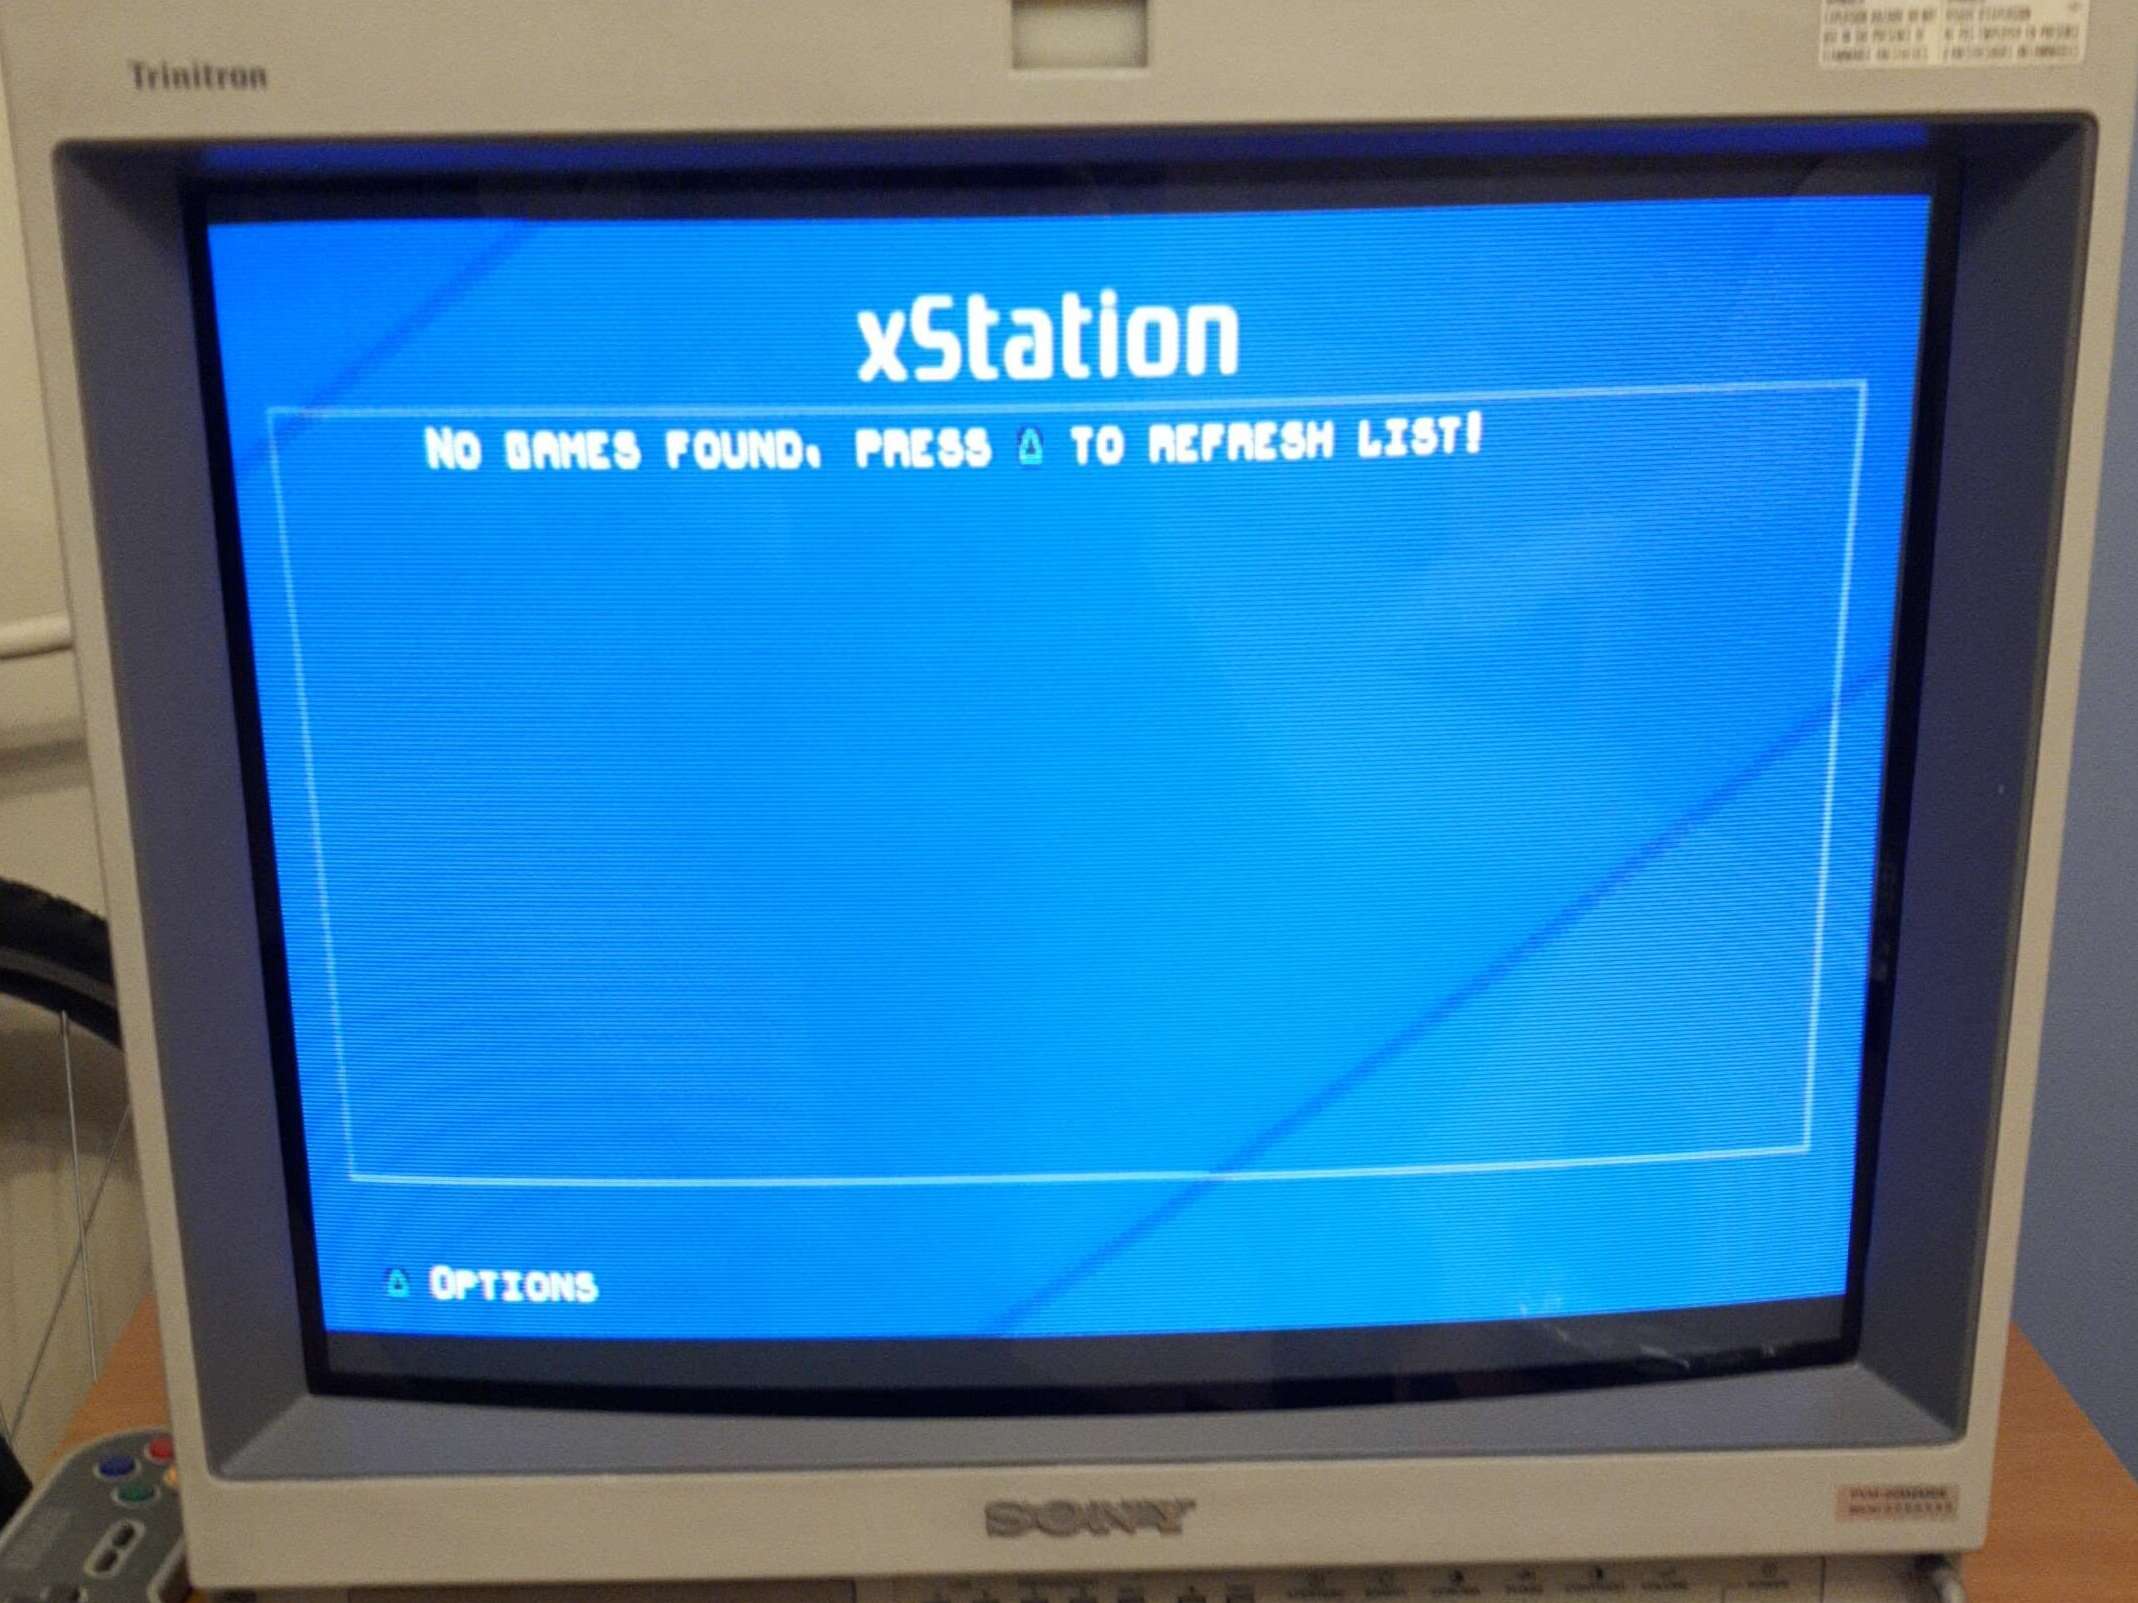
I copied a game image to an SD card, plugged it into XStation to make sure it indeed works, and finally my work was done. I started at noon and finished right before 8PM. This was way longer than expected. Note that the above account is an abridged one. In fact, there was some trial and error when fixing the solder points on the QSB and I ended up disassembling and reassembling the console around 7 times or so. Lessons learned:
- Practice soldering more.
- When lifting pins reflow the remaining ones just in case.
The luck part is in that it was available. In the past 2-3 years overwhelming majority of mods is notoriously out of stock.↩︎